How to Spot Clean a Mattress Properly: A Complete Guide to Keep Your Bed Fresh and Hygienic
Let me be honest with you—most of us spend about a third of our lives sleeping on our mattresses, yet we rarely give them the cleaning attention they deserve. Think about it: you wouldn’t wear the same clothes for weeks without washing them, so why would you treat your mattress any differently? Spot cleaning your mattress is one of those simple tasks that can dramatically extend its lifespan and keep it looking and smelling fresh.
In this comprehensive guide, I’m going to walk you through everything you need to know about spot cleaning your mattress properly. Whether you’re dealing with mysterious stains, accidental spills, or just general dirtiness, I’ve got you covered.
Why Mattress Cleaning Is More Important Than You Think
Your mattress is like a sponge that absorbs everything—sweat, dead skin cells, dust mites, and their droppings. Over time, this accumulation can affect your sleep quality and even trigger allergies or respiratory issues. Regular spot cleaning isn’t just about aesthetics; it’s about your health and well-being.
The Hidden World Living in Your Mattress
Did you know that your mattress can harbor up to 10 million dust mites? These microscopic creatures feed on dead skin cells and their waste can trigger allergies in sensitive individuals. By spot cleaning your mattress regularly, you’re essentially keeping this population in check and maintaining a healthier sleeping environment.
How Stains Affect Mattress Longevity
When stains penetrate deep into your mattress, they can break down the fabric and padding over time. What starts as a small spot can become a breeding ground for mold and mildew, especially if the mattress isn’t dried properly. This deterioration directly impacts the structural integrity and comfort of your mattress.
Identifying Your Enemy: Types of Mattress Stains
Not all stains are created equal. The approach you take depends entirely on what you’re dealing with. Let me break down the most common culprits you’ll encounter.
Organic Stains: The Messy Ones
These include blood, urine, sweat, and other bodily fluids. Organic stains are particularly tricky because they contain proteins that can set permanently if not treated quickly. The key is to act fast before they have time to bond with the fabric fibers.
Accidental Spills: Liquids and Foods
Coffee, juice, wine, or accidentally eating breakfast in bed—these liquid stains need immediate attention. The sooner you blot them up, the better your chances of complete removal. Waiting even a few hours can make a significant difference in how easily the stain comes out.
Stubborn Marks: Ink, Chocolate, and Makeup
These stains are particularly annoying because they often require specific treatments. Ink, for example, demands a completely different approach than a chocolate stain. Understanding the nature of what you’re cleaning helps you choose the right solution.
Gathering Your Arsenal: Essential Supplies for Spot Cleaning
Before you start attacking that stain, make sure you have the right tools. Using the wrong cleaning solution can actually make things worse, so let’s talk about what you’ll need.
The Basic Cleaning Kit
- White cloth or paper towels (avoid colored materials that might transfer dye)
- Spray bottle filled with water
- Vacuum cleaner with upholstery attachment
- Rubber gloves to protect your hands
- Small bowls for mixing solutions
- Soft-bristled brush or toothbrush for gentle scrubbing
Cleaning Solutions You Can Make at Home
I’m a big fan of DIY cleaning solutions because they’re safer, cheaper, and often just as effective as commercial products. Here are some proven recipes that actually work:
- Baking Soda Solution: Mix three tablespoons of baking soda with one cup of water. This is your go-to for general stains and odors.
- Vinegar and Water Mix: Combine equal parts white vinegar and water. This cuts through grease and works well on organic stains.
- Hydrogen Peroxide Solution: Use a 3% hydrogen peroxide solution for blood and protein-based stains. It’s gentle but effective.
- Dish Soap Mixture: Mix one teaspoon of liquid dish soap with one cup of warm water. This works wonderfully for liquid spills.
The Spot Cleaning Process: Step by Step
Now that you’re prepared, let’s walk through the actual process. Think of this as your blueprint for success, and remember—patience is your best friend here.
Step One: Blot, Don’t Rub
This is crucial. When you first notice a stain, your instinct might be to rub it vigorously, but that’s exactly what you shouldn’t do. Rubbing pushes the stain deeper into the fibers. Instead, use a clean white cloth and blot gently. Press down to absorb as much of the spill as possible without grinding it into the mattress.
Step Two: Vacuum the Affected Area
Once you’ve blotted up what you can, use your vacuum with the upholstery attachment to remove any remaining particles or dried debris. This creates a clean canvas for your cleaning solution to work on.
Step Three: Test Your Cleaning Solution
Before applying any solution directly to the stain, test it on a hidden area of your mattress. This ensures you won’t accidentally damage the fabric or cause discoloration. Wait a few minutes and check the results before proceeding.
Step Four: Apply Your Chosen Solution
Spray or apply your cleaning solution lightly to the stained area. Don’t oversaturate—you’re not trying to soak the mattress. A light misting is usually sufficient. Let it sit for about five to ten minutes to allow the solution to break down the stain.
Step Five: Gently Work the Solution In
Using a soft-bristled brush or cloth, gently work the solution into the stain with circular motions. The goal is to help the cleaning agent interact with the stain without damaging the fabric. You’re not scrubbing—you’re encouraging the solution to do its job.
Step Six: Blot Again
Once you’ve worked the solution in, use a clean cloth to blot up the moisture. You might need to repeat the spray-and-blot process several times, especially for stubborn stains. Each cycle should remove more of the stain.
Tackling Specific Stain Types: Custom Solutions
Different stains require different strategies. Let me give you specific guidance for the most common problem areas.
Blood Stains: Act Immediately
Blood contains proteins that set when exposed to heat, so avoid hot water at all costs. Use cold water and hydrogen peroxide. Apply the peroxide solution, let it fizz for a few minutes (that fizzing is doing the work), then blot carefully. Repeat as needed until the stain is gone.
Urine Accidents: A Comprehensive Approach
Whether it’s from a child, pet, or just an unfortunate accident, urine stains need multi-step treatment. First, blot with cold water. Then apply an enzymatic cleaner specifically designed for urine, or use your vinegar-and-water solution. These help break down the compounds that cause both the stain and the smell.
Coffee and Tea Stains: The Morning Mishaps
Act quickly here because these tannin-based stains set over time. Use your dish soap solution or a baking soda paste. Apply, let sit for 10-15 minutes, then blot thoroughly. You might need several applications.
Sweat Stains: The Yellow Nuisance
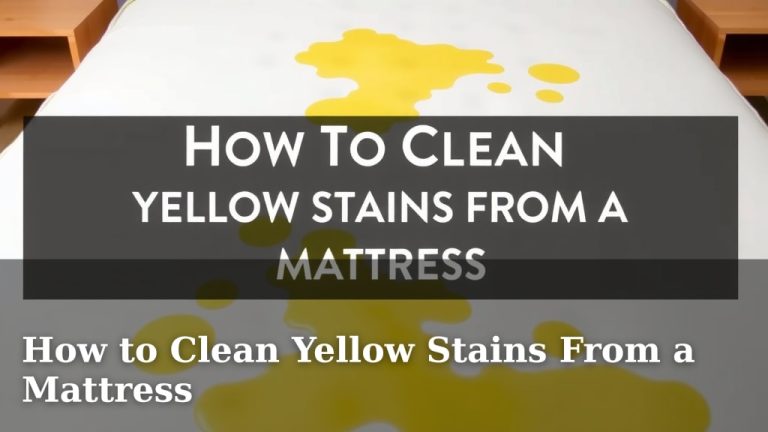
These often appear around the pillow area and are yellowish in color. They’re caused by body oils and salts. Mix baking soda with water to create a paste, apply it to the stain, let it dry completely, then vacuum it up. This usually works beautifully.
Ink and Marker Stains: Prevention Is Key
Once ink sets, it’s nearly impossible to remove completely. Your best bet is to use rubbing alcohol on a cloth and gently dab the stain. Work from the outside edges toward the center to prevent spreading. Do this very carefully and avoid oversaturating.
Chocolate and Food Stains: Patience Required
First, remove any dried matter with a butter knife or scraper. Then use your dish soap solution or baking soda paste. These typically require multiple applications, so don’t give up if the first attempt doesn’t completely remove the stain.
The Drying Phase: Why It’s Just as Important as Cleaning
Here’s where many people make a critical mistake. Once you’ve cleaned the stain, your work isn’t done—proper drying is essential to prevent mold and mildew growth.
Air Drying: The Best Method
After spot cleaning, open your windows and allow air to circulate around your mattress. If possible, place your mattress in sunlight because UV rays naturally kill bacteria and help with odor removal. This might take several hours or even a full day, depending on humidity levels and how wet the area is.
Using Fans and Dehumidifiers
If you’re in a humid climate or weather won’t cooperate, use a ceiling fan or portable fan pointed at the cleaned area. A dehumidifier in the room also helps draw out moisture. The goal is to get the mattress completely dry to prevent any musty smells.
The Baking Soda Trick for Final Drying
Once the mattress is mostly dry, sprinkle baking soda over the cleaned area and let it sit for several hours. Baking soda absorbs any remaining moisture and odors. Vacuum it up completely before putting your sheets back on.
Prevention: Your Best Defense Against Future Stains
Spot cleaning is important, but preventing stains in the first place is even better. Here’s what I recommend.
Invest in a Quality Mattress Protector
A waterproof mattress protector is one of the best investments you can make. It creates a barrier between you and your mattress, catching spills before they become permanent problems. Most protectors are washable, making cleanup incredibly easy.
Establish Bedtime Boundaries
No eating or drinking in bed might sound strict, but it’s the single best way to prevent spills. If you do allow beverages, use spill-proof cups with lids.
Regular Maintenance Routine
Vacuum your mattress monthly with the upholstery attachment. This removes dust, dead skin cells, and debris before they accumulate. It’s a simple five-minute task that makes a huge difference.
Rotate and Flip Your Mattress
Every few months, rotate your mattress (turn it 180 degrees) and flip it if it’s double-sided. This distributes wear evenly and prevents stain accumulation in one area.
When Professional Help Is Your Best Option
Sometimes stains are just too stubborn or too large to handle yourself. Here’s when you should consider calling professionals.
Deep-Set Stains That Won’t Budge
If a stain has been there for weeks or months, it’s likely set deeply into the fibers. Professional cleaners have industrial-strength solutions and equipment that can handle these tough cases.
Large Spills or Accidents
If a significant amount of liquid has soaked into your mattress—think a full cup of coffee or a major accident—professionals can often save your mattress from permanent damage. They have commercial-grade extraction equipment that removes moisture effectively.
Mold or Mildew Growth
If you notice any signs of mold or mildew, that’s your signal to call professionals. These require specialized treatment, and attempting DIY remedies might not fully eliminate the problem.
Odors That Linger
Sometimes even after removing a visible stain, odors persist. Professional enzymatic treatments can break down the organic compounds causing the smell in ways that home remedies can’t quite achieve.
Frequently Asked Questions About Mattress Spot Cleaning
Can I use hot water for all mattress stains?
No, hot water should be avoided for most stains, especially protein-based ones like blood and urine. Hot water can set these stains permanently. Always use cold or lukewarm water unless the stain specifically calls for heat. The only exception is when dealing with grease-based stains, where warm water can help break down the oils more effectively.
How often should I spot clean my mattress?
You should spot clean your mattress as soon as a stain appears—the fresher the stain, the easier it is to remove. For preventative maintenance, vacuum your mattress monthly and do a general inspection. If you notice any new stains, address them immediately rather than letting them sit.
Is baking soda safe to use on all mattress fabrics?
Baking soda is generally safe for most mattress fabrics and is actually one of the gentlest options available. However, always test it on a hidden area first, especially if your mattress has delicate or specialty fabrics. The baking soda paste method is particularly safe and won’t damage any standard mattress material.
What’s the difference between spot cleaning and deep cleaning?
Spot cleaning targets specific stains and affected areas using minimal moisture. Deep cleaning, on the other hand, involves cleaning the entire mattress surface and potentially penetrating deeper into the layers. Deep cleaning is typically done professionally and is recommended every one to two years, while spot cleaning happens as needed throughout the year.
Can white vinegar damage my mattress?
White vinegar is quite safe for mattresses when diluted properly with water. The acidic nature of vinegar helps break down organic stains without damaging fabric. The only downside is the smell, which dissipates as the mattress dries. Some people find the smell unpleasant initially, but it’s completely harmless to both your mattress and your health.