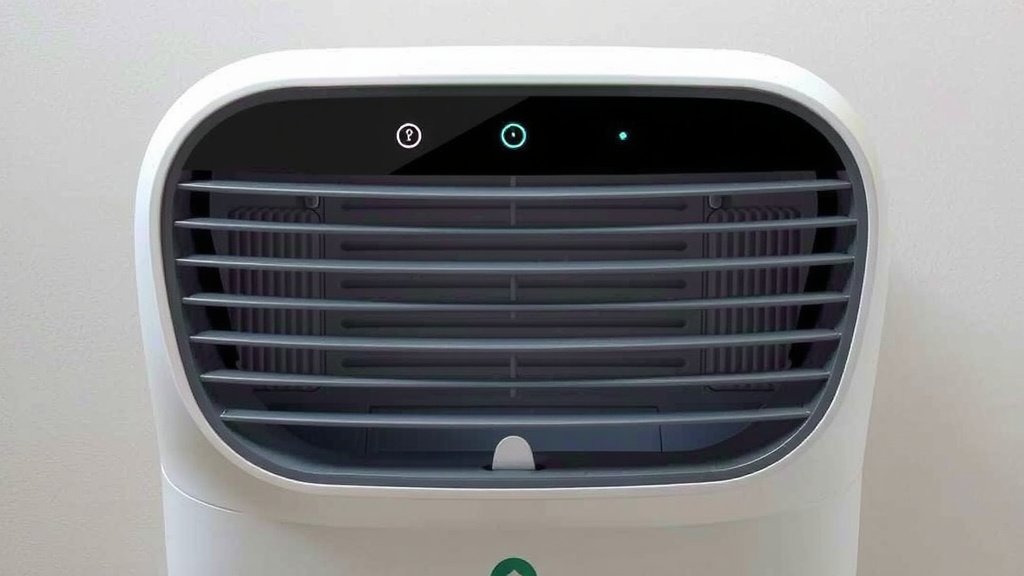
How to Clean Your Rainmate Air Purifier Easily
The easiest way to clean your RainMate air purifier is by disassembling it and washing the collection plates and fan blades with warm, soapy water. You’ll want to do this regularly to ensure your purifier is working its best and keeping your air fresh. A clean RainMate is a happy RainMate!
Keeping your RainMate clean is more than just aesthetics. It’s about maintaining the efficiency of your air purification. Dust and grime can build up, making it harder for the machine to do its job and potentially leading to a musty smell. Regular maintenance ensures you’re breathing the cleanest air possible.
- Disassemble the RainMate carefully.
- Wash collection plates and fan blades with soap and water.
- Dry all parts completely before reassembly.
- Clean the exterior with a damp cloth.
- Check the manual for specific model instructions.
Ready to get your RainMate sparkling clean? Let’s walk through the simple steps together.
Caring for Your RainMate: A Simple Cleaning Guide
Keeping your RainMate air purifier in tip-top shape is easier than you might think. Regular cleaning ensures your device works efficiently to keep your home’s air fresh and clean. Think of it like giving your car an oil change – a little maintenance goes a long way!
When your RainMate is clean, it can better capture dust, allergens, and other airborne particles. This means a healthier environment for you and your family. Plus, a clean machine just looks and smells better. Let’s get started on making your RainMate sparkle!
Preparing for Cleaning
Before you begin, gather everything you’ll need. This will make the cleaning process smooth and efficient. You don’t want to be searching for a cloth halfway through, do you?
What You’ll Need
- A soft, lint-free cloth
- Mild dish soap
- Warm water
- A soft brush (like an old toothbrush)
- A towel for drying
- Possibly a screwdriver (check your manual!)
Safety First: Unplugging Your Device
The very first step is always to unplug your RainMate from the power outlet. Never attempt to clean any electrical appliance while it’s plugged in. This is a basic safety rule that’s super important.
Forgetting this step could lead to a nasty shock. We want a clean air purifier, not a trip to the emergency room. So, give that cord a good tug and make sure it’s completely disconnected from power.
Disassembling Your RainMate for Cleaning
Your RainMate is designed to be cleaned, and taking it apart is usually straightforward. Most models allow you to easily remove the key components that collect dust and grime.
Removing the Collection Plates
You’ll likely find that the collection plates are the main area where dust accumulates. These are the parts that trap the particles in the air. You can usually slide them out or unclip them.
Consult your RainMate’s user manual if you’re unsure how to remove them. Different models might have slightly different mechanisms. A quick peek at the manual can save you a lot of frustration!
Accessing the Fan Blades
The fan blades are another area where dust can cling. Cleaning these is important for maintaining good airflow. Depending on your model, you might be able to access them once the collection plates are removed.
Be gentle when handling the fan blades. They are often made of plastic and can be delicate. You don’t want to bend or break them.
Cleaning the Collection Plates and Fan Blades
This is where the real cleaning magic happens! The goal here is to remove all the trapped dust and build-up.
Washing with Soap and Water
Prepare a sink or basin with warm water and a small amount of mild dish soap. Gently wash the collection plates and fan blades. Use your soft brush for any stubborn spots.
Avoid using harsh chemicals or abrasive cleaners. These can damage the surfaces of your RainMate components. Mild soap and warm water are usually all you need for effective cleaning. Many cleaning experts recommend this gentle approach (CDC).
Rinsing Thoroughly
After washing, rinse all the parts thoroughly with clean water. Make sure no soap residue remains. Leftover soap can sometimes attract more dust or affect the purifier’s performance.
Ensure you get into all the nooks and crannies. A good rinse is key to having perfectly clean parts ready for reassembly.
Drying All Components
This step is absolutely critical. Water and electricity do not mix! All parts must be completely dry before you put your RainMate back together.
Air Drying Recommended
The best way to dry the components is to let them air dry completely. Place them on a clean towel in a well-ventilated area. This might take a few hours, so plan accordingly.
Never use a hairdryer or direct heat to speed up the drying process. Excessive heat can warp or damage the plastic parts. Patience is your friend here.
Checking for Complete Dryness
Before reassembling, do a final check. Feel each part to ensure there’s no lingering moisture. Pay special attention to any crevices or joints where water might hide.
If you’re in a hurry, you can gently pat the parts with a dry, lint-free towel. Just be sure not to leave any fuzz behind!

Cleaning the Exterior and Other Parts
Don’t forget the outside of your RainMate! A clean exterior keeps your whole unit looking fresh.
Wiping Down the Casing
Use a slightly damp, soft cloth to wipe down the exterior of your RainMate. You can use plain water or a very mild cleaning solution if needed. Make sure the cloth is not dripping wet.
Avoid getting water into any vents or openings on the main unit. You don’t want to risk damaging the internal electronics. Many appliance manufacturers suggest this simple wipe-down (EPA).
Cleaning the Water Reservoir (if applicable)
Some RainMate models may have a water reservoir. If yours does, empty it and wash it with mild soap and water. Rinse well and dry it thoroughly before reassembly.
A clean reservoir helps prevent any potential odors from developing. It’s a small step that contributes to the overall freshness of the air you breathe.
Reassembling Your RainMate
Once all the parts are perfectly dry, it’s time to put your RainMate back together. This is usually the reverse of the disassembly process.
Putting It All Back Together
Carefully reinsert the collection plates and reattach any other components you removed. Ensure everything clicks or slides back into place securely. You should hear or feel them lock in.
Refer to your user manual if you have any doubts. It’s always better to double-check than to force a part that isn’t aligned correctly.
Final Check and Power Up
After reassembly, give your RainMate a quick once-over. Ensure all parts are properly seated. Then, you can plug it back in and turn it on.
Listen for any unusual noises and check that the fan is running smoothly. If everything sounds and looks good, you’ve successfully cleaned your RainMate!
How Often Should You Clean Your RainMate?
Consistency is key to maintaining peak performance. How often you clean depends on a few factors.
General Cleaning Schedule
For optimal performance, most users find that cleaning their RainMate every 2-4 weeks is a good routine. If you live in an area with high pollen counts or have pets, you might need to clean it more often.
Pay attention to your device. If you notice dust build-up or a decrease in air quality, it’s probably time for a cleaning, regardless of the calendar.
Signs It’s Time for a Clean
- Visible dust accumulation on the collection plates.
- A decrease in the airflow from the unit.
- Any unusual odors coming from the purifier.
- If the purifier seems to be working harder than usual.
Conclusion
You’ve learned how to keep your RainMate air purifier running smoothly! A clean unit means fresher air for your home. Remember to unplug it first, then carefully disassemble and wash the collection plates and fan blades. Always let everything air dry completely before reassembling. A little consistent effort ensures your RainMate continues to perform at its best.
Make cleaning your RainMate a regular part of your home maintenance routine. You’ll breathe easier knowing your air is clean and your purifier is working efficiently. Take a moment today to schedule your next cleaning!
Frequently Asked Questions
Can I use household cleaners to clean my RainMate?
It’s best to stick to mild dish soap and warm water. Harsh chemicals or abrasive cleaners can damage the plastic parts of your RainMate. Always check your user manual for specific recommendations.
What if I can’t get a part to come off during disassembly?
Don’t force anything! If a part feels stuck, refer to your RainMate’s user manual. Different models have different designs, and the manual will show you the correct way to remove components without causing damage.
How long does it typically take for the parts to air dry?
Drying times can vary depending on humidity and ventilation. Most parts will take at least a few hours to dry completely. It’s better to let them dry overnight if possible to ensure no moisture remains.
Is it okay to leave my RainMate unplugged for an extended period?
Yes, it is perfectly fine to leave your RainMate unplugged for cleaning. As long as all components are thoroughly dry before reassembly and plugging it back in, there are no issues with leaving it unplugged for a day or two.
My RainMate is making a strange noise after cleaning. What could be wrong?
A strange noise usually means a part isn’t reassembled correctly or isn’t fully dry. Double-check that all collection plates and fan blades are seated properly and have no residual moisture. Ensure the exterior casing is also secured.