How to Install an In-Duct Air Purifier for Cleaner Air
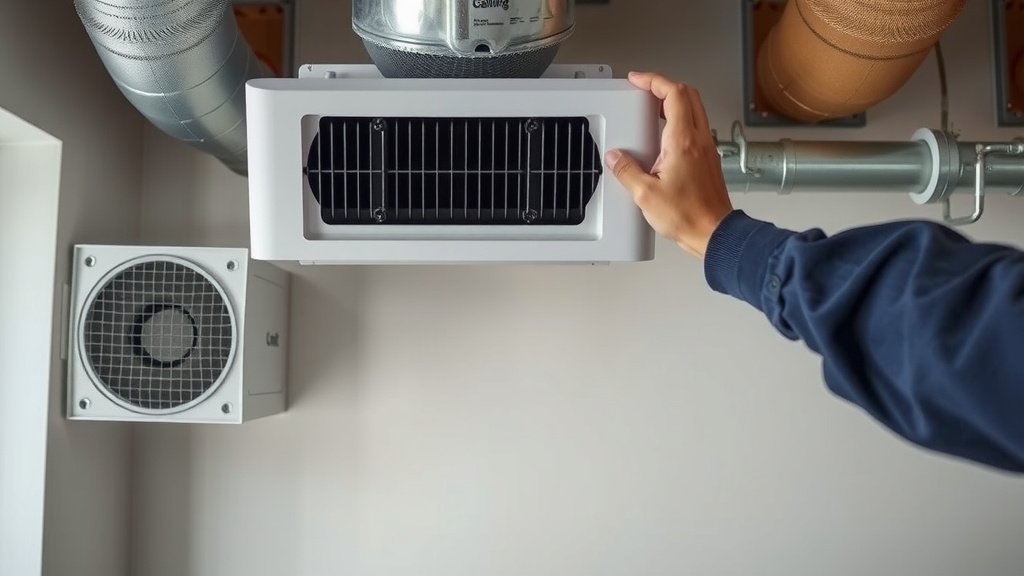
Installing an in-duct air purifier involves connecting it to your HVAC system’s ductwork. This process generally requires basic DIY skills and can significantly improve your home’s air quality. Many homeowners find it a rewarding project.
An in-duct air purifier works quietly in the background. It filters out allergens, dust, and other airborne particles right where your air circulates. This system helps create a healthier living environment for everyone in your household. It’s a smart addition to your home’s climate control.
- Understand your HVAC system basics.
- Choose the right in-duct air purifier.
- Gather necessary tools and safety gear.
- Locate a suitable spot in your ductwork.
- Mount the purifier securely.
- Connect it to your system’s power.
Ready to breathe easier? Let’s walk through exactly how to install an in-duct air purifier step by step, making sure you get it right the first time.
Your Guide to Installing an In-Duct Air Purifier
You’ve decided to improve your home’s air quality with an in-duct air purifier. That’s a fantastic choice! Installing one yourself can save you money and give you a real sense of accomplishment. Think of it like giving your HVAC system a healthy upgrade from the inside out. This guide will walk you through the process, making it as straightforward as possible.
Understanding Your HVAC System: The Foundation
Before you even unbox your new purifier, it’s essential to have a basic understanding of your home’s heating, ventilation, and air conditioning (HVAC) system. This system is the central hub for your air. It’s what circulates air throughout your entire house. Knowing its main components will make installation much smoother.
Key HVAC Components to Know
You don’t need to be an HVAC technician, but a little knowledge goes a long way. You should be familiar with:
- Furnace or Air Handler: This is the main unit that heats or cools your air. Your in-duct purifier will connect to its ductwork.
- Ductwork: These are the channels that carry conditioned air from your HVAC unit to different rooms and return stale air.
- Return Air Grille: This is where air is pulled back into the system.
- Supply Air Vents: These are where the freshly conditioned air blows out into your rooms.
Safety First: Always Power Down!
This is non-negotiable. Before touching any part of your HVAC system or ductwork, you absolutely must turn off the power to your entire HVAC system. Find the circuit breaker that controls your furnace or air handler and flip it off. This prevents any electrical shock and protects your equipment from damage. Double-check that the system is completely off before proceeding. We don’t want any surprises!
Choosing the Right In-Duct Air Purifier for Your Needs
With so many options out there, picking the right purifier is key. Think about what you want to target. Are you dealing with allergies, pet dander, or general dust? Different purifiers are designed for different purposes.
Types of In-Duct Air Purifiers
We found that in-duct purifiers generally fall into a few categories:
- HEPA Filters: These are highly effective at capturing very small particles. They are often considered the gold standard for air purification.
- UV-C Light Purifiers: These use ultraviolet light to kill bacteria, viruses, and mold. They work well in conjunction with other filtration methods.
- Electronic Air Cleaners: These use electrostatic charges to trap particles. They can be effective but may produce a small amount of ozone, which some people are sensitive to.
Sizing Your Purifier Correctly
Just like a car engine, your HVAC system has a certain airflow capacity. Your air purifier needs to match this. Check your HVAC system’s specifications (often found on a label inside the unit or in its manual) and compare it to the purifier’s recommended airflow rate, measured in cubic feet per minute (CFM). An improperly sized unit won’t be effective and could even strain your system.
Gathering Your Tools and Materials
Having everything ready before you start will make the installation process much smoother. It’s like prepping ingredients before cooking a meal.
Essential Tools You’ll Need
Here’s a list of common tools:
- Screwdriver set (Phillips and flathead)
- Drill with appropriate bits
- Sheet metal shears or aviation snips
- Measuring tape
- Utility knife
- Marker or pencil
- Safety glasses
- Work gloves
- Duct tape (high-quality foil tape is best)
- Ladder (if needed to reach ductwork)
Safety Gear is a Must
We can’t stress enough how important safety is. Always wear your safety glasses to protect your eyes from dust and debris. Work gloves will keep your hands safe from sharp edges in the ductwork. If you’re working in an attic or crawl space, a dust mask is also a good idea.
Locating the Ideal Installation Spot
Where you install the purifier within your ductwork matters. The goal is to capture the cleanest air possible before it circulates everywhere. Many experts recommend installing it on the supply side of your system, after the furnace or air handler but before the air branches off to different rooms. This is where the air is most evenly distributed.
Understanding Airflow Direction
Your HVAC system has a specific airflow direction. You’ll usually see arrows on the ductwork indicating this. Your in-duct air purifier needs to be installed so that it faces the direction of the airflow. Installing it backward will render it ineffective and could even damage it. Check your purifier’s manual for specific instructions on airflow orientation.
Choosing Between Supply and Return Ducts
While the supply side is often preferred, some purifiers can be installed on the return side. If you install on the return side, it pulls air through the filter before it reaches your furnace or air handler, potentially protecting your equipment from dust and debris. However, many models are designed for supply-side installation. Always follow the manufacturer’s recommendations for placement.
Mounting the Air Purifier
Now comes the hands-on part! Most in-duct purifiers come with mounting brackets or instructions on how to secure them.
Cutting the Opening in Your Ductwork
Using your measuring tape and marker, carefully mark the area on your ductwork where the purifier will fit. Many purifiers come with a template for this. Use your sheet metal shears or aviation snips to carefully cut along your marked lines. You want a snug fit. Smooth any sharp edges with a file if necessary.
Securing the Purifier Unit
Slide the purifier into the opening you’ve created. It should fit snugly. Use the provided mounting hardware or screws to secure it in place. Make sure it’s flush and stable. Once it’s in position, use your foil duct tape to create a tight seal around the edges where the purifier meets the ductwork. This is critical to prevent air leaks, which reduce efficiency.
Connecting the Power and Testing
This is the final step before you can enjoy cleaner air!
Wiring Your Air Purifier
Most in-duct air purifiers are designed to run on your HVAC system’s existing power. They often have a simple wiring harness that connects to the control board of your furnace or air handler. Follow the wiring diagram provided by the manufacturer precisely. If you’re uncomfortable with electrical connections, this is the point where you should call a qualified HVAC technician or electrician. Incorrect wiring can be dangerous and damage your equipment. For many models, it’s as simple as connecting a few color-coded wires.
Final Checks and Powering On
Once everything is wired and secured, it’s time for the moment of truth. Double-check all your connections. Ensure the duct tape is holding strong. Go back to your circuit breaker panel and restore power to your HVAC system. Turn on your system (set to fan mode first, if possible, to test airflow). Listen for any unusual noises. Check around the purifier for any air leaks. You should feel air being drawn into or pushed through the purifier as intended.
Here’s a quick checklist to ensure you haven’t missed a step:
- Power to HVAC is OFF.
- Ductwork location is chosen and marked.
- Opening cut cleanly and safely.
- Purifier mounted securely.
- All electrical connections are correct and safe.
- Ductwork sealed with tape.
- Power is restored, and system is tested.
Conclusion
You’ve successfully navigated the installation of your in-duct air purifier! By understanding your HVAC system, choosing the right unit, and carefully following the mounting and wiring steps, you’ve taken a major step toward a healthier home. Remember, proper sealing and safe electrical connections are key to both performance and safety. Now, sit back and enjoy the benefits of cleaner, fresher air circulating throughout your home. Your next step is to establish a routine for filter changes or maintenance as recommended by the purifier’s manufacturer.
Frequently Asked Questions
How often do I need to change the filter in my in-duct air purifier?
The frequency of filter replacement depends on the type of purifier you installed and your home’s air quality. Generally, you’ll want to check the filter every 3-6 months. Many manufacturers provide specific guidelines in their user manuals.
Can I install an in-duct air purifier myself, or do I need a professional?
Many in-duct air purifiers are designed for DIY installation if you have basic mechanical and electrical knowledge. However, if you’re uncomfortable with electrical wiring or cutting into ductwork, hiring an HVAC professional is a wise choice to ensure it’s done safely and correctly.
What happens if I install the air purifier backward in the ductwork?
Installing the purifier backward will prevent it from effectively cleaning the air and can even cause damage to the unit and your HVAC system. Always pay close attention to the airflow direction arrows on both the purifier and your ductwork before installation.
Will an in-duct air purifier make my HVAC system work harder?
A properly sized and installed in-duct air purifier should not significantly strain your HVAC system. However, an oversized unit or one with a very high MERV rating can restrict airflow, potentially reducing efficiency and increasing wear on your system. Always match the purifier’s CFM rating to your HVAC system’s capacity.
Are there any specific tools I absolutely cannot skip when installing this?
Essential tools for a successful installation include a drill, a screwdriver set, sheet metal shears or aviation snips for cutting the ductwork, and high-quality foil duct tape for sealing. Safety glasses and work gloves are also non-negotiable for protecting yourself during the process.
![How to Clean Charcoal Filter for Air Purifier [Easy Guide]](https://homeunderstandable.com/wp-content/uploads/2025/05/how-to-clean-charcoal-filter-for-air-purifier-easy-guide-768x512.jpg)
![What Is The Best Air Purifier for Chemical Sensitivity [In 2026]](https://homeunderstandable.com/wp-content/uploads/2025/06/best-air-purifier-for-chemical-sensitivity.jpg)