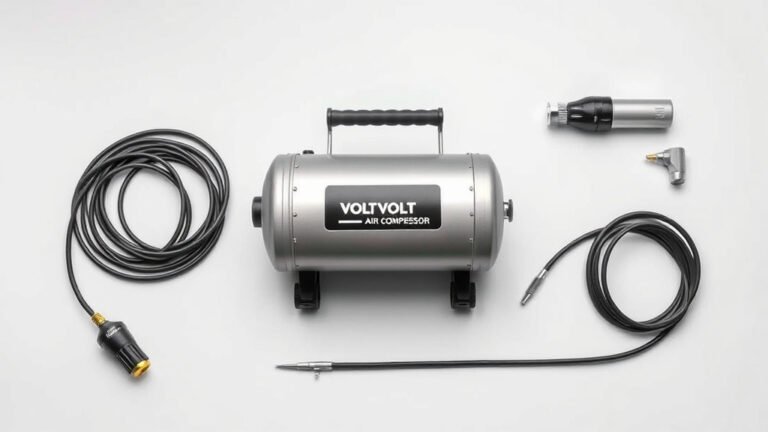
Setting Up Your Air Compressor System: A Simple Guide
Setting up an air compressor system is a manageable project for most DIYers. You’ll want to choose the right location, connect the air lines, and ensure proper electrical setup. Following these steps helps you get your compressor running safely and efficiently for all your projects.
We found that a well-planned air compressor system can boost your workshop’s productivity significantly. Understanding the different components and their purpose is key. This guide will help you avoid common pitfalls and ensure your system performs optimally for years to come.
- Pick a good spot for your compressor.
- Run your air lines correctly.
- Wire it up safely.
- Understand your system’s parts.
Ready to get your air compressor system up and running? Let’s walk through exactly how to set it up, step by step.
Getting Your Air Compressor System Set Up Right
Setting up your air compressor system might sound like a big job. But, we found it’s quite manageable when you break it down. You’ll want to find the perfect spot, connect all your air lines, and make sure the electrical setup is safe. Doing this correctly helps your compressor run efficiently and safely for all your projects.
Choosing the Ideal Location for Your Compressor
Where you put your air compressor matters a lot. A good location helps it perform better and last longer. You need to think about a few key things before you decide.
Ventilation and Temperature Considerations
Air compressors generate heat. They need plenty of fresh air to keep cool. Placing it in a small, stuffy closet is a recipe for trouble. Research shows that overheating can damage the motor and reduce its lifespan (U.S. Department of Energy). Aim for an area with good air circulation. This helps dissipate the heat effectively.
Avoid extreme temperatures. Very cold conditions can make the oil too thick, and very hot conditions will make cooling difficult. Many experts suggest keeping your compressor in a temperature-controlled environment if possible. This is ideal for optimal performance year-round.
Noise and Vibration Management
Air compressors can be loud. They also vibrate when running. Think about where this noise and shaking will have the least impact. You don’t want it disturbing your family or neighbors. Placing it away from living areas is often a smart move.
Consider putting it in a garage, workshop, or even a detached shed. Using anti-vibration pads under the compressor can also make a big difference. We found these pads significantly reduce the noise and shaking transferred to the floor.
Accessibility and Maintenance Space
You’ll need to access your compressor for maintenance. This includes draining the tank, checking oil levels, and cleaning air filters. Make sure there’s enough space around it to work comfortably. You don’t want to feel like you’re performing surgery in a tight spot.
Ensure easy access to power outlets and any air outlets you plan to use. A convenient location means you’re more likely to perform regular maintenance, which keeps your compressor running smoothly.
Running Your Air Lines: The Lifelines of Your System
Once your compressor is in place, it’s time to think about the air lines. These tubes carry the compressed air to where you need it. The type and installation of your lines can affect air pressure and flow. We found that using the right materials is key.
Choosing the Right Tubing Material
You have a few options for air lines. Common choices include rubber, polyurethane, PVC, and braided nylon. For stationary systems in a workshop, copper or PEX tubing are excellent choices. They offer durability and good air flow.
For portable use, flexible hoses like rubber or polyurethane are more practical. Always ensure the tubing is rated for the maximum pressure your compressor can produce. Bursting hoses are dangerous and a major hassle. Always check the specifications.
Proper Installation Techniques
When installing fixed lines, proper support is essential. Use clamps to secure the tubing along walls or ceilings. This prevents sagging and stress on the connections. Make sure all fittings are tight and leak-free. Small leaks can waste a lot of air and energy over time.
Consider installing a regulator and moisture trap at the point of use. A regulator controls the air pressure for your tools, preventing damage. A moisture trap removes condensation, which can harm sensitive pneumatic tools. Many users find these additions greatly improve tool performance.
Key Components for Your Air Line Setup
Here are some essential parts you’ll likely need:
- Air tubing or hose: The main line to carry air.
- Fittings and connectors: To join sections of tubing and connect to tools.
- Couplers and plugs: For quick connection and disconnection of tools.
- Regulator: To control air pressure.
- Moisture trap/water separator: To remove condensation.
- Pressure gauge: To monitor air pressure.
Ensuring a Safe and Efficient Electrical Setup
This is where safety really comes into play. Air compressors often draw a lot of power. Getting the electrical setup wrong can be dangerous. You need to match the compressor’s needs with your home’s electrical capacity.
Understanding Voltage and Amperage Requirements
Most small compressors run on standard 110-120V household power. Larger, more powerful units might require 220-240V. Always check the compressor’s nameplate or manual for its specific electrical needs. This is non-negotiable information.
Amperage is also critical. The compressor will draw a certain amount of current when running. You need to ensure the circuit you use can handle this load without tripping breakers. Many experts recommend dedicated circuits for larger compressors.
Dedicated Circuits and Proper Wiring
We found that using a dedicated electrical circuit for your air compressor is often the best practice. This means the compressor is the only thing on that breaker. It prevents overloading other appliances and reduces the risk of power interruptions. This is especially true for units that draw significant amperage.
Ensure the wiring gauge is appropriate for the amperage draw and the distance from the breaker box. Using undersized wire can cause overheating and voltage drop. If you’re unsure about electrical work, it’s always best to consult a qualified electrician. Safety first is our motto here!
Grounding and Safety Features
Proper grounding is absolutely essential for electrical safety. It provides a path for electricity to flow safely to the ground in case of a fault, preventing electric shock. Make sure your compressor and any extension cords used are properly grounded.
Many compressors come with built-in thermal overload protection. This feature shuts off the motor if it gets too hot. Familiarize yourself with all safety features and follow all manufacturer recommendations. We learned that ignoring these can lead to serious accidents.
Your Air Compressor System Checklist
Ready to get started? Here’s a quick checklist to help you through the process:
- Confirm your chosen location has good ventilation and is away from extreme temperatures.
- Ensure there’s enough space around the compressor for maintenance and repairs.
- Select air line tubing rated for your compressor’s maximum pressure.
- Install regulators and moisture traps for optimal tool performance.
- Verify your electrical circuit can handle the compressor’s voltage and amperage requirements.
- Always ensure all electrical connections are properly grounded.
Conclusion
You’ve successfully navigated the essential steps to set up your air compressor system! By carefully choosing the ideal location, correctly running your air lines, and ensuring a safe electrical setup, you’ve built a solid foundation. Remember, a well-installed system means more efficient work and longer equipment life. Now that your system is ready, take a moment to review your setup and double-check all connections. Your next project is just an air hose away!
Frequently Asked Questions
How much space do I really need around my air compressor?
You’ll want at least two to three feet of clearance on all sides. This allows for proper ventilation and easy access for maintenance like draining the tank or checking the oil. Enough space prevents overheating and makes repairs much simpler.
Can I run air lines through unheated spaces during winter?
It’s generally not recommended to run air lines through unheated spaces in freezing temperatures. Condensation can freeze inside the lines, blocking airflow or even damaging the tubing. If you must, consider insulated lines or a heated conduit.
What’s the difference between a regulator and a pressure gauge?
A pressure gauge simply shows you how much air pressure is in the tank or line. A regulator, on the other hand, allows you to *set* and *control* the air pressure delivered to your tools. You need both for safe and effective operation.
Is it okay to use a regular household extension cord with my air compressor?
For most smaller compressors, a heavy-duty extension cord rated for outdoor use and the compressor’s amperage might work for short distances. However, we found that using a dedicated circuit without any extension cord is always the safest and most efficient option. It prevents voltage drops and potential fire hazards.
How often should I drain the moisture from my air compressor tank?
You should drain the tank after each use, or at least daily if you use it regularly. This prevents rust and corrosion inside the tank, which can degrade air quality and shorten the compressor’s lifespan. It’s a quick step that makes a big difference.