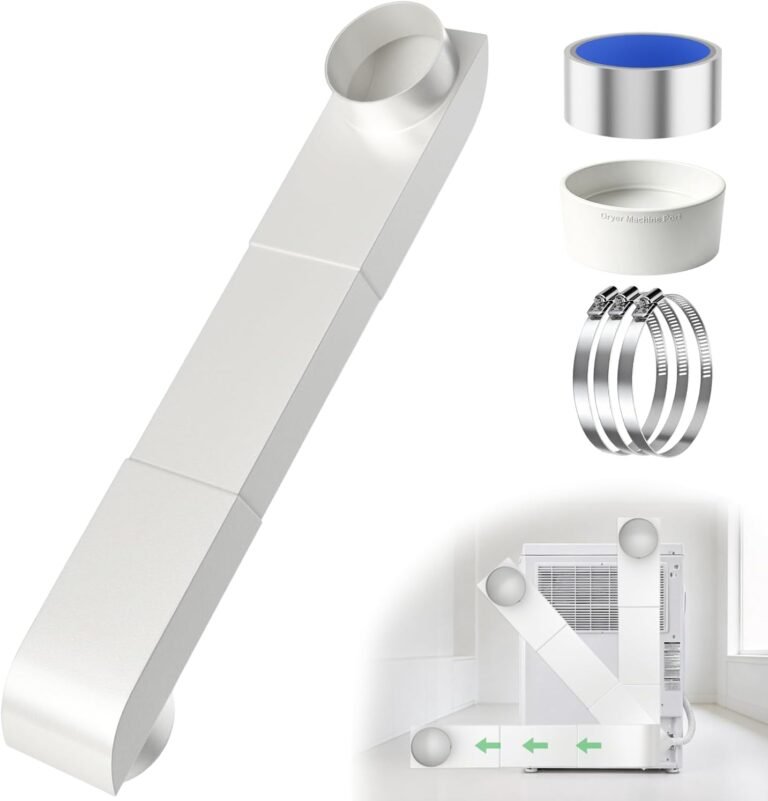
How to Install a Clothes Dryer Duct in 7 Steps
To install a clothes dryer duct, start by choosing the shortest, straightest vent path from your dryer to the outside wall, then connect rigid or semi-rigid metal ducting using foil tape and clamps. The most important rule is to use smooth metal ducts, never plastic or foil, because they trap lint and are a major fire hazard. This is the safest and most common method for a standard home installation.
We found that most DIYers complete this job in about 2-3 hours with basic tools like a screwdriver, tin snips, and a drill. Proper installation isn’t just about getting warm air outside; it’s about preventing house fires, improving dryer efficiency, and cutting your energy bills. A crushed or kinked duct is the #1 reason dryers stop drying clothes effectively.
TL;DR — The essentials before you start:
- Always use rigid metal or semi-rigid aluminum ducts. Never use plastic, vinyl, or foil ducts.
- Keep the total duct run as short as possible. Under 25 feet is ideal.
- Use metal foil tape (not duct tape) to seal every joint, and clamps to secure it.
- Vent to the outside only. Never vent into an attic, crawlspace, or garage.
- Make sure the exterior flap opens easily and closes tightly when not in use.
Below, we walk you through the safe and simple step-by-step process to connect your dryer and get it venting properly. Let’s get your laundry room working like it should.
Getting Your Dryer Vent Installation Right
You can absolutely tackle this project yourself. We found that careful planning and the right materials make all the difference. Before you even touch the dryer, you need a clear picture of the path the duct will take.
Think of the duct like a highway for hot, moist air. The smoother and shorter the road, the easier the air travels. A long, winding path with lots of turns forces the air to slow down. This causes lint to pile up where the air loses speed.
Your first job is to measure the distance from the dryer’s exhaust port to the outside wall. Many experts say that a straight line is your best friend here. Keep the total length under 25 feet if you can. Every 90-degree turn in the duct adds roughly 5 feet of resistance. So, a run with three turns is like having a 40-foot-long straight pipe.
Choosing the Right Duct Material
This is where most DIYers make a critical error. You might see flexible plastic or foil ducts at the hardware store. Please, do not buy those. They are a serious fire hazard.
Plastic and foil ducts trap lint easily. Lint is highly flammable. The combination of trapped lint and hot dryer air creates a dangerous situation. The U.S. Consumer Product Safety Commission has reported that thousands of home fires start due to improperly installed dryer vents.
Here is the simple rule: only use the smooth metal ducts.
- Rigid metal duct (galvanized steel or aluminum): This is the best choice. It is strong, smooth, and doesn’t trap lint.
- Semi-rigid metal duct (flexible aluminum): This is okay for tight spots. It is metal, but the ridges can catch some lint. Use it only for short sections where you cannot use rigid ducting.
We found that sticking with the rigid metal duct provides the best airflow. It lasts for decades and is practically bulletproof against crushing.
The Tools You Will Need
Most of these you probably already own. Gathering everything first saves you from multiple trips to the store.
- Tape measure
- Tin snips (for cutting metal duct)
- Phillips-head screwdriver or a drill with bits
- Metal foil tape (crucial for sealing joints)
- Duct clamps (to hold connections tight)
- Screwdriver for the clamp screws
Having a simple level is also a good idea. It helps you make sure the duct slopes slightly downward towards the outside. This lets any condensation drain out instead of pooling in the pipe.
Step-by-Step Guide to Installing the Duct
With your tools ready, you can start the physical work. This process works for most standard laundry rooms. Always make sure your dryer is unplugged before you start working behind it.
Safety first, folks. Working with metal ducting means sharp edges. Wear work gloves to protect your hands when cutting or fitting pieces.
Step 1: Prepare the Outside Vent
Start at the point where the air will exit your house. You need a vent hood on the exterior wall. If you don’t have one, now is the time to install it.
This vent hood has a flap that opens when the dryer runs. It closes when the dryer is off to keep out bugs and cold air. Ensure the flap moves freely and seals tightly. You can reach behind the dryer and feel the vent pipe coming through the wall from the outside.
Step 2: Measure and Measure Again
Now you need to measure the gap between the wall vent pipe and your dryer’s exhaust port. This is the length of straight metal duct you will need.
Do not guess this measurement. A piece that is too long will stick out. A piece that is too short will not reach, leaving a gap. Measure the top and the bottom of the space, as walls are not always perfectly straight. Use the longer measurement if they differ.
Step 3: Cut the Metal Duct to Size
Put on your gloves. Use your tin snips to cut the rigid metal duct to the length you measured.
Cut straight across the pipe. You want a clean edge where the next piece can connect. After cutting, use your fingers or a screwdriver to smooth out any burrs on the cut edge. Sharp metal can slice through the foil tape later, causing air leaks.
Step 4: Assemble the Duct Run
Slide the cut piece of duct over the pipe coming from the wall vent. Make sure it overlaps by at least an inch or two. This creates a strong, leak-proof joint.
Next, slide the other end of the duct onto the dryer’s exhaust outlet. Your dryer has a small metal or plastic stub on its back where the duct connects. Push the duct over it as far as it will go.
You might find that the duct needs to bend to connect. If so, use a semi-rigid aluminum section for the last few feet. Just keep the bend as gentle as possible. A sharp bend is called a kink, and it blocks airflow badly.
Step 5: Seal Every Joint
Here is the step that separates a good install from a great one. Use metal foil tape to seal every single connection point.
This is not the same as gray duct tape you might have in the garage. Standard duct tape dries out, cracks, and falls off. Metal foil tape is strong, sticky, and made for this exact job. Wrap the tape tightly around each joint.
Why is this so important? Inside your dryer, a fan pushes the air out. If the joints have gaps, the air will escape into your laundry room. This air is warm and full of moisture. It can cause mold on your walls and make the room feel sticky and hot.
Step 6: Secure the Connections with Clamps
For a mechanical lock, add a duct clamp around the duct where it meets the dryer outlet. Place another clamp where the duct meets the wall vent pipe.
Tighten the clamps with your screwdriver until they are snug. Be careful not to overtighten and crush the metal pipe. This clamp ensures the duct will not pop off over time, even with the vibration from the dryer running.
Step 7: The Final Push
Carefully slide your dryer back into place against the wall. Watch the duct as you move it. Make sure the duct is not pinched or crushed between the dryer and the wall. A crushed duct is a dead end for airflow.
This is the most common mistake we see. People think it is fine if the pipe is squashed a little. It is not. A crushed duct reduces airflow by over 50% or more. Your clothes will take forever to dry, and you will waste energy.
Key Rules for a Long-Lasting and Safe Duct System
Once everything is connected, you should run a quick test. But first, let’s review the non-negotiables you need to follow.
We found that ignoring these simple rules leads to the most calls for dryer repair technicians.
| Do: | Don’t: |
|---|---|
| Use smooth, rigid metal pipes for most of the run. | Use plastic, vinyl, or thin foil ducts. |
| Keep the total run under 25 feet. | Vent into a wall cavity, attic, or crawlspace. |
| Seal joints with metal foil tape. | Use clamps and screws that poke inside the pipe. |
| Make sure the exterior flap opens fully. | Poke screws into the duct, as they catch lint. |
The Checklist Before You Start Your Dryer
Use this quick checklist. It takes less than a minute to complete, and it will give you peace of mind.
- The duct material is all metal with no plastic or foil.
- Every joint is sealed with metal foil tape.
- All connections are secured with metal clamps.
- The duct is not crushed, kinked, or pinched behind the dryer.
- The outside vent flap opens when you use a leaf blower or vacuum at the interior end.
- There are no sharp edges or exposed screws inside the duct.
Testing Your New Dryer Duct
Start your dryer on the air-fluff cycle or the regular heat setting. Go outside immediately and check the vent flap. It should be pushing out air strongly.
Feel the air flow with your hand. It should feel strong and steady. If it feels weak, you have a clog or a bend somewhere. Go back and check each connection point for any gaps or kinks you may have missed.
Also, go back to the laundry room. You should not feel any warm air leaking out from behind the dryer. If you do, check your tape and clamps on that joint.
Take a sniff. You should smell the fabric softener and clean laundry coming from the outside vent, not from inside the laundry room. If you smell bleach or detergent inside, you have an air leak. Research from the National Fire Protection Association indicates that clogged dryer vents are a leading cause of dryer fires. Regular maintenance is key.
About once a year, disconnect the duct from the dryer and use a vacuum hose to clean out any lint that has collected inside the pipe. This is the simplest way to keep your vent efficient and your home safe. This quick annual check also helps extend the life of your dryer because it doesn’t have to work so hard to push the air outside.
Conclusion
You now have everything you need to install a dryer duct safely and correctly. The core takeaway is simple: metal ducts, short runs, and tight seals are the secret to efficiency and fire safety. We’ve covered the right materials, the step-by-step assembly, and the small details that prevent big problems down the road.
Take your time, wear those gloves, and don’t rush the final push back against the wall—that’s where ducts get crushed. Your final step is to run that quick air-flow test on the outside vent. When it feels strong and steady, you are done. Your dryer will thank you with faster drying times and a longer life.
Frequently Asked Questions
Can I use a dryer vent cleaning kit to install a new duct?
No, a cleaning kit is not a replacement for a proper duct installation. Those kits are only for clearing out lint from an existing, already-installed pipe. For a new install, you must use rigid or semi-rigid metal duct sections.
What happens if my dryer vent duct is too long?
A long duct run makes your dryer work much harder. The air cools down and moves slower, which causes lint to build up inside the pipe. You might notice longer drying times and higher energy bills. If you need to go over 25 feet, you may need a booster fan.
Is it okay to use a dryer duct with a slight sag in the middle?
A sag always traps lint and creates a block point. You want the duct to run as straight as possible. If you have a sag, support the duct with metal strap hangers to keep it taut and level.
Can I connect a metal dryer duct to a PVC pipe?
No, you should never connect a dryer vent to PVC or any plastic pipe. Local building codes prohibit it because the plastic melts and burns easily. Stick with the smooth metal ducts from start to finish.
How often should I inspect my new dryer duct installation?
We recommend checking the outside vent flap every few months to make sure it opens and closes freely. Once a year, disconnect the duct from the dryer and vacuum it out. This simple habit keeps your setup safe and efficient for years.