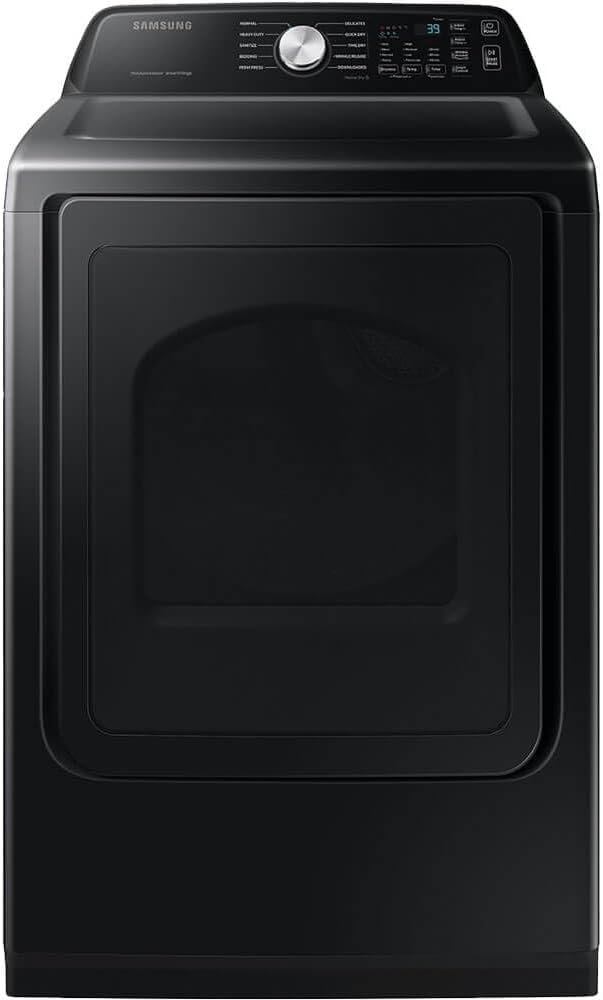
How to Install a Clothes Dryer Vent: Step-by-Step
The easiest way to install a clothes dryer vent is to run a rigid metal duct from the dryer to an exterior wall opening, keeping the run as short and straight as possible. This setup removes moist air safely and prevents lint buildup that can cause house fires. We found that doing it right the first time saves you from costly repairs and dangerous hazards down the road.
You can install a dryer vent yourself in a few hours with basic tools. We found that proper airflow is critical for your dryer to work efficiently and for your home to stay safe. Many experts say that shorter, smoother duct runs are always better than long, twisted paths. This project is a great weekend DIY task for any homeowner.
- Rigid metal ducts are the only safe choice—skip the plastic or foil.
- Keep the total length under 25 feet, and subtract 5 feet for every 90-degree bend.
- Vent to the outside only, never into an attic, crawlspace, or garage.
- Seal every joint with metal tape (never screws, which catch lint).
- Use a hood with a flap and screen on the exterior wall to block pests.
Below, we walk you through the process step by step, from choosing the right pipe to cutting the hole and securing everything in place. Let’s get your dryer venting safely and efficiently.
Getting Ready for a Dryer Vent Installation
You want a dryer that works fast and stays safe. The key is an effective dryer vent system. We found that planning your route before touching any tools saves real headaches later.
Start with measuring. A simple tape measure gives you the distance from the dryer to the outside wall. This number determines all your materials. Many experts say that a short, straight path is the gold standard for any installation.
Choosing the Right Duct Material
Not all ducts are the same. The material you pick matters more than almost anything else. We found that rigid metal ducts are the safest and most efficient choice for your home.
- Semi-rigid metal works for tight spots and is acceptable in most codes.
- Flexible foil ducts are common but risky because they trap lint and sag easily.
- PVC or plastic pipes are a fire hazard and should never be used with a dryer.
Plastic pipes are banned in most building codes. They melt easily from hot dryer exhaust. We recommend spending a few extra dollars on rigid metal to get maximum airflow and maximum safety.
Understanding Duct Diameter
Most dryers need a 4-inch duct. This size matches the exhaust outlet on your machine. We found that using smaller or larger sizes causes lint buildup and pressure problems.
Stick with 4-inch rigid metal pipe. This standard size works with almost every residential dryer on the market. It’s simple, effective, and easy to source at any home improvement store.
Mapping Your Dryer Vent Route
Before you cut any holes, think about the path. The best route goes straight through an exterior wall right behind the dryer. This keeps the run short and reduces bend points.
We found that longer routes cause more problems. Every bend slows airflow and catches lint. A straight line is always your best friend in this project.
Calculating Maximum Duct Length
Home inspectors and dryer manufacturers follow a simple rule. The maximum total duct length is 25 feet. This rule is important because it keeps the airflow strong enough to push lint all the way outside.
Bends reduce your allowed length. Every 90-degree angle in your duct reduces the maximum length by 5 feet. A 45-degree bend subtracts about 2.5 feet. We found that homeowners often forget this calculation until it’s too late.
| Duct Component | Length Deduction |
|---|---|
| Straight rigid pipe | 2 feet per section (no deduction) |
| 90-degree elbow | 5 feet |
| 45-degree elbow | 2.5 feet |
| Wall cap with damper | 3 feet |
Example: If your dryer sits 8 feet from the wall with two 90-degree elbows, your effective length is 18 feet. That’s within the limit. Adding more bends pushes you over the edge.
Picking the Ideal Exhaust Location
Your exterior wall vent should face away from heavy foot traffic. Avoid placing it near windows, air conditioning units, or neighbors’ patios. The moist air needs a clear path to dissipate without bothering anyone.
We found that venting through the wall behind the dryer is easiest. This minimizes the duct run and keeps the pipe hidden from view. If that’s impossible, look for the closest available wall space.
Preparing the Exterior Hole Safely
Now it’s time to mark your spot on the outside wall. Use a level to ensure your line is straight. We found that double-checking this step prevents slanted installation and frustrating gaps.
Check for obstacles before you cut. Look for electrical wires, plumbing pipes, or studs in the wall space. Many experts recommend using a stud finder to map out what’s behind the drywall.
Tools and Materials You’ll Need
Gather everything before you start. Running out of supplies midway through the job wastes your time. This project goes much faster when you have clear tasks.
- Rigid metal duct pipe and elbows
- Metal foil tape (never duct tape)
- Jigsaw or hole saw for cutting
- Drill with screwdriver bits
- Measuring tape and pencil
- Safety glasses and work gloves
- Exterior vent hood with a flap
- Level and stud finder
We found that having these tools ready avoids frustration. A clean workspace also helps you stay organized. You’ll finish faster and with fewer mistakes.
Marking and Cutting the Opening
Trace the outline of your vent hood on the exterior wall. Most hoods have a square or round flange. Use your level to keep the lines perfectly straight.
Cut the hole slightly larger than the duct pipe. This gives you room to work but not so much that air leaks through. We found that a hole saw is the easiest way to make a clean circular cut.
Installing the Exterior Vent Hood
The vent hood connects your duct to the outside world. It keeps the weather out and stops pests from climbing inside. We found that installing this component first makes the rest of the job easier.
Apply a bead of exterior caulk around the flange of the hood. This seals out rain and drafts. Push the pipe through the wall and connect it to the hood from inside.
Sealing the Hood for Weather Protection
Use stainless steel screws to secure the hood to your siding. Then cover the screw heads and edges with a quality exterior caulk. This layer protects against water damage and rust.
We found that a well-sealed hood lasts much longer. The flap should move freely. If it sticks, the air cannot escape properly, which leads to moisture problems inside your home.
Connecting the Rigid Duct Inside
Start from the outside and work inward. Connect each section of rigid pipe with the crimped end facing the dryer. This orientation prevents lint from catching on the joints.
We found that assembling the duct in sections helps. Test the connection before moving to the next piece. This way, you catch misalignments before they become a headache.
Securing Metal Duct Joints
Every joint must be sealed with metal foil tape. Do not use screws inside the duct. Screws create tiny edges where lint gathers and builds up over time.
Wrap the tape tightly around each connection. Many experts say that metal tape creates an airtight seal that lasts for years. Press it down firmly to avoid any gaps.
- Wrap tape fully around the joint.
- Smooth it out with your fingers.
- Check for any wrinkles or bubbles.
- Add a second layer for extra safety.
Attaching the Duct to Your Dryer
The dryer connection often requires a transition piece. This piece connects the 4-inch pipe to the dryer’s exhaust outlet. We found that using a metal transition duct works best here, even if it’s flexible.
Slide the transition piece over the dryer outlet. Secure it with a clamp or metal tape. We found that the clamp keeps everything tight and prevents accidental disconnection.
Positioning the Dryer for Final Connection
Move the dryer gently into its final spot. Leave enough room behind it to make the connection. We found that pushing the dryer too close can crush the duct and block airflow.
Once it sits in place, reach behind and confirm the duct is still attached. A pulled connection leaks warm, moist air into your laundry room. This promotes mold and increases your energy bills.
Testing Your Dryer Vent Installation
Turn on the dryer and go outside. You should feel a strong rush of warm air coming from the vent. This confirms that your installation is working correctly.
If the airflow feels weak, check for kinks or crushed sections. We found that most airflow problems trace back to bends or sagging flexible ducts. Fix those issues before calling the job done.
Checking for Leaks and Loose Connections
Run your hand along the duct run inside your home. Feel for warm air escaping at the joints. Any leak means moist air is entering your living space.
Inspect the exterior flap closely. It should close fully when the dryer is off. A flapping or loose vent door lets cold air inside and invites pests to visit.
Maintaining Your New Dryer Vent
Your job is not done after installation. Regular maintenance keeps your vent clear and your dryer efficient. We found that a yearly cleaning makes a dramatic difference in performance.
Disconnect the duct and use a dryer vent brush to remove lint. This simple task takes about 20 minutes. Doing it annually prevents the buildup that causes most dryer fires.
Signs Your Vent Needs Attention
Watch for clues that your vent is clogged or damaged. These warning signs mean it’s time to act. We found that catching problems early saves you from expensive repairs.
- Clothes take longer than usual to dry.
- The dryer feels hot to the touch on the outside.
- Burning smell in the laundry room.
Moisture on the laundry room windows is another red flag. This means humid air is not escaping. The National Fire Protection Association recommends regular dryer vent cleaning for every home.
Quick Maintenance Checklist
Stay ahead of problems with this simple routine. Set a reminder on your phone if you tend to forget. Future you will be grateful.
- Clean the lint trap after every single load.
- Inspect the exterior flap for debris monthly.
- Check the duct for visible sagging each season.
- Brush the entire vent line once a year.
- Replace the semi-rigid duct if it shows cracks.
- Call a pro if you sense strong odors or dampness.
Your hard work pays off with lower energy bills and a safer home. We found that a properly installed dryer vent also extends the lifespan of your machine. That alone makes the effort worthwhile.
Conclusion
You now have everything you need to install a dryer vent that is safe, efficient, and built to last. The biggest takeaways are simple: use rigid metal duct, keep your run short, and seal every joint with metal tape. Skipping these steps is the fastest way to invite lint buildup and fire risk into your home.
We found that a little bit of planning before you start will save you hours of frustration. Measure your route, gather the right tools, and double-check your cuts. The result is a dryer that dries faster and costs less to run.
Your next step is to grab your tape measure and check the distance from your dryer to the exterior wall. Commit to finishing this project this weekend. Your home will be safer, and your dryer will thank you.
Frequently Asked Questions
Can I install a dryer vent myself, or should I hire a pro?
You can handle this as a DIY project if you are comfortable with basic tools. The job takes a few hours and requires drilling a hole through your wall. Call a professional if you hit electrical wires, plumbing, or unusual framing.
What is the best dryer vent pipe to use?
Rigid metal pipe is the only choice we recommend. It is smooth inside, which means lint slides right through to the outside. Semi-rigid metal is a backup option for tight spaces, but foil and plastic are fire hazards you should avoid.
How often should I clean my dryer vent after installation?
You should give your vent a thorough cleaning once a year. If you have a large family or do many loads weekly, bump that up to twice a year. Regular cleaning prevents fires and keeps your dryer running at peak efficiency.
Why does my dryer vent have a burning smell?
A burning smell almost always means lint is trapped somewhere in the duct. Turn off the dryer immediately and inspect the entire run for buildup or a crushed pipe. This is a serious fire warning sign that needs your attention right away.
Is it okay to use a flexible hose for the entire dryer vent run?
No, using flexible foil hose for the full run is a mistake. The ribbed surface traps lint and restricts airflow significantly. Use flexible metal only for the short transition piece right behind the dryer, and use rigid pipe for everything else.