
How to Repair Sewing Machine Timing: Expert Tips
Sewing machines are wonderful tools. They help us make clothes and crafts. But sometimes, they stop working well. This can be frustrating. One common problem is timing issues. Let’s learn how to fix this problem.
What is Sewing Machine Timing?
Sewing machine timing is important. It makes sure the needle and thread work together. If they don’t, the machine won’t sew right. It can skip stitches or break threads. Timing problems are common but can be fixed.

Credit: sewing-machine-service-and-repair.com
Signs of Timing Problems
How do you know if timing is off? Here are some signs:
- Skipped stitches
- Needle hitting the bobbin case
- Thread bunching up
- Strange noises
If you notice these problems, check the timing. It’s an important step.
Tools You Need
Before you start, gather some tools. You will need:
- Screwdriver
- Needle
- Thread
- Fabric
- User manual (if you have it)
Having these tools ready will make the job easier.
Steps to Repair Sewing Machine Timing
Follow these steps to fix the timing:
Step 1: Turn Off The Machine
First, unplug the machine. Safety is very important. Never work on a plugged-in machine.
Step 2: Remove The Needle Plate
Use a screwdriver to remove the needle plate. This lets you see the bobbin case. Be gentle and careful.
Step 3: Check The Needle
Make sure the needle is not bent. A bent needle can cause problems. Replace it if needed. Always use the right needle for your fabric.
Step 4: Inspect The Bobbin Case
Look at the bobbin case. It should be clean and free of lint. Use a brush to clean it. A clean bobbin case helps with smooth sewing.
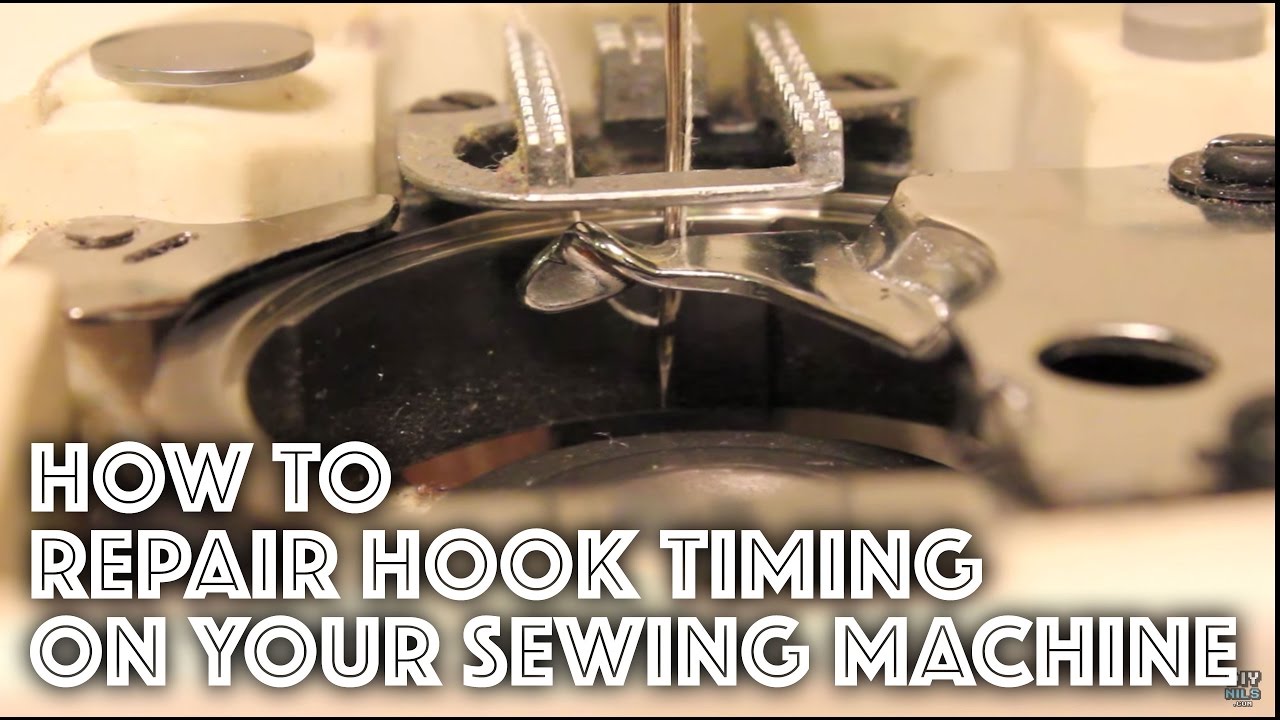
Step 5: Align The Needle And Hook
The needle and hook must be aligned. The hook catches the thread from the needle. If they don’t meet at the right time, sewing will not work.
| Action | Result |
|---|---|
| Needle down, hook moves | Thread is caught |
| Needle up, hook moves | Thread is released |
Step 6: Adjust The Timing
Now adjust the timing. Turn the handwheel slowly. Watch the needle and hook. They should meet at the right time. If not, adjust the hook position. Follow your manual if needed.
Step 7: Reassemble The Machine
Once timing is fixed, reassemble the machine. Put the needle plate back. Make sure everything is tight and secure.
Step 8: Test The Machine
Plug in the machine. Sew on a scrap of fabric. Check for skipped stitches or noise. If all is well, your machine is ready!
Tips for Maintaining Sewing Machine Timing
Keep your machine in good shape. Here are some tips:
- Regularly clean your machine
- Oil moving parts as recommended
- Use the correct needle and thread
- Store the machine in a safe place
These steps help prevent timing issues. A well-maintained machine lasts longer.
Credit: www.youtube.com
Frequently Asked Questions
How Do You Identify Sewing Machine Timing Issues?
Listen for strange noises. Check if stitches are uneven or fabric bunches up.
Why Is Sewing Machine Timing Important?
Correct timing ensures smooth operation. It prevents broken threads and uneven stitches.
What Tools Are Needed For Timing Repair?
You’ll need a screwdriver and a sewing machine manual. Some machines need a timing gauge.
Can I Repair Sewing Machine Timing Myself?
Yes, follow the manual’s instructions. Be patient and careful while adjusting parts.
Conclusion
Fixing sewing machine timing is important. It helps the machine sew well. Follow these simple steps to repair it yourself. Always be careful and take your time. Your sewing projects will turn out better. Enjoy sewing with a well-timed machine!
Thank you for reading! Happy sewing!