
How to Thread a Needle on a Brother Sewing Machine: Easy Guide
Sewing can be fun. It is also useful. A Brother sewing machine helps us sew. But first, we need to thread the needle. This can be tricky. But do not worry. This guide will help you. We will show you each step. Follow along, and you will do great!
Credit: support.brother.com
Why is Threading Important?
Threading is the first step in sewing. Without it, the machine cannot sew. The needle needs thread to stitch. Proper threading makes sewing easy. Incorrect threading can cause problems. The machine may jam. Or the stitches may not look good.
Credit: mindymakes.com
Get to Know Your Brother Sewing Machine
Every sewing machine is different. Brother machines have special parts. Knowing these parts helps in threading.
- Spool Pin: This holds the thread spool.
- Tension Dial: It controls the thread tightness.
- Take-up Lever: This moves the thread up and down.
- Needle: The sharp point that stitches the fabric.
Steps to Thread a Needle
Let us start threading. Follow these simple steps.
Step 1: Prepare The Machine
First, turn off the machine. Safety is important. Check that the needle is up. Turn the handwheel if needed. This brings the needle to the top.
Step 2: Place The Thread Spool
Find the spool pin. It is usually on top. Place the thread spool on it. Make sure it is secure. The thread should come off the spool easily.
Step 3: Guide The Thread
Look for the thread guide. This is near the spool pin. Pull the thread through this guide. Pull gently, do not rush.
Step 4: Follow The Thread Path
Brother machines have a path. It is often marked by numbers. Follow these numbers carefully. The path goes down, then up again.
Step 5: Use The Take-up Lever
The thread must go through the take-up lever. This lever moves up and down. It is important for sewing. Make sure the thread is in the lever’s eye.
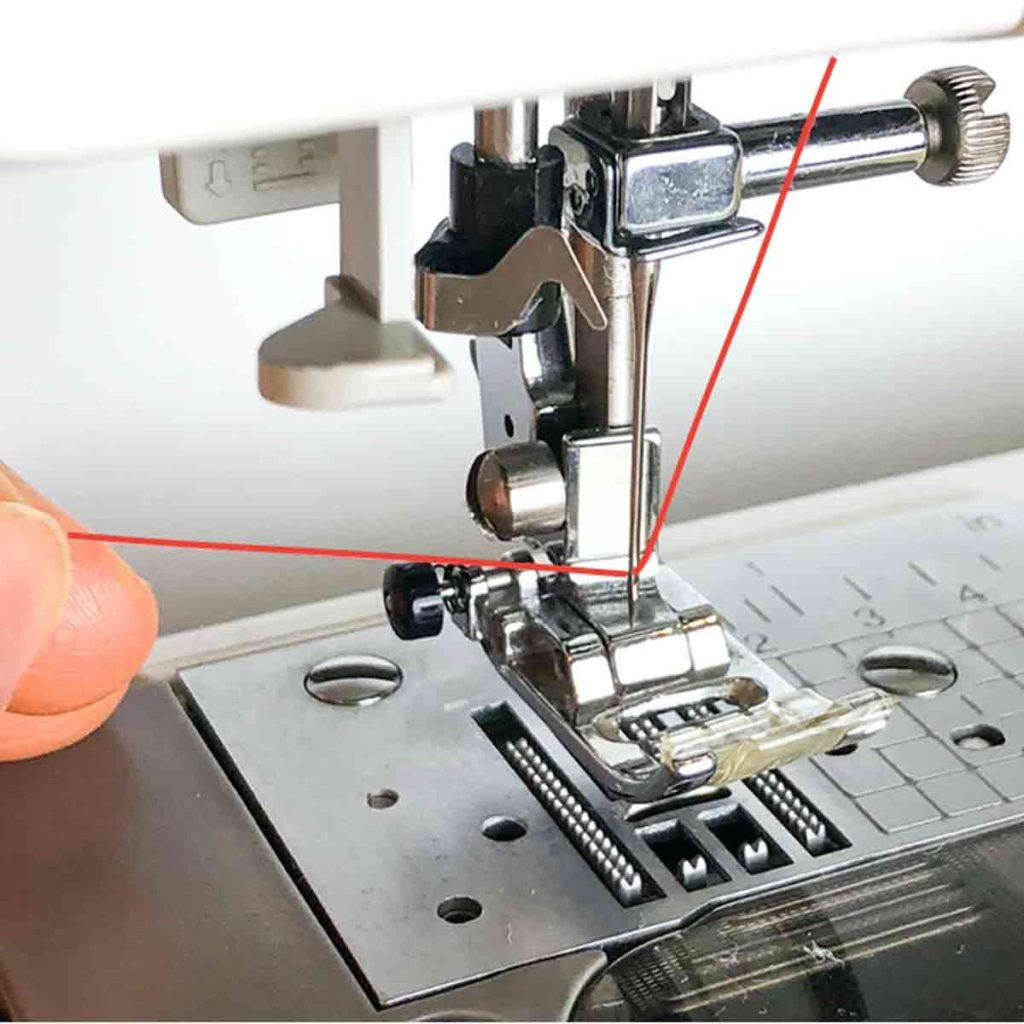
Step 6: Thread The Needle
This is the last part. The needle has a small hole. This is called the eye. Pass the thread through this hole. Use your fingers or a needle threader. Be patient. This can take time.
Check Your Work
Now, check the threading. Make sure it looks right. Pull the thread slightly. It should move smoothly. If it is too tight, check the tension dial. If it is too loose, check the guides.
Why Practice Matters
Practice makes threading easy. The first time may be hard. But do not give up. The more you practice, the better you get. Soon, you will thread quickly.
Common Mistakes
People make mistakes while threading. Here are some to watch out for:
- Skipping the Guide: Always use the guides. They keep the thread in place.
- Wrong Tension: Adjust the tension dial if needed. Too tight or too loose is not good.
- Needle Eye: Make sure the thread is through the needle’s eye.
Tips for Easy Threading
Here are some tips to help you:
- Good Light: Threading needs light. Use a lamp if it is dark.
- Cut the Thread: A clean cut helps. Use scissors to cut the thread before threading.
- Stay Calm: Take your time. Rushing can cause mistakes.
Frequently Asked Questions
What Is The Easiest Way To Thread A Needle?
Use an automatic needle threader. It simplifies the process and saves time.
How Do I Prepare The Thread For Sewing?
Cut the thread at an angle. It helps guide it smoothly through the needle.
Why Does My Thread Keep Breaking?
Check your tension settings. Incorrect tension can cause thread breakage.
Can I Use Any Thread On A Brother Sewing Machine?
No. Use threads compatible with your machine for best results.
Conclusion
Threading a needle on a Brother sewing machine is simple. Follow the steps. Practice often. Soon, you will be a pro. Sewing will be fun and easy. Remember, take your time. Check your work. And most importantly, enjoy sewing!
