Honeywell Air Purifier Cleaning Guide: Step-by-Step Instructions
The easiest way to clean your Honeywell air purifier is by regularly wiping down the exterior and cleaning or replacing the filters as recommended by the manufacturer. Keeping your Honeywell air purifier clean ensures it runs efficiently and keeps your air fresh. This simple maintenance is key to achieving the best air quality in your home.
Many users wonder about the best practices for maintaining their Honeywell air purifier. We found that consistent filter checks and cleaning are critical for optimal performance. Neglecting this can lead to reduced effectiveness and even potential damage over time. It’s all about keeping those internal parts free from dust and debris.
- Wipe down the outside often.
- Check and clean/replace filters regularly.
- Always unplug before cleaning.
- Refer to your manual for specifics.
Let’s walk through exactly how to get your Honeywell air purifier sparkling clean, step by step.
“`htmlKeeping Your Honeywell Air Purifier Running Smoothly
You’ve invested in a Honeywell air purifier to bring cleaner air into your home. That’s a fantastic choice for your family’s well-being! To make sure it’s always doing its best work, a little regular maintenance goes a long way. We’ll walk you through how to clean it effectively, step-by-step.
Think of your air purifier like a car. You wouldn’t drive for thousands of miles without changing the oil or checking the tires, right? Your air purifier needs similar care to keep its engine humming and its performance top-notch. We found that consistent cleaning prevents dust buildup and ensures optimal airflow, which is key to capturing those airborne particles.
Essential First Steps Before Cleaning
Safety first! Before you even think about wiping or washing, there’s one absolutely critical step. You must always, always unplug your Honeywell air purifier from the wall outlet. This prevents any accidental power surges or the unit turning on while you’re cleaning its delicate parts. We can’t stress this enough – it’s for your safety!
Gathering Your Cleaning Supplies
Once it’s safely unplugged, let’s get your cleaning toolkit ready. You probably have most of these items already. You’ll need a soft, dry cloth. A slightly damp cloth can also be helpful for tougher spots. For the interior, a vacuum cleaner with a brush attachment is your best friend. And, of course, you’ll want your Honeywell air purifier’s user manual handy.
Consulting Your User Manual
Every Honeywell model is a little different. Your user manual has the specific instructions tailored to your particular air purifier. It will tell you exactly which parts are washable, which should only be wiped, and the recommended schedule for filter maintenance. We found that referring to the manual prevents any guesswork and ensures you’re caring for your unit correctly.
Cleaning the Exterior Surfaces
The outside of your air purifier is the most visible part and often the easiest to clean. Regular dusting keeps it looking good and prevents dust from accumulating and eventually finding its way inside.
Wiping Down the Casing
Start with a dry, soft cloth. Gently wipe down the entire outer casing of the unit. Pay attention to any vents or grilles where dust might collect. If you encounter any smudges or sticky spots, a slightly damp cloth can do the trick. Just be sure the cloth isn’t too wet, as excess moisture can damage the electronics. After damp wiping, always follow up with a dry cloth to remove any residual moisture.
Cleaning the Control Panel
The control panel is where you interact with your purifier. It can get fingerprinted easily. Use a dry, lint-free cloth to wipe down the buttons and display. For stubborn marks, again, a slightly damp cloth will work, but be very careful not to let water seep into the panel. Many experts advise against using harsh chemicals or abrasive cleaners on this area, as they can damage the finish or controls (Consumer Reports).
Maintaining the Filters: The Heart of Your Purifier
The filters are the workhorses of your air purifier. They capture all those tiny particles you want out of your air. Keeping them clean or replacing them as needed is absolutely vital for performance. This is where most of your maintenance effort will be focused.
Understanding Your Filter Types
Honeywell air purifiers typically use a combination of filters. You often have a pre-filter that captures larger particles like pet hair and dust bunnies. Then, there’s usually a HEPA filter that traps smaller allergens like pollen, mold spores, and dust mites. Some models also include an activated carbon filter to reduce odors. Knowing your filter types helps you understand how to clean each one.
Pre-Filter Care
Your pre-filter is designed to be cleaned. Most pre-filters are washable. You can often vacuum them gently with a brush attachment to remove loose debris. For a more thorough cleaning, you can rinse it under cool running water. Make sure the pre-filter is completely dry before you put it back in the air purifier. We found that cleaning the pre-filter regularly extends the life of the HEPA filter.
HEPA Filter Maintenance
True HEPA filters are generally not washable. They are designed to trap very fine particles, and washing them can damage their delicate structure. You will need to replace your HEPA filter periodically. Your user manual will specify the recommended replacement interval, often every 6 to 12 months depending on usage and air quality. Ignoring this can significantly reduce your purifier’s effectiveness (CDC guidelines suggest HEPA filters are effective for capturing airborne particles).
Activated Carbon Filter Notes
Activated carbon filters are also typically not washable. Their porous structure captures odors and gases. Over time, their capacity to absorb these substances is used up. Like HEPA filters, these are usually replaced rather than cleaned. Check your manual for the recommended replacement schedule for your carbon filter.
A Quick Filter Cleaning Checklist
Here’s a simple guide for your filter routine:
- Check pre-filters monthly.
- Vacuum pre-filters if dusty.
- Wash pre-filters when visibly dirty.
- Ensure all parts are dry before reassembly.
- Note HEPA and carbon filter replacement dates.
Cleaning the Interior Components
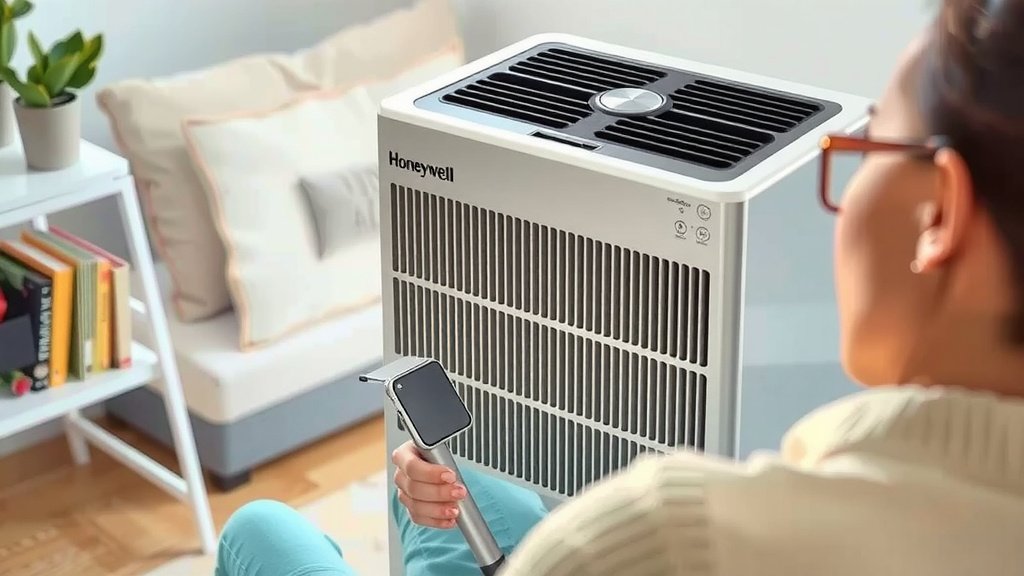
While the filters do the heavy lifting, the interior components can also accumulate dust over time. It’s a good idea to give these a gentle cleaning during filter changes.
Vacuuming Internal Parts
With the filters removed, you can use your vacuum cleaner’s brush attachment to gently clean the inside of the air purifier. Carefully vacuum around the fan blades and the interior walls. Be thorough but gentle. You’re just trying to remove any loose dust or debris that might have bypassed the filters.
Cleaning the Fan and Motor Area
The fan motor area can be a dust magnet. Use a dry cloth or a soft brush attachment to carefully clean around the fan and motor housing. Avoid using any liquids in this area, as it can cause serious damage. Many manufacturers advise focusing on gently removing dust to ensure proper fan operation (EPA recommends regular maintenance for HVAC systems).
Reassembly and Final Checks
Once everything is clean and dry, it’s time to put your Honeywell air purifier back together. This is a crucial step to ensure it functions correctly and safely.
Putting It All Back Together
Carefully reinsert the clean or new filters into their correct positions. Make sure they are seated properly. Close up any panels or covers securely. Double-check that all parts are in place and that no cleaning materials have been left inside.
Plug In and Power On
With everything reassembled, you can now plug your air purifier back into the wall outlet. Turn it on and let it run for a few minutes. Listen for any unusual noises and check that all the indicator lights are functioning as they should. You should notice your unit running more smoothly and quietly.
Frequency of Cleaning and Filter Replacement
Consistency is key to keeping your air purifier working its best. Knowing when to clean and replace filters helps maintain optimal air quality.
Recommended Cleaning Schedule
We found that a good routine involves checking the pre-filters at least once a month. Wash or vacuum them as needed. Wipe down the exterior weekly or bi-weekly, depending on your home’s dust levels. A more thorough interior cleaning, along with HEPA and carbon filter replacement, should be done as indicated in your manual, typically every 6-12 months.
Filter Replacement Timetable
The lifespan of your HEPA and activated carbon filters depends heavily on your environment. If you have pets, live in a high-pollen area, or notice a decrease in air quality, you might need to replace them sooner than the manufacturer’s recommendation. We found that keeping a log of filter changes can be helpful in remembering when the next replacement is due.
Here’s a general guideline for filter replacement:
| Filter Type | Typical Replacement Interval | When to Consider Earlier Replacement |
|---|---|---|
| Pre-Filter | Washable, check monthly | Visibly dirty or clogged |
| HEPA Filter | 6-12 months | Reduced airflow, noticeable dust, increased allergies |
| Activated Carbon Filter | 6-12 months | Lingering odors, reduced effectiveness |
Conclusion
You’ve learned how essential regular cleaning and filter maintenance are for your Honeywell air purifier. By consistently wiping down the exterior, cleaning or replacing your filters, and referring to your manual, you ensure your unit operates at peak performance. This simple care routine directly contributes to fresher air in your home and extends the life of your appliance. Make it a habit to check your filters monthly and clean your purifier thoroughly as recommended. Taking these steps will keep your air clean and your purifier running smoothly for years to come.
Frequently Asked Questions
How often should I clean my Honeywell air purifier?
We recommend checking your pre-filters at least once a month for dust buildup. Wipe down the exterior weekly or bi-weekly, depending on how dusty your home gets. A deeper interior clean and filter replacement schedule will be outlined in your user manual, typically every 6 to 12 months.
Can I wash my Honeywell HEPA filter?
Generally, no, you should not wash your Honeywell HEPA filter. HEPA filters are designed with a delicate structure to capture tiny particles. Washing can damage this structure and reduce its effectiveness. Always replace your HEPA filter according to the manufacturer’s recommendations.
What should I do if my air purifier is making strange noises?
Strange noises often indicate a problem. First, unplug the unit and check if the filters are properly installed and not clogged. Dust buildup on the fan blades can also cause noise. Carefully vacuum any visible dust from the fan area when the unit is unplugged. If the noise persists, consult your manual or contact Honeywell support.
Can I use household cleaners on my Honeywell air purifier?
It’s best to avoid harsh household cleaners, especially on the exterior and control panel. We found that a soft, dry or slightly damp cloth is usually sufficient for cleaning. Strong chemicals can damage the plastic casing or electronic components. Always refer to your user manual for specific cleaning product recommendations.
How do I know when to replace my activated carbon filter?
Activated carbon filters work by absorbing odors and gases. When you notice lingering smells in your home that the purifier used to handle, or if it simply seems less effective at odor removal, it’s likely time for a replacement. Check your manual for the suggested replacement interval, which is often similar to the HEPA filter’s lifespan.
![5 Best Air Purifier for Home Gym [In 2026]](https://homeunderstandable.com/wp-content/uploads/2025/06/best-air-purifier-for-home-gym.jpg)