Honeywell Air Purifier Filter Change: Easy Step-by-Step Guide
Changing your Honeywell air purifier filter is a simple process that keeps your air clean. You can typically swap out the old filter for a new one in just a few minutes. It’s important to replace filters regularly for your purifier to work its best and keep your home air fresh and healthy.
Regular filter changes help your Honeywell air purifier remove dust, pollen, and other airborne particles. This maintenance ensures your unit runs efficiently and continues to provide the best air quality. Ignoring this task can lead to decreased performance and a less effective purifier, so it’s a quick win for better air.
- Unplug your Honeywell air purifier before starting.
- Locate the filter cover and remove it.
- Carefully take out the old filter.
- Insert the new filter, ensuring it’s properly seated.
- Replace the cover and plug the unit back in.
Ready to get that fresh air flowing again? Let’s walk through exactly how to change your Honeywell air purifier filter step by step.
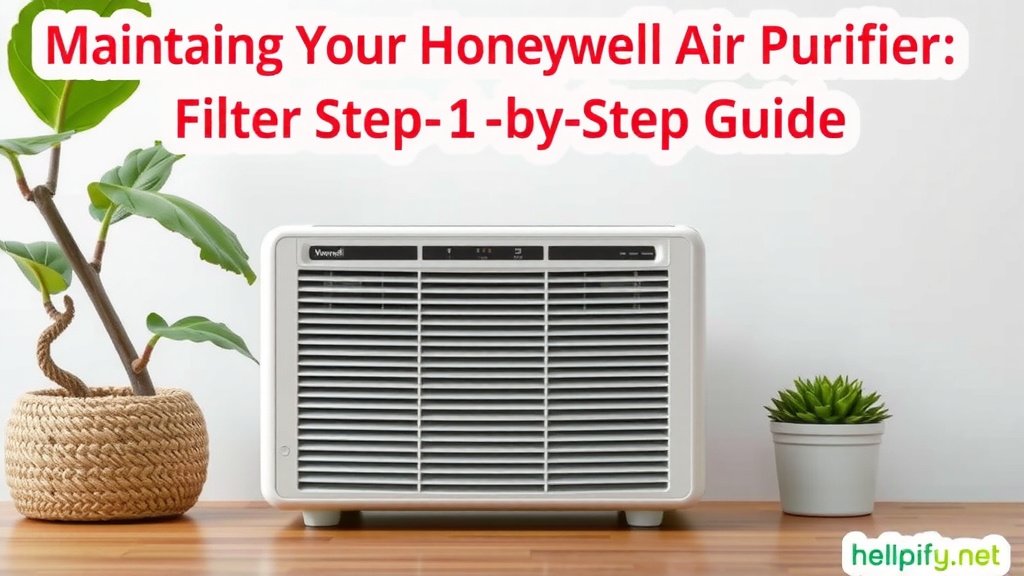
Maintaining Your Honeywell Air Purifier: Filter Replacement Guide
Swapping out the filter in your Honeywell air purifier is straightforward. You’ll want to do this regularly to keep your air as clean as possible. Think of it like changing the oil in your car. It keeps things running smoothly.
Why Regular Filter Changes Matter
Your air purifier works hard to capture tiny particles. Dust, pollen, pet dander, and even smoke can get trapped. Over time, the filter gets full and can’t do its job effectively. A clogged filter means less air moving through the unit. This reduces its overall efficiency. It might even start to make more noise.
Research from the Environmental Protection Agency (EPA) shows that indoor air can be two to five times more polluted than outdoor air. Your air purifier is a key tool in combating this. A clean filter ensures it can continue to capture these pollutants. This leads to a healthier home environment. It’s a simple step for a big impact on your air quality.
When Should You Change Your Honeywell Air Purifier Filter?
Most Honeywell air purifiers have an indicator light. This light will turn on when it’s time for a filter change. It’s usually a good rule of thumb to check your filter around this time. Some models might suggest a schedule in their manual. Always refer to your specific model’s instructions.
General guidelines suggest changing pre-filters more often. These capture larger particles. Activated carbon filters help with odors. HEPA filters trap the smallest particles. For most homes, a full filter set replacement might be needed every 6 to 12 months. This can vary based on usage and air quality. If you have pets or live in a dusty area, you might need to change them sooner. Pay attention to any changes in performance too. Is it less effective? Does it smell musty?
Gathering Your Supplies
Before you start, gather what you need. You’ll need a replacement filter kit. Make sure it’s the correct model number for your Honeywell air purifier. You can usually find this number on the back or bottom of the unit. Having the right filter is essential for proper performance.
You might also want a soft brush or a damp cloth. This is for cleaning the inside of the unit. A vacuum cleaner with a brush attachment can be handy too. But for the filter change itself, it’s usually just the new filter and your hands. It’s a pretty low-tech process.
Step-by-Step Guide to Changing Your Filter
Let’s get your purifier ready for fresh air. Follow these steps carefully. Safety first is always a good approach.
Step 1: Power Down and Unplug
This is the most important step. Always unplug your Honeywell air purifier from the electrical outlet. Never attempt to change the filter while the unit is powered on. This protects you from any electrical hazards. It also prevents accidental damage to the purifier.
Step 2: Accessing the Filter Compartment
Locate the filter cover. On most Honeywell models, this is on the back or side of the unit. You’ll usually see latches or clips holding it in place. Gently release these latches. Some covers might slide off. Others might need a slight pull. Consult your owner’s manual if you’re unsure. It’s often a very intuitive design.
Opening the Cover
Carefully open or remove the filter cover. Be gentle. You don’t want to force anything. If it feels stuck, double-check for any hidden clips or tabs you might have missed. Once open, you should see the existing filter inside.
Step 3: Removing the Old Filter
Take out the old filter. It might be a snug fit. Some filters have a handle or tab to help you pull them out. If not, grip the edges firmly. Gently slide the old filter out of its housing. Be prepared; it might be dusty. Avoid shaking it, as this can release trapped particles back into the air.
Dispose of the old filter properly. Many filters are not recyclable. Check your local waste disposal guidelines. Some people like to put the old filter in a plastic bag before discarding it. This helps contain any dust. Think of it as giving the old filter a tidy send-off.
Step 4: Cleaning the Inside (Optional but Recommended)
With the filter compartment empty, you have a chance to clean. Use a soft brush or a damp cloth. Gently wipe down the inside of the compartment. You can also use a vacuum cleaner with a brush attachment. This removes any accumulated dust. A clean interior helps your purifier run more efficiently. It’s a good time to ensure no debris is blocking airflow.
Step 5: Inserting the New Filter
Now for the fresh filter. Unwrap your new Honeywell filter. Look for any markings on the filter indicating airflow direction. These arrows should point towards the inside of the unit. Some filters have a plastic wrap that you need to remove. Make sure all protective packaging is gone.
Slide the new filter into place. It should fit snugly. Ensure it’s seated correctly in the housing. You don’t want any gaps around the edges. These gaps would allow air to bypass the filter. This would reduce its effectiveness. You should feel it settle into place with a satisfying click or gentle push.
Step 6: Replacing the Filter Cover
Close the filter cover. Re-secure any latches or clips you released earlier. Make sure the cover is fully closed and flush with the unit. A secure closure is important for proper operation. It also helps prevent dust from entering the unit through the cover seams.
Step 7: Power Up and Reset
Plug your Honeywell air purifier back into the electrical outlet. Turn the unit on. If your model has a filter replacement indicator light, you’ll likely need to reset it. Check your manual for specific instructions on how to reset the indicator. This usually involves pressing and holding a button for a few seconds. Your purifier is now ready to go!
Filter Replacement Checklist
- Gather correct replacement filter.
- Unplug the air purifier.
- Open filter compartment cover.
- Remove and dispose of old filter.
- Insert new filter, check direction.
- Close cover securely.
- Plug in and reset indicator light.
Troubleshooting Common Filter Issues
Most filter changes are smooth sailing. But sometimes, you might run into a snag. Here are a few common problems and how to solve them.
Filter Won’t Fit
If the new filter doesn’t seem to fit, double-check the model number. Make sure you have the right filter for your specific Honeywell air purifier. Sometimes, filters have a specific orientation. Ensure you’re not trying to insert it backward. Remove any excess packaging that might be blocking the fit. A properly sized filter should slide in with a gentle but firm pressure.
Indicator Light Stays On
If the filter change indicator light stays on after you’ve replaced the filter and reset it, try resetting it again. Consult your manual for the exact procedure. Sometimes, the unit needs to be powered off and unplugged for a minute before resetting. If the light persists, there might be a technical issue with the unit itself. Contact Honeywell support or a qualified technician.
Strange Smells After Change
A new filter might have a faint, new-filter smell. This should dissipate quickly. If you notice a strong, unpleasant odor, the filter might not be seated correctly. Check for any gaps. Also, ensure you removed all original packaging. Sometimes, if the unit itself has lingering dust or mold, it can cause smells. Cleaning the interior during the filter change is a good way to prevent this. Many sources recommend this cleaning step (Cleveland Clinic).
| Filter Type | Purpose | Typical Replacement Frequency | Where to Find |
|---|---|---|---|
| Pre-Filter | Captures large particles like hair and lint. | Every 1-3 months (washable on some models) | Outer layer, often washable |
| Activated Carbon Filter | Absorbs odors, gases, and VOCs. | Every 6-12 months | Behind the pre-filter |
| HEPA Filter | Traps 99.97% of airborne particles 0.3 microns in size. | Every 6-12 months | Innermost layer |
Remember, these are general guidelines. Your specific usage and home environment will affect how often you need to change your filters. Keeping your Honeywell air purifier’s filters clean is one of the easiest ways to ensure you’re breathing the freshest air possible.
Conclusion
You’ve now got the knowledge to easily change your Honeywell air purifier filter. Remember, this simple task keeps your air clean and your unit running efficiently. Regularly replacing your filters is one of the best things you can do for your home’s air quality. It helps remove those unseen pollutants that affect your health. Don’t wait for the indicator light! Check your filters periodically. Your lungs will thank you.
Frequently Asked Questions
How do I know which filter to buy for my Honeywell air purifier?
You’ll need to find the specific model number of your Honeywell air purifier. This is usually located on a sticker on the back or bottom of the unit. Once you have the model number, you can search for compatible replacement filters online or at appliance stores.
Can I wash my Honeywell air purifier filter instead of replacing it?
Some pre-filters on Honeywell units are washable. However, HEPA and activated carbon filters are typically disposable and cannot be washed. Always check your owner’s manual to confirm if your specific filter type is washable and how to clean it properly.
What happens if I don’t change my Honeywell air purifier filter often enough?
If you don’t change your filter, it will become clogged with dust and debris. This reduces airflow, making your purifier less effective at cleaning the air. It can also strain the motor, potentially shortening the life of your appliance and leading to strange noises or smells.
My Honeywell air purifier has a filter reset button. Do I need to press it every time?
Yes, after you have successfully replaced the filter, you will need to reset the filter indicator light. Consult your owner’s manual for the exact procedure, as it usually involves pressing and holding a specific button for a few seconds.
Is it normal for a new Honeywell air purifier filter to have a slight odor?
It’s normal for a new activated carbon filter to have a faint, new-filter smell. This is usually harmless and will dissipate within a few hours of running the purifier. If the smell is strong or unpleasant, double-check that you removed all protective packaging and that the filter is seated correctly.