
Build Your Own Air Purifier: A Step-by-Step Guide
Yes, you absolutely can build your own air purifier! It’s a surprisingly DIY-friendly project that can help improve your home’s air quality. You can create an effective unit for much less than many store-bought models by using readily available components.
Many people are looking for ways to breathe cleaner air at home. Building your own allows you to understand exactly what’s in your purifier and often provides greater airflow for the cost. It’s a smart way to tackle dust, allergens, and other common airborne irritants with a custom solution.
TL;DR:
- Building your own air purifier is possible and cost-effective.
- You’ll need basic components like a fan and a filter.
- DIY purifiers can be customized for your needs.
- It’s a great way to improve your home’s air quality affordably.
- This guide will show you how step-by-step.
Ready to get started? Let’s walk through exactly how to build your own air purifier step by step.
Putting Together Your DIY Air Purifier
Building your own air purifier is a fantastic project. It’s more accessible than you might think. You can create a unit that works well without breaking the bank. This guide will walk you through the process. We’ll cover the essential parts and how they come together.
Understanding the Core Components
At its heart, a DIY air purifier is quite simple. It’s mostly about two main things: moving air and cleaning air. You need a fan to draw air in. You also need a filter to trap the particles. Many experts agree these are the basic building blocks for any air purification system (CDC).
The Fan: Your Air Mover
The fan is the engine of your purifier. Its job is to pull dirty air from your room into the unit. It then pushes the cleaner air back out. For most home-sized rooms, a box fan is a popular choice. They are readily available and powerful enough. You can find them at most hardware stores or online retailers. We found that a 20-inch box fan offers a good balance of airflow and size for DIY projects.
The Filter: The Particle Catcher
This is where the magic happens. The filter removes pollutants from the air. For DIY purifiers, furnace filters are often used. They are designed to capture dust, pollen, and other airborne debris. It’s important to choose a filter with a good MERV rating. MERV stands for Minimum Efficiency Reporting Value. A higher MERV rating means the filter is better at capturing smaller particles. Many guidelines suggest a MERV 13 filter for effective air cleaning in homes (EPA). This rating strikes a good balance between filtration and airflow. A filter that’s too dense can restrict air and make your fan work harder.
Gathering Your Materials and Tools
Before you start building, you’ll need to gather everything. Having all your supplies ready makes the process smooth. You don’t want to be hunting for a specific screw mid-project. We’ve put together a list of common items you’ll need. This will help you prepare.
Essential Supplies Checklist
- A box fan (20-inch is common)
- MERV 13 furnace filters (typically 20x20x1 inches)
- Duct tape or strong packing tape
- Cardboard (optional, for sealing gaps)
- Scissors or a utility knife
- Measuring tape (optional, for precision)
Choosing the Right Filter for Your Needs
We’ve touched on MERV ratings, but let’s dive a little deeper. The filter is arguably the most important part of your DIY air purifier for air quality. When selecting filters, think about what you want to remove from your air. Common allergens like dust mites, pet dander, and pollen are caught by most decent filters.
For a DIY setup, you’ll likely need multiple filters. This increases the surface area for filtration. More surface area means the air has more opportunities to be cleaned. It also helps the filters last longer. We found that using two filters is a common and effective approach for box fan purifiers.
Filter Options and Considerations
When you’re looking at filters, consider the dimensions. Standard furnace filters come in many sizes. For a 20-inch box fan, filters that are 20x20x1 inches are a good fit. Some people opt for thicker filters (like 2 or 4 inches). These can offer even more filtration surface area and potentially last longer. However, they might also restrict airflow more. Always check the MERV rating on the packaging.
Here’s a quick comparison of filter types:
| Filter Type | Pros | Cons | Best For |
|---|---|---|---|
| Standard Fiberglass (Low MERV) | Inexpensive, High Airflow | Poor Particle Capture | Basic Dust Reduction |
| Pleated Filters (MERV 8-13) | Good Particle Capture, Widely Available | Can Restrict Airflow at Higher MERVs | Allergens, Dust, Pollen |
| High-Efficiency Filters (MERV 14+) | Excellent Particle Capture | Significantly Restricts Airflow, More Expensive | Specific Air Quality Concerns (less common for DIY) |
For most DIY air purifiers, MERV 13 pleated filters are considered the sweet spot for effectiveness and airflow. Many sources, including consumer reports, suggest this rating for home use.
Assembling Your Air Purifier: Step-by-Step
Now for the fun part – putting it all together! This is where your DIY skills come into play. Don’t worry if you’re not a master builder. This project is designed to be straightforward.
Building the Box Fan Filter Sandwich
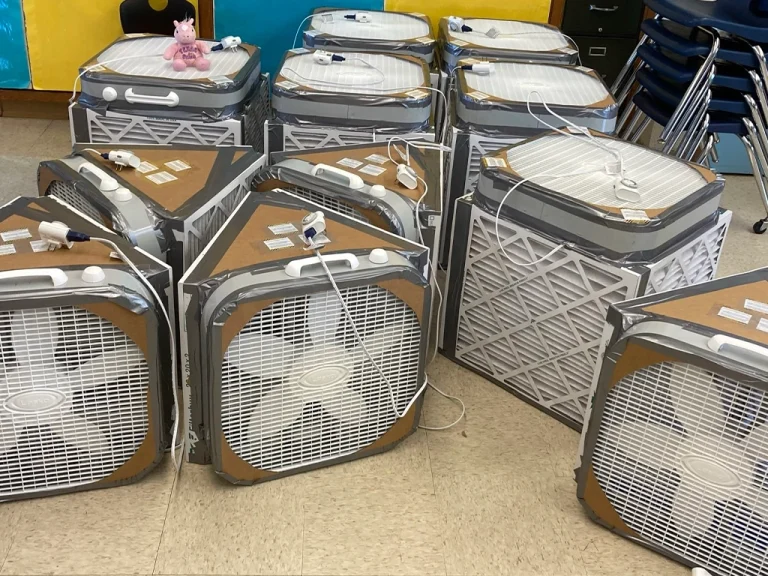
The most common DIY design involves attaching filters directly to the back of the box fan. This creates what many people call a “Corsi-Rosenthal box” or a simplified version of it. The fan will pull air through the filters. This is where you’ll want to make sure the airflow is correct.
First, orient your box fan so the air blows *away* from you. You want the back of the fan (where the air is drawn in) to face the filters. Place one filter against the back of the fan. Make sure the arrows on the filter point towards the fan. This indicates the direction of airflow.
Next, attach another filter to the first one, again with the arrows pointing towards the fan. You can create a “sandwich” effect. Some designs use four filters arranged in a box shape around the fan. For a simpler build, two filters stacked together on the back work well. If you’re using four filters, they’d form a cube with the fan on top.
Once your filters are in place, it’s time to secure them. Use duct tape or strong packing tape. You want to seal the edges where the filters meet each other and where they meet the fan. The goal is to prevent air from leaking around the filters. A good seal ensures all the air drawn by the fan goes through the filter media.
If you’re using the four-filter box design, you’ll tape the filters together to form a cube. Then, you’ll tape the box fan on top, sealing the edges. Some people add cardboard pieces to bridge any gaps for an even better seal. This step is vital for maximizing the purifier’s efficiency. We found that taking your time with the taping step really pays off.
Sealing Gaps for Maximum Efficiency
Air will always take the path of least resistance. If there are gaps between your filters or between the filters and the fan, air will bypass the filter material. This reduces how much dirt and dust you’re actually removing from your air. Think of it like trying to drink through a straw with a hole in it – you don’t get as much liquid!
Pay close attention to the corners and edges. Ensure the tape creates a continuous seal. You can also use a piece of cardboard cut to size to cover any larger gaps. For a simple two-filter design, focus on taping the perimeter where the filter frame meets the fan housing. For the four-filter box, ensure the sides of the cube are fully sealed and that the fan is securely taped to the top.
Placement and Usage Tips
Once your DIY air purifier is built, where you place it matters. Like store-bought units, you want to allow it to work effectively. Placing it in a corner might trap some of the airflow. We recommend placing it in an open area of the room.
Consider the room size. A single box fan unit is generally best suited for medium to large rooms. For very large spaces, you might consider building a second unit or using a more powerful fan. Remember, these DIY units can move a lot of air, so they can be quite effective. Just be aware of the noise level. Box fans can be a bit noisy, especially on higher settings.
Maintenance: Keeping Your Purifier Running Smoothly
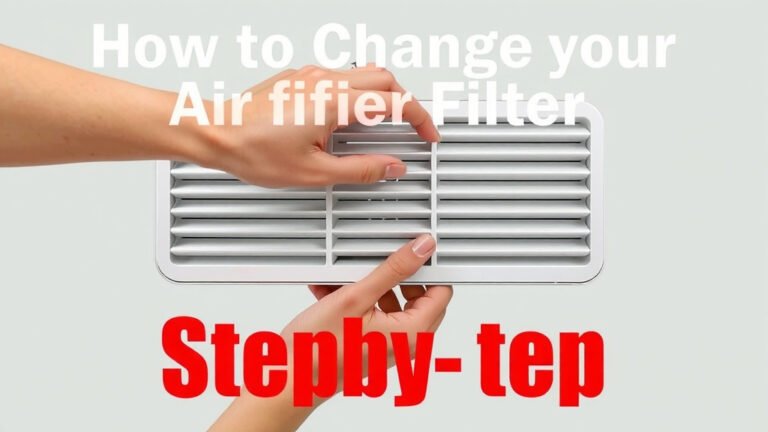
Like any air filter, your DIY unit’s filters will get dirty over time. How often you need to replace them depends on your air quality and how much you run the purifier. A good rule of thumb is to check them monthly. You’ll likely see dust and debris accumulating on the surface.
When the filters look visibly dirty or you notice a decrease in airflow, it’s time for a change. For a typical home environment running the fan for several hours a day, you might need to replace the filters every 3-6 months. This maintenance is key to ensuring your purifier continues to effectively clean your air. Following these steps will help you build a functional and affordable air purifier for your home.
Conclusion
You’ve learned that building your own air purifier is an achievable and budget-friendly project. By understanding the core components like the fan and selecting the right MERV 13 filters, you can create an effective unit. Proper assembly and sealing are key to maximizing its performance. Now, you’re ready to take the next step and begin constructing your custom air purifier to enjoy cleaner air in your home.
Frequently Asked Questions
How much does it typically cost to build a DIY air purifier?
The cost can vary, but you can generally build one for under $100. A standard box fan usually costs between $20-$40, and MERV 13 filters range from $10-$20 each. The main expense is upfront; replacement filters will be a recurring cost.
Can a DIY air purifier be as effective as a store-bought one?
For many common airborne particles like dust, pollen, and pet dander, a well-built DIY unit using MERV 13 filters can be very effective. Some designs, especially the multi-filter box fan versions, are found to move a significant amount of air, rivaling or exceeding the performance of many commercial units for particle removal.
What is the best MERV rating for a DIY air purifier filter?
For a balance of effective particle capture and good airflow, a MERV 13 rating is generally recommended. Higher MERV ratings can capture smaller particles but might restrict airflow too much, making your fan work harder and potentially reducing its overall effectiveness.
How often should I replace the filters on my DIY air purifier?
This depends on your home’s air quality and how often you run the purifier. A good guideline is to check the filters monthly. You’ll likely need to replace them every 3-6 months when they appear visibly dirty or you notice a decrease in airflow.
Are there safety concerns I should be aware of when building or using a DIY air purifier?
Ensure you use a fan that is in good working condition with no frayed cords. Always secure the filters firmly to the fan to prevent them from being dislodged. Keep the unit away from water sources and ensure it has adequate ventilation around it during operation.

![5 Best Hepa Room Air Purifier for Allergies [In 2026]](https://homeunderstandable.com/wp-content/uploads/2025/05/best-hepa-room-air-purifier-for-allergies-top-picks-for-clean-air-768x512.jpg)