How to Clean Your HEPA Air Purifier Filter
The simplest way to clean a HEPA air purifier filter is to **vacuum it gently**. For many models, this is all you need to do to remove trapped dust and debris. This simple step can **restore airflow** and improve your home’s air quality. Always check your purifier’s manual first, as some filters aren’t washable.
Keeping your HEPA filter clean is **essential for peak performance**. A clogged filter works harder and less effectively. This can mean more dust in your air and a shorter lifespan for the unit. Many experts recommend a **regular cleaning schedule**. This keeps your air purifier running smoothly.
- Vacuum your HEPA filter gently.
- Check your manual for specific instructions.
- Clean filters improve air quality.
- Regular cleaning protects your purifier.
Ready to get your air purifier back in top shape? Let’s walk through exactly how to clean your HEPA filter, step by step.
Keeping Your HEPA Filter Clean for Better Air
You’ve got a HEPA air purifier, and that’s fantastic for your home’s air quality! But did you know that a dirty filter can actually make things worse? It’s true. A clogged filter struggles to pull in air, meaning less clean air gets circulated. Plus, it can strain your purifier’s motor and shorten its life. So, how do you keep it in tip-top shape? We’ve got you covered.
The good news is that for most HEPA filters, cleaning is a pretty straightforward process. You don’t need a degree in engineering or a whole afternoon. A little regular attention can go a long way. Think of it like changing the oil in your car. It’s a simple maintenance step that keeps the whole machine running smoothly.
Understanding Your HEPA Filter: What to Know First
Before you grab any cleaning supplies, it’s super important to know what kind of filter you’re dealing with. Not all HEPA filters are created equal, and some absolutely cannot get wet. You’ll usually find this information right in your air purifier’s manual. It’s like getting the instruction booklet for a new gadget – essential reading!
Many air purifiers use a combination of filters. There’s often a pre-filter that catches larger particles like pet hair and lint. Behind that is the true HEPA filter, designed to capture tiny particles like dust mites, pollen, and smoke. Some models also have a carbon filter to tackle odors. Knowing which part you’re cleaning will save you a lot of trouble.
True HEPA vs. HEPA-like Filters
It’s worth mentioning that there’s a difference between “True HEPA” and “HEPA-like” filters. True HEPA filters are certified to capture 99.97% of particles 0.3 microns in size. HEPA-like or HEPA-type filters might capture a good amount, but they don’t meet the strict True HEPA standard. For our cleaning guide, we’re focusing on cleaning a **True HEPA filter**, which is what most quality air purifiers use.
Washable vs. Non-Washable HEPA Filters
This is the biggest distinction. Most true HEPA filters are **not washable**. The delicate material they’re made of can be damaged by water. Washing them can ruin their ability to trap tiny particles. If your manual says “do not wash,” please don’t try it!
On the other hand, some air purifier pre-filters *are* washable. These are typically made of a mesh material. Always double-check your manual to be sure. Washing a washable pre-filter can extend its life and help protect the main HEPA filter. We’ll cover how to handle both types.
Your Step-by-Step Guide to Cleaning Your HEPA Filter
Ready to get started? Here’s how you can tackle cleaning your HEPA filter. We’ll break it down into simple steps so you can get back to breathing easier.
Step 1: Safety First – Unplug Your Purifier!
This sounds obvious, but it’s the most important step. Before you do anything, **unplug your air purifier** from the wall. You don’t want any accidental power surges or to be working with a running machine. Safety is always job number one.
Step 2: Access the Filter
You’ll need to open up your air purifier to get to the filter. Most units have a back panel or a front cover that easily snaps or slides off. Consult your manual if you’re unsure how your specific model opens. You might need a screwdriver for some, but many are tool-free.
Step 3: Remove the Filter Gently
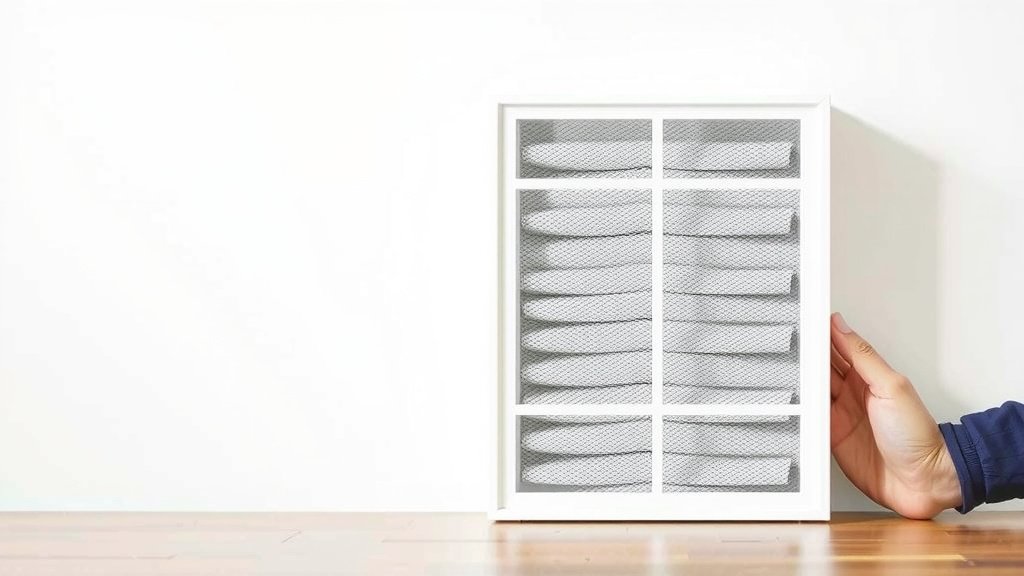
Once you’ve opened the unit, carefully slide out the filter. Handle it with care. The HEPA filter itself looks like a thick, pleated paper-like material. Try not to touch the filter surface directly with your fingers. Oils from your skin can sometimes affect its performance, according to some manufacturer guidelines.
Step 4: Cleaning Methods Based on Filter Type
Now, we get to the cleaning itself. This depends entirely on what your filter is made of.
Method A: For Non-Washable HEPA Filters (Most Common)
This is where your vacuum cleaner becomes your best friend. You’ll want to use a **soft brush attachment** on your vacuum cleaner. This prevents any harsh scrubbing that could damage the delicate filter media.
- Gently vacuum the surface of the HEPA filter. Move in one direction.
- Focus on removing loose dust and debris from the pleats.
- Don’t press hard. You’re just trying to dislodge surface dust.
Many cleaning guides suggest that this gentle vacuuming can remove up to 80% of trapped particles. If your filter has a washable pre-filter attached, you can rinse that separately under cool, running water. Let it air dry completely before reassembling.
Method B: For Washable HEPA Filters (Less Common)
If your manual explicitly states your HEPA filter is washable, you can use cool, running water. Be sure to **rinse it thoroughly**.
- Hold the filter under a faucet or showerhead.
- Use cool water only. Hot water can damage the filter material.
- Rinse from the dirtiest side first.
- Gently shake off excess water.
**Crucially, the filter MUST be completely dry before you put it back.** This can take 24 hours or more. Never use a hairdryer or place it in direct sunlight, as excessive heat can damage it. A damp filter can lead to mold growth, which is the opposite of what you want!
Step 5: Reassemble and Power Up!
Once your filter is clean (and completely dry, if washed), carefully slide it back into your air purifier. Make sure it’s seated correctly. Close up the housing panel. Now, you can plug your purifier back in and turn it on.
When to Clean and When to Replace Your HEPA Filter
So, how often should you be doing this? It really depends on your home environment. If you have pets, live in a dusty area, or have allergies, you might need to clean your filter more often.
A good rule of thumb is to check your filter monthly. Most manufacturers recommend cleaning the main HEPA filter every 1-3 months, and replacing it every 6-12 months. Check your manual for specific recommendations from your purifier’s brand.
You’ll know it’s time for a replacement when the filter looks visibly gray and dirty, even after cleaning. If you notice your air purifier is running louder or not seeming as effective, it’s a strong sign the filter is past its prime. Think of it like a sponge; eventually, it just can’t absorb anymore.
| Action | Frequency (General Guideline) | Notes |
|---|---|---|
| Check Filter | Monthly | Look for visible dirt and dust accumulation. |
| Clean Non-Washable HEPA Filter | Every 1-3 Months | Use a vacuum with a soft brush attachment. |
| Clean Washable Pre-Filter (if applicable) | Monthly or as needed | Rinse with cool water, let air dry completely. |
| Replace HEPA Filter | Every 6-12 Months | Or when cleaning no longer restores performance. |
Remember, regular maintenance is key to optimal performance. A little effort now can save you money and breathing trouble later.
Quick Checklist for Your HEPA Filter Cleaning
- Unplug the air purifier.
- Open the unit to access the filter.
- Gently vacuum non-washable filters.
- Rinse washable filters with cool water.
- Ensure filters are **completely dry** before reassembly.
- Reassemble and plug in the unit.
Conclusion
You’ve learned how to keep your HEPA air purifier running effectively by properly cleaning its filter. Remember, gentle vacuuming is usually your best bet for non-washable filters, and always check your manual to confirm if yours is washable. Regular filter maintenance ensures your purifier continues to capture those tiny particles, leading to cleaner air in your home. Don’t forget to reassemble everything correctly and ensure the filter is completely dry if you washed it. Your next step is to schedule a monthly check of your air purifier’s filter and clean it as needed.
Frequently Asked Questions
How often should I really clean my HEPA filter?
A good rule of thumb is to check your filter monthly. For most homes, cleaning the HEPA filter itself every 1 to 3 months is sufficient. If you have pets or live in a very dusty environment, you might need to clean it more frequently.
Can I use water on my HEPA filter?
Most true HEPA filters are made of delicate material and cannot be washed. Only use water if your air purifier’s manual specifically states that the HEPA filter is washable. Washing a non-washable filter can damage it and reduce its effectiveness.
What happens if I don’t clean my HEPA filter?
A clogged HEPA filter will struggle to pull air through, meaning less clean air circulates in your home. This makes your air purifier work harder, can shorten its lifespan, and may lead to reduced air quality. It can also cause the unit to become noisier.
How do I know when to replace my HEPA filter instead of just cleaning it?
You should replace your HEPA filter when cleaning no longer restores its performance. If the filter looks visibly gray and dirty even after vacuuming, or if your air purifier seems less effective, it’s likely time for a replacement. Most filters need replacing every 6 to 12 months.
Can I use a hairdryer to dry a washable HEPA filter faster?
No, you should never use a hairdryer or place a washable HEPA filter in direct sunlight to dry. Excessive heat can damage the filter material. Always allow washable filters to air dry completely, which can take 24 hours or more, to prevent mold growth.