
How to Clean Your Honeywell Air Purifier Pre-Filter
The easiest way to clean your Honeywell air purifier pre-filter is to gently vacuum it. This removes larger dust particles and debris. You can also hand wash it with mild soap and water if it’s very dirty. Always ensure the pre-filter is completely dry before putting it back.
Keeping your pre-filter clean is key for your air purifier’s efficiency. A clogged filter makes your unit work harder. This means poorer air quality and a higher energy bill. Regularly cleaning this part helps your air purifier last longer.
- Vacuum the pre-filter.
- Wash with soap and water if needed.
- Let it dry completely.
- Clean monthly or as needed.
- This keeps your air pure.
Ready to get yours sparkling clean? Let’s walk through the simple steps to make sure your Honeywell air purifier is running at its best.
Keeping Your Honeywell Air Purifier’s Pre-Filter Clean
Your Honeywell air purifier’s pre-filter is the first line of defense against larger particles. Think of it like the gatekeeper for your home’s air. It catches the big stuff before it reaches the more sensitive HEPA and carbon filters.
Regularly cleaning this pre-filter is essential for optimal performance. A dirty pre-filter can’t do its job effectively. This means your air purifier works harder than it needs to, potentially reducing its lifespan and your home’s air quality.
Why Cleaning the Pre-Filter Matters So Much
When a pre-filter gets clogged with dust, pet hair, and other debris, airflow is restricted. This is like trying to breathe through a stuffy nose – not very efficient! Your air purifier has to work overtime to pull air through the obstruction.
This extra strain can lead to several issues:
- Reduced Airflow: Less air passes through the unit, meaning less purified air circulates in your room.
- Lower Efficiency: The purifier can’t capture as many pollutants because the air isn’t moving freely.
- Increased Energy Consumption: The motor works harder, drawing more power and potentially increasing your electricity bill.
- Shorter Filter Lifespan: The HEPA and carbon filters might get dirty faster if the pre-filter isn’t doing its job of catching the larger particles first.
Many experts recommend cleaning the pre-filter monthly. However, if you have pets or live in a dusty environment, you might need to clean it more frequently. You’ll notice a difference in performance when it’s clean!
Step-by-Step Guide to Cleaning Your Honeywell Pre-Filter
Cleaning your Honeywell air purifier pre-filter is usually quite straightforward. Most models feature a removable pre-filter that you can easily access. Let’s walk through the most common and effective methods.
Accessing Your Pre-Filter
First, you’ll need to open up your air purifier to get to the pre-filter. Always unplug your air purifier from the wall outlet before you begin any cleaning or maintenance. Safety first!
Consult your specific Honeywell model’s manual if you’re unsure how to open the unit or where the pre-filter is located. Typically, you’ll find the pre-filter as the outermost layer, often behind a front grill or panel. It might be a mesh screen or a thin, black foam layer.
Method 1: Gentle Vacuuming
For most situations, a regular vacuum cleaner is all you need. This is the easiest and quickest way to remove loose dust and debris.
What You’ll Need
- Your vacuum cleaner with a brush attachment or crevice tool.
- Your unplugged Honeywell air purifier.
The Vacuuming Process
Once you’ve removed the pre-filter from the unit, lay it on a flat surface. Use the brush attachment on your vacuum cleaner. Gently go over the entire surface of the pre-filter.
Pay attention to both sides if possible, especially if it’s a mesh type. The goal here is to lift and remove surface dust. You don’t need to scrub; just let the vacuum do the work. If you see larger particles like pet hair, the brush attachment should handle them well.
If your pre-filter is a foam type, the vacuum can still be effective at pulling dust out of the pores. You might need to go over it a few times. This method is ideal for routine maintenance between deeper cleanings.
Method 2: Hand Washing for Deeper Cleaning
Sometimes, vacuuming isn’t enough. If your pre-filter looks visibly grimy, feels greasy, or has stubborn particles stuck to it, a gentle wash is in order. This is especially common for foam pre-filters that have absorbed odors or oils.
What You’ll Need
- Lukewarm water.
- Mild dish soap or a gentle detergent.
- A soft cloth or sponge.
- A clean, dry towel.
- Your unplugged Honeywell air purifier.
The Washing Process
Start by rinsing the pre-filter under lukewarm water. This helps to loosen any loose debris. Next, add a small amount of mild dish soap to the water or directly onto your soft cloth or sponge.
Gently wipe down the surface of the pre-filter. Avoid harsh scrubbing, as this could damage the material. For mesh filters, you can gently rub both sides. For foam filters, carefully squeeze out the dirty water and soap, being careful not to tear the foam.
Rinse the pre-filter thoroughly with clean, lukewarm water until all soap residue is gone. Any lingering soap can affect performance or create suds. This washing method is highly effective for removing accumulated grime and odors.
The Crucial Drying Step
This is arguably the most important part of the process. Putting a damp pre-filter back into your air purifier can cause more harm than good.
Moisture can encourage the growth of mold and mildew. It can also damage the internal components of your air purifier. Therefore, you must ensure the pre-filter is completely dry before reinserting it.
Air Drying is Best
After rinsing, gently shake off any excess water. You can use a clean, dry towel to pat it down carefully. Then, allow the pre-filter to air dry completely. This typically takes several hours, depending on humidity and air circulation.
Find a well-ventilated spot where the pre-filter can dry without interference. Do not place it in direct sunlight, as excessive heat can warp some materials. Patience here is key!
What NOT to Do
Avoid using heat sources like hair dryers or placing the filter in a tumble dryer. High heat can damage or deform the pre-filter material. Always opt for natural air drying for the best results.
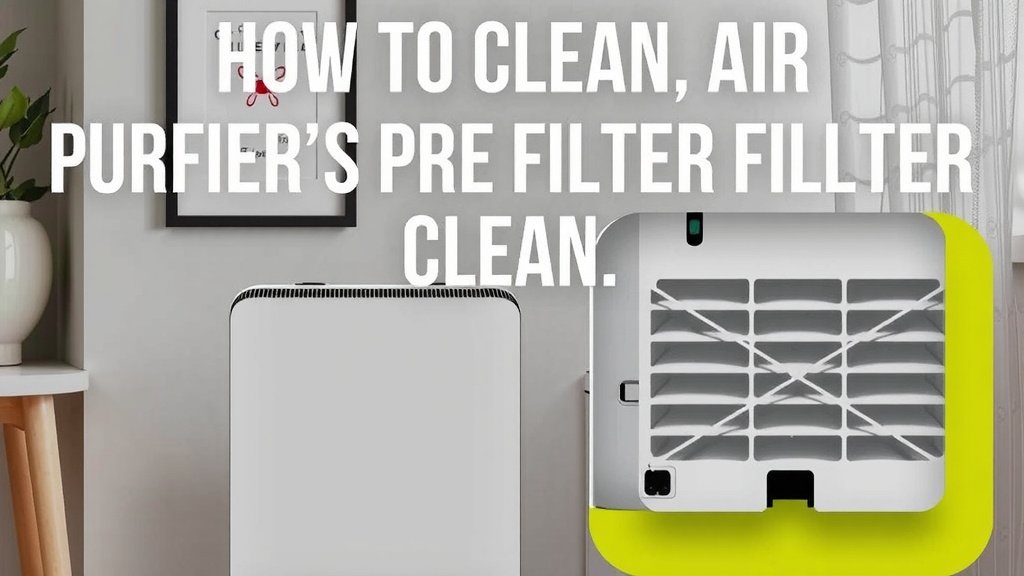
When to Replace Your Honeywell Pre-Filter
While pre-filters are designed to be cleaned and reused, they don’t last forever. If you notice your pre-filter is cracked, torn, or permanently misshapen after cleaning, it’s time for a replacement. A damaged pre-filter won’t seal properly, allowing unfiltered air to pass through.
Consult your Honeywell user manual for the recommended replacement schedule. For most models, this is typically every 6 to 12 months, depending on usage and the air quality in your home. Using a damaged filter compromises the entire system’s effectiveness.
Quick Pre-Filter Cleaning Checklist
- Unplug your air purifier before starting.
- Access the pre-filter by opening the unit.
- Vacuum gently with a brush attachment for routine cleaning.
- Wash with mild soap and water for deeper cleaning, rinse well.
- Air dry completely before reassembly.
- Reassemble and plug in the unit.
Following these simple steps will ensure your Honeywell air purifier continues to deliver clean, fresh air to your home. A clean pre-filter is a small effort for a big impact on your indoor air quality!
Conclusion
You’ve learned that keeping your Honeywell air purifier’s pre-filter clean is a simple yet powerful way to ensure your unit works at its best. Regular vacuuming or a gentle wash tackles dust and debris, preventing your purifier from straining. Remember, a clean pre-filter means better airflow, improved air quality, and extended filter life for your machine.
Don’t let a dirty filter reduce your home’s air quality. Your next step is to check your pre-filter today and give it a quick clean. You’ll breathe easier knowing your air is truly pure!
Frequently Asked Questions
How often should I clean my Honeywell air purifier pre-filter?
For most homes, cleaning your pre-filter monthly is a good general rule. If you have pets, allergies, or live in a dusty area, you may need to clean it more frequently. Inspecting it visually will help you decide.
Can I wash my Honeywell pre-filter with hot water?
No, it’s best to use lukewarm water. Hot water can potentially damage or warp the pre-filter material. Always use mild soap and lukewarm water for washing.
Is it okay to put a slightly damp pre-filter back in my air purifier?
Absolutely not. A damp pre-filter can encourage mold and mildew growth inside your unit. Always ensure the pre-filter is completely dry before reinserting it to prevent damage.
My Honeywell pre-filter looks worn out. When should I replace it instead of cleaning it?
If your pre-filter has cracks, tears, or is permanently misshapen, it’s time for a replacement. A damaged filter won’t seal correctly, allowing unfiltered air to bypass it. Check your manual for specific replacement recommendations.
Can I use a strong detergent to clean my pre-filter?
No, stick to mild dish soap or a gentle detergent. Harsh chemicals or strong detergents can degrade the filter material or leave behind residue that could affect air quality or the purifier’s function.
![5 Best Air Purifier for Office Space [In 2026]](https://homeunderstandable.com/wp-content/uploads/2025/05/best-air-purifier-for-office-space-enhance-air-quality-effortlessly-768x384.jpg)