Fixing Your Air Compressor Hose: A Step-by-Step Guide
Yes, you can often fix a leaking air compressor hose yourself with a few simple tools and materials. A damaged hose is usually caused by wear and tear, kinks, or accidental punctures, but most minor issues don’t require a complete replacement. Knowing how to perform basic hose repairs can save you time and money.
Don’t let a faulty hose bring your projects to a halt. A damaged air hose can lead to loss of air pressure, which means your tools won’t perform as expected. We found that many common problems are surprisingly easy to address with the right approach, ensuring your compressor operates efficiently again.
- Assess the damage: Look for cracks, leaks, or kinks.
- Gather your supplies: You might need hose clamps, sealant, or a repair kit.
- Prepare the hose: Clean the damaged area thoroughly.
- Apply the fix: Use sealant or a patch as needed.
- Test for leaks: Ensure the repair holds before resuming work.
Let’s walk through exactly how to tackle that leaky air compressor hose, step by step.
Repairing Your Air Compressor Hose: A Step-by-Step Guide
A damaged air compressor hose is a common issue. It can stop your work in its tracks. Fortunately, many hose problems are fixable without buying a new one. We found that with the right approach, you can often get your air hose back in working order. Let’s dive into how you can tackle this yourself.
Assessing the Damage to Your Air Hose
Before you can fix it, you need to know what’s wrong. Look closely at your air hose. Is there a visible cut, crack, or puncture? Sometimes, the issue isn’t obvious. You might hear a hissing sound, indicating a leak. Pay attention to where that sound is coming from.
Common Types of Hose Damage
Several things can go wrong with an air hose. Wear and tear are frequent culprits. You might see surface cracks, especially if the hose is old or exposed to sunlight. Kinks can weaken the hose material over time. Accidental punctures from sharp objects are also a possibility. Sometimes, the fittings at the ends can become loose or damaged.
Pinpointing the Exact Leak Location
Finding the precise spot of the leak is key. Once you’ve pressurized the hose (connect it to your compressor, but don’t turn it on fully), listen for escaping air. You can also use a spray bottle filled with soapy water. Spray it along the hose and watch for bubbles forming. Bubbles mean air is escaping right there.
Gathering the Right Repair Supplies
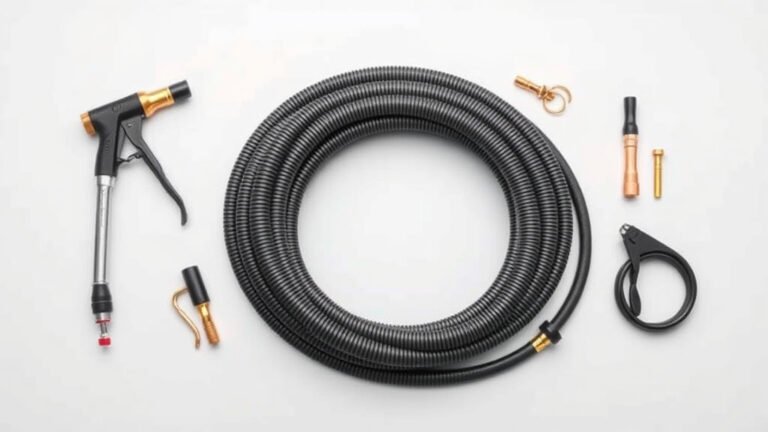
Once you know the problem, you can gather what you need. The supplies depend on the type of damage. For small punctures or cracks, specialized hose repair kits are often the best bet. These kits usually come with patches and adhesives. You might also need a good quality rubber repair tape or even some heavy-duty duct tape for a temporary fix.
Essential Tools for the Job
You’ll likely need a few basic tools. A good pair of utility scissors or a sharp knife is essential for trimming away damaged material. You’ll also need a clean rag for wiping down the hose. If you’re dealing with a leak near a fitting, you might need pliers or a wrench to tighten it. For a more permanent fix on certain types of hoses, you might need hose clamps.
Choosing the Right Repair Material
Many experts suggest using materials specifically designed for rubber or flexible hose repair. Look for products labeled for automotive or industrial hose repair. These are formulated to withstand pressure and flex. For a quick, temporary fix, strong, waterproof tape can work, but it’s usually not a long-term solution. We found that dedicated repair kits offer the best balance of ease of use and durability.
Preparing the Hose for Repair
A clean surface is critical for any repair to hold. Make sure the air compressor is unplugged and all pressure is released from the hose. Then, clean the damaged area thoroughly. Use soap and water or a degreaser to remove any dirt, oil, or debris. A clean hose ensures the adhesive or patch will stick properly.
Cleaning the Damaged Area
This step is more important than you might think. Even a tiny bit of grime can prevent a good seal. Wipe the area down with a clean rag. If you’re using a solvent, like rubbing alcohol, make sure it dries completely before proceeding. This helps ensure a strong bond for your repair.
Applying the Hose Repair
This is where you bring your hose back to life! For small leaks, a patch from a repair kit is often the way to go. Follow the kit’s instructions carefully. Usually, this involves applying adhesive to the hose and the patch, then pressing them together firmly. We found that pressing firmly and holding for the recommended time is crucial.
Using a Hose Repair Kit
Hose repair kits are designed for this purpose. They often contain a flexible patch and a strong adhesive. Cut the patch to a size that covers the damaged area with overlap. Apply the adhesive evenly. Press the patch onto the hose, smoothing out any wrinkles. Many kits recommend letting the adhesive cure for a certain period.
Temporary Fixes: When and How
If you need to get back to work quickly and don’t have a repair kit, a temporary fix might be necessary. Wrap the damaged area tightly with several layers of heavy-duty, waterproof tape. Ensure the tape overlaps generously. This can hold for a while, but don’t rely on it for high-pressure applications. It’s always best to seek a more permanent solution soon.
Testing Your Repair
You’ve done the hard part! Now it’s time to see if your fix worked. Reconnect the hose to your compressor. Slowly build up air pressure. Listen carefully for any hissing sounds. If you used the soapy water trick before, you can use it again to check for new bubbles.
Ensuring a Secure and Leak-Free Connection
If you don’t hear or see any leaks, congratulations! Your repair is holding. If you do notice a small leak, you might need to reapply your repair material or try a different method. Sometimes, a second layer of tape or a larger patch can do the trick. Many common problems are fixable with a bit of patience.
Here’s a quick checklist to keep you on track:
- Inspect the hose thoroughly for leaks.
- Gather appropriate repair materials and tools.
- Clean the damaged area completely.
- Apply the patch or sealant according to instructions.
- Allow adequate drying or curing time.
- Test for leaks before resuming normal use.
Conclusion
You’ve learned how to tackle that leaking air compressor hose yourself. By carefully assessing the damage, gathering the right supplies, and preparing the hose properly, you can often achieve a reliable fix. Remember that a clean surface and following repair kit instructions are key to success. Testing your repair thoroughly is the final step before you’re back to work. Don’t let a small leak sideline your projects; with these steps, you can get your air hose working efficiently again.
Now that you know how to fix it, go ahead and try it out on your next damaged hose. You’ve got this!
Frequently Asked Questions
Can I fix any air compressor hose leak?
You can often fix minor leaks from punctures, cuts, or cracks with the right repair materials. However, severe damage, like a hose that’s completely split or has compromised fittings, might require a replacement. Always assess the extent of the damage before attempting a repair.
What’s the best way to find a small air leak?
The soapy water test is a highly effective method. After pressurizing the hose, spray or brush soapy water along its length. You’ll see small bubbles forming at the exact spot where air is escaping, making it easy to pinpoint the leak.
Are temporary fixes reliable for air compressor hoses?
Temporary fixes, like using heavy-duty waterproof tape, can work in a pinch to get you through a job. However, they are not a long-term solution and may not hold under consistent high pressure. It’s best to use them only until you can perform a more permanent repair.
How long does a repaired air hose typically last?
The lifespan of a repaired hose depends on the quality of the repair materials used and the type of damage. A well-done repair with a proper kit can last a long time, potentially saving you from buying a new hose. However, it’s always wise to keep an eye on the repaired area.
Can I use regular duct tape to fix my air hose?
While duct tape might offer a very temporary seal, it’s generally not recommended for air compressor hoses. Air compressors operate under significant pressure, and standard duct tape is unlikely to hold reliably. Opt for specialized hose repair tape or kits designed for flexibility and pressure resistance.