Install Air Compressor Piping: A Step-by-Step Guide
Installing air compressor piping is a job you can absolutely tackle yourself with the right plan. The core of a good installation involves using the correct pipe material and ensuring all connections are airtight. Properly installed piping keeps your tools running smoothly and prevents costly leaks.
Getting your air compressor piping set up right means thinking about both efficiency and safety. We found that using a system designed for compressed air, like aluminum or copper piping, makes a big difference. It’s about building a reliable air delivery network for your workshop or garage.
TL;DR:
- Use aluminum or copper piping for compressed air.
- Make sure all connections are completely sealed.
- Plan your pipe layout for efficient air delivery.
- Consider future expansion when designing your system.
Ready to get started? Let’s walk through the steps to get your air compressor piping installed correctly.
Setting Up Your Air Compressor Piping System
Installing your air compressor piping can feel like a big project, but it’s totally doable with a bit of planning. The goal is to create a reliable way to get compressed air where you need it. We found that choosing the right materials and making sure every connection is sealed tight are the most important steps. This setup will keep your tools working their best.
Choosing the Right Pipe Material
What kind of pipes should you use? This is a big decision for your system’s performance and longevity. Many experts agree that materials designed for compressed air are best. You’ll often see aluminum and copper recommended. These metals resist corrosion and can handle the pressures involved.
Aluminum Piping: Lightweight and Easy
Aluminum piping systems are becoming very popular, and for good reason. They’re lightweight, which makes them easier to handle during installation. Plus, they are designed with push-to-connect fittings. This means you can often complete connections without needing to solder or glue. We found this makes the setup process much quicker and less prone to leaks if done correctly. Many DIYers appreciate how forgiving aluminum systems can be.
Copper Piping: The Classic Choice
Copper has been a standard for compressed air for a long time. It’s durable and can withstand high pressures and temperatures. However, installing copper pipes usually involves soldering. This requires a bit more skill and specialized tools. If you’re comfortable with soldering, copper is a solid, long-lasting option for your air lines. Many professional shops still rely on copper for its proven reliability.
Other Materials to Consider (and Why They Might Not Be Ideal)
You might see other pipe types, like black iron or PEX tubing. While black iron is strong, it can rust over time, which can introduce contaminants into your air supply. PEX tubing is great for water, but many experts don’t recommend it for compressed air. It can become brittle under pressure or degrade over time. We found that sticking to aluminum or copper generally leads to a more trouble-free system.
Planning Your Piping Layout
Before you cut any pipes, you need a good plan. Think about where your air compressor will sit. Then, figure out where you’ll use your air tools the most. Running pipes directly to these locations is key for efficient air delivery. You don’t want to lose too much pressure over long, winding runs.
Mapping Out Your Air Lines
Sketch your workshop or garage. Mark the location of your compressor. Then, draw out the paths your air lines will take. Consider running them along walls or overhead. This keeps them out of your way and protects them from accidental damage. Think about how many drop lines you’ll need for your tools. It’s also wise to include a main shut-off valve near the compressor.
Designing for Efficiency: Drop Lines and Loops
To ensure consistent air pressure, consider designing your system with a main loop that encircles your workspace. This looped design helps maintain pressure throughout the system. From this main loop, you can install drop lines that go down to your tool connection points. Many setups benefit from having the drop lines hang from the top of the pipe. This way, any moisture that condenses in the pipes will drain down into the drop line and can be purged from a low point, rather than flowing directly to your tools. We found that a well-thought-out layout minimizes pressure drop and air pulsation.
Planning for Future Expansion
Will you add more tools or workstations later? It’s smart to plan for this now. You can install extra ports or leave sections of pipe capped off. This makes adding to your system much easier down the road. It saves you from having to tear down and redo your piping later.
Gathering Your Tools and Supplies
Once you have a plan, it’s time to get what you need. Having everything ready makes the installation process smooth. Don’t forget safety gear!
Essential Piping Components
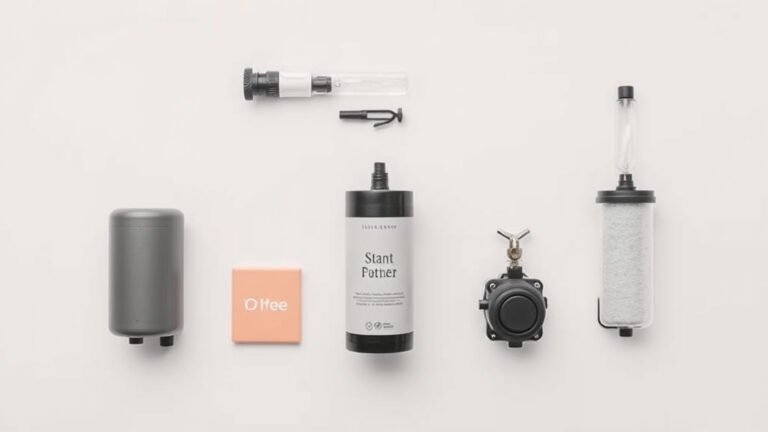
You’ll need your chosen piping (aluminum or copper). You’ll also need fittings like elbows, tees, and connectors. If you’re using an aluminum system, you’ll likely need special pipe cutters and deburring tools. For copper, you’ll need a torch, solder, flux, and pipe cutters. Make sure to get the correct size fittings that match your pipe diameter.
Fittings and Connectors: The Backbone of Your System
The fittings are what connect your pipes together. For aluminum systems, push-to-connect fittings are common and easy to use. Ensure you get fittings specifically designed for compressed air. For copper, you’ll be using sweat fittings that require soldering. Many experts recommend using Teflon tape or pipe dope on threaded fittings to ensure a good seal. We found that the quality of your fittings makes a big difference in leak prevention. Choosing the right hose fittings is crucial for a leak-free system.
Safety First: What You Need
Always wear safety glasses when cutting or assembling pipes. If you’re soldering, you’ll need heat-resistant gloves and a fire extinguisher nearby. Good ventilation is also important, especially if you’re using flux or solder. Your air compressor will likely be running, so be mindful of noise and any potential electrical hazards.
Installation Steps for Your Air Lines
Now for the hands-on part! Follow these steps carefully to install your piping system. Remember, patience is key here.
Step 1: Cut and Prepare Your Pipes
Measure and cut your pipes to the lengths you need according to your layout plan. Use a pipe cutter designed for your material. After cutting, deburr the inside and outside edges of the pipe. This is critical for a good seal, especially with push-to-connect fittings. A clean, smooth edge helps the fittings grip properly. We found that a clean cut is the first step to a leak-free connection.
Step 2: Connect the Pipes and Fittings
For aluminum push-to-connect systems, simply push the pipe firmly into the fitting until it seats completely. You’ll feel a solid stop. For copper, clean the pipe ends and fitting sockets. Apply flux, then heat the joint and apply solder until it flows around the connection. Make sure each connection is secure and that you haven’t accidentally blocked the pipe opening with excess solder.
Step 3: Install Drop Lines and Outlets
Drill holes in your main pipes or use specific tee fittings to install your drop lines. Ensure these connections are also sealed properly. Attach your quick-disconnect couplers at the end of each drop line where you’ll plug in your tools. These couplers should be rated for the pressure your system will produce.
Step 4: Pressure Testing Your New System
Once everything is connected, it’s time to test for leaks. Turn on your air compressor and let it build pressure slowly. As the system fills with air, listen carefully for any hissing sounds. You can also use a spray bottle filled with soapy water and spray it on all your connections. Bubbles forming indicate a leak that needs to be fixed. Many experts suggest starting with low pressure for the initial test.
Checklist for a Successful Installation:
- Plan your pipe layout carefully.
- Select the right pipe material (aluminum or copper).
- Use fittings designed for compressed air.
- Cut and deburr pipes for clean connections.
- Test your system for leaks before full use.
- Install a main shut-off valve for safety.
Conclusion
You’ve got the roadmap to installing your air compressor piping system. We found that taking your time to plan, choosing the right materials like aluminum or copper, and ensuring every connection is airtight are the keys to success. A well-installed system means reliable air for your tools and fewer headaches down the road. Your next step is to gather your supplies and start laying out your pipes according to the plan you’ve sketched.
Frequently Asked Questions
What’s the biggest mistake people make when installing air compressor pipes?
The most common mistake is not properly preparing the pipe ends before making connections. For push-to-connect fittings, an unclean or uneven cut can lead to leaks. For soldered copper, poor cleaning or insufficient heat will result in a weak joint. We found that taking the extra minute for proper preparation prevents a lot of future trouble.
How do I deal with moisture in my compressed air lines?
Proper layout is key. We recommend installing drop legs at low points in your system, especially at the end of main lines or before tool drop lines. These allow moisture to collect and be drained periodically. You can also use air dryers or filters near your compressor to remove water vapor before it enters the piping.
Can I use PVC pipe for my air compressor lines?
While PVC is common for water, it’s generally not recommended for compressed air. PVC can become brittle over time under pressure and may shatter, posing a safety hazard. Research and found that materials specifically designed for compressed air, like aluminum or copper, are much safer and more durable options for your workshop.
How often should I check my air compressor piping for leaks?
You should perform a leak check whenever you notice a drop in air pressure that can’t be explained by tool usage. A good practice is to check for leaks after installation and then again every 6-12 months. A simple soapy water spray on your connections is an easy way to find them.
Is it worth running a loop for my compressed air piping?
Yes, many professionals and DIYers find that a looped main line design significantly improves air delivery efficiency. A loop helps maintain consistent pressure throughout your workshop, reducing pressure drop to tools located far from the compressor. We found this design to be especially beneficial for larger spaces or those with multiple air drop points.