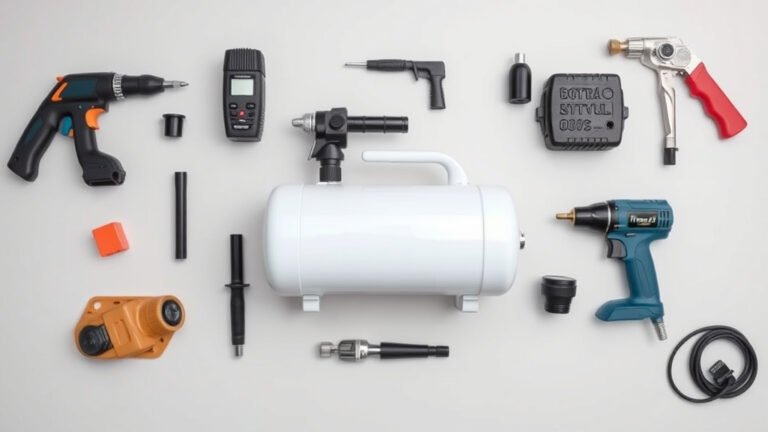
Drain Your Air Compressor Tank: Simple Steps
The easiest way to remove water from your air compressor tank is to simply open the drain valve at the bottom. This is a quick and essential maintenance task. Doing this regularly prevents rust and keeps your tools running smoothly. It’s a simple step with big rewards for your compressor’s health.
Water in an air compressor tank is a common problem. It happens because of condensation as air cools. Leaving this water can lead to tank corrosion and damage. You might also notice moisture coming out of your air tools. Addressing this issue helps maintain air quality and prolong equipment life.
- Open the drain valve.
- Let all the water out.
- Close the valve when done.
- Do this regularly.
Let’s walk through the simple steps to ensure your air compressor tank stays dry and functional. We’ll make sure you know exactly how to tackle this common issue.
Getting Water Out of Your Air Compressor Tank
You’ve got water in your air compressor tank, and you’re wondering what to do next. It’s a really common issue, but thankfully, it’s also easy to fix. We found that the quickest and most effective method involves using the drain valve located at the very bottom of your tank.
Why Water Builds Up in Your Air Compressor
Air naturally holds moisture. When your compressor takes in air, it compresses it. This process heats the air up. As the air cools inside the tank, that moisture turns into liquid water. Think of it like a cold soda can on a humid day – condensation forms. We found that even a small amount of water can cause problems over time.
The Downsides of Standing Water
Leaving water in your tank is like leaving a puddle in your garage. It can lead to rust and corrosion. This weakens the metal of your tank. It can also reduce the overall lifespan of your compressor. Plus, that water can get into your air lines and damage your sensitive air tools. Nobody wants that!
How to Safely Drain Your Air Compressor Tank
Draining your tank is a straightforward process. It’s like letting out a little bit of air, but with a specific purpose. We’ve broken down the steps to make it super simple.
Step 1: Prepare Your Workspace and Compressor
First, make sure your compressor is turned off. Also, unplug it from the power source. This is a safety precaution to prevent any accidental startups. You might want to place a small bucket or pan under the drain valve. This will catch any water and prevent a mess.
Step 2: Locate the Drain Valve
The drain valve is usually found at the very bottom of the air compressor tank. It often looks like a small faucet or a knob. Some valves have a pull-up or twist-off mechanism. If you’re unsure, check your compressor’s manual. We found that most manufacturers place it in a very accessible spot.
Step 3: Open the Drain Valve
Slowly open the drain valve. You’ll likely hear air hissing out first. Then, you’ll see water start to drain. Be patient! Let all the water come out. This might take a few minutes, depending on how much condensation has built up.
What to Expect When Draining
Initially, you might just get air. Then, you’ll see a bit of sputtering. This is normal. Eventually, a steady stream of water will come out. The water might be clear, or it could have a bit of rust color if corrosion has already started. We found that a little rust isn’t usually a major issue, but a lot of it is a warning sign.
Using a Drain Pan
Having a pan underneath is a good idea. It catches the water and any rust particles. This keeps your floor clean and makes cleanup easy. You can use any kind of container that fits. A shallow baking pan works well.
Step 4: Close the Drain Valve
Once the water stops flowing and only air is coming out, it’s time to close the valve. Gently turn or push it back into its original position. Make sure it’s snug, but don’t overtighten it. You don’t want to damage the valve.
Step 5: Check for Leaks
After closing the valve, you can turn your compressor back on. Let it build pressure. Listen carefully for any air leaks around the drain valve. If you hear hissing, the valve might not be fully closed. Turn off the compressor and adjust it. We found that a small leak here can waste air and energy.
How Often Should You Drain Your Air Compressor?
Consistency is key when it comes to draining your compressor. How often you need to do it depends on a few factors, including your climate and how much you use the compressor. However, we found that a good rule of thumb is to drain it at the end of each day you use it.
Factors Affecting Condensation
Humid environments naturally create more condensation. If you live in a place with high humidity, you’ll need to drain your tank more frequently. Also, if your compressor runs for long periods, it’s working harder and generating more heat, which can lead to more moisture.
Recommended Draining Schedule
Here’s a simple checklist to help you remember:
- Drain your tank at the end of every use.
- If you live in a very humid area, consider draining it weekly even if unused.
- If you notice water spraying from your air tools, drain it immediately.
- Check the tank for rust buildup periodically.
- Make it a habit like checking your tire pressure.
Troubleshooting Common Drainage Issues
Sometimes, things don’t go as smoothly as planned. What if the valve is stuck, or you’re not getting any water out?
Stuck Drain Valve
If your drain valve is difficult to turn, don’t force it too hard. You could damage it. Try gently wiggling it back and forth. Sometimes, a little bit of penetrating oil applied carefully around the valve stem can help. In stubborn cases, you might need to consult your manual or a repair professional. We found that rust can sometimes seize these valves.
No Water Coming Out
If you’ve run your compressor and it’s cooled down, but no water drains, it could mean your air is very dry, or there’s a blockage. If you suspect a blockage, you might need to use a small wire or tool to carefully clear the valve opening after draining any trapped air. However, if your compressor is new and used in a dry climate, it’s possible there’s very little condensation forming.
Beyond Basic Draining: Other Moisture Control Tips
While draining the tank is essential, there are other ways to keep moisture at bay. These methods can help protect your tools and ensure cleaner air.
Using an Air Dryer
For serious users or those who need very dry air, an air dryer is a great investment. These devices actively remove moisture from the compressed air before it even enters the tank. We found that they are particularly useful in humid climates or for applications requiring extremely dry air, like painting or operating sensitive electronics.
Water-Sensing Drain Valves
Some compressors come with or can be retrofitted with automatic drain valves. These valves sense when water has accumulated and expel it automatically. This takes the guesswork out of draining and ensures your tank stays dry. It’s a bit more advanced but very effective.
Proper Storage
When not in use, store your compressor in a dry, protected area. Avoid leaving it exposed to damp conditions. This simple step can reduce the amount of moisture that enters the tank in the first place.
Summary of Best Practices
Keeping your air compressor tank free of water is a simple yet vital maintenance task. By regularly draining the tank, you prevent rust, extend the life of your equipment, and ensure your air tools perform as they should. Remember these key points:
- Always turn off and unplug your compressor before draining.
- Locate the drain valve at the bottom of the tank.
- Open the valve slowly to release air and then water.
- Close the valve securely once all water is out.
- Drain at the end of each use for best results.
Making this a habit is one of the easiest ways to keep your air compressor in top shape. It’s a small effort with significant benefits for your tools and your compressor’s longevity.
Conclusion
You’ve learned that keeping water out of your air compressor tank is simple but vital. Regularly draining the tank prevents rust and corrosion. It also ensures your air tools work reliably. Remember to always turn off and unplug your compressor first. Then, locate the drain valve, open it slowly, and close it tightly once water is gone. Make this a habit after every use. This small maintenance step protects your investment and keeps your compressor running efficiently for years to come. Start draining your tank today for better performance!
Frequently Asked Questions
How do I know if there’s water in my air compressor tank?
The most common sign is moisture coming out of your air tools. You might also hear sputtering sounds when using compressed air. If you suspect water, draining the tank is the best way to check and remove it.
Can I leave water in the air compressor tank overnight?
It’s best to drain your tank at the end of each day you use it. Leaving water overnight, especially in humid conditions, significantly increases the risk of rust and corrosion inside the tank. This can damage the tank and your tools.
What happens if I don’t drain the water from my air compressor?
Not draining the water can lead to rust and corrosion within the tank. This weakens the metal over time and can cause leaks. Water can also travel through the air lines and damage delicate air-powered tools, leading to costly repairs.
Is it okay to use a stuck drain valve on my air compressor?
If your drain valve is stuck, avoid forcing it too hard. You could break the valve. Try wiggling it gently or using a penetrating oil around the stem. If it remains stuck, consult your compressor’s manual or a repair professional for assistance.
How often should I drain my air compressor if I live in a dry climate?
Even in dry climates, some condensation can form. Draining at the end of each use is still the best practice. If you notice no water comes out after several uses, it’s likely you have very little condensation, but continue to check periodically.