Air Compressor Spray Staining: Your Ultimate Guide
Yes, you can absolutely spray stain with an air compressor! It’s a faster and more efficient way to apply stain compared to brushing or wiping. You just need the right setup and a few simple adjustments to get a beautiful, even finish on your wood projects.
Using an air compressor for staining can be a real time-saver. It allows you to cover larger areas quickly and achieve a professional look. Many DIYers and pros alike have found great success with this technique. It’s all about controlling the air pressure and the amount of stain being sprayed.
- Spray stain with an air compressor for a faster, even finish.
- You’ll need an air compressor, spray gun, and the right stain.
- Proper setup is key for avoiding drips and blotches.
- Ventilation and safety gear are always important.
Let’s walk through exactly how to get your air compressor ready to spray stain for a gorgeous result on your next project.
Spraying Wood Stain with an Air Compressor
Yes, you can absolutely spray stain with an air compressor! It’s a faster and more efficient way to apply stain compared to brushing or wiping. You just need the right setup and a few simple adjustments to get a beautiful, even finish on your wood projects.
Getting Started: Your Air Compressor Spraying Setup
Using an air compressor for staining can be a real time-saver. It allows you to cover larger areas quickly and achieve a professional look. Many DIYers and pros alike have found great success with this technique. It’s all about controlling the air pressure and the amount of stain being sprayed.
Essential Gear for Spray Staining
Before you power up that compressor, let’s gather your tools. You’ll need a few key items to make this process smooth and successful. Think of this as your staining toolkit.
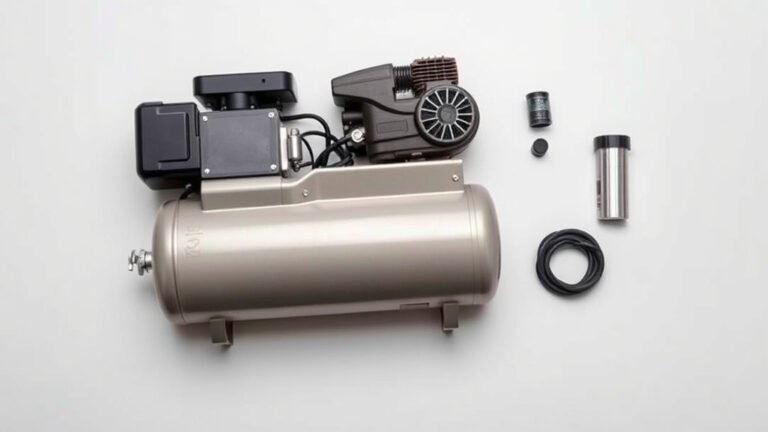
- Air Compressor: This is your powerhouse. It needs to provide consistent air pressure.
- Spray Gun: You’ll need a spray gun designed for coatings, often called a HVLP (High Volume Low Pressure) gun.
- Stain: Not all stains are created equal for spraying. You’ll want a stain that’s specifically formulated for spraying or one that thins well.
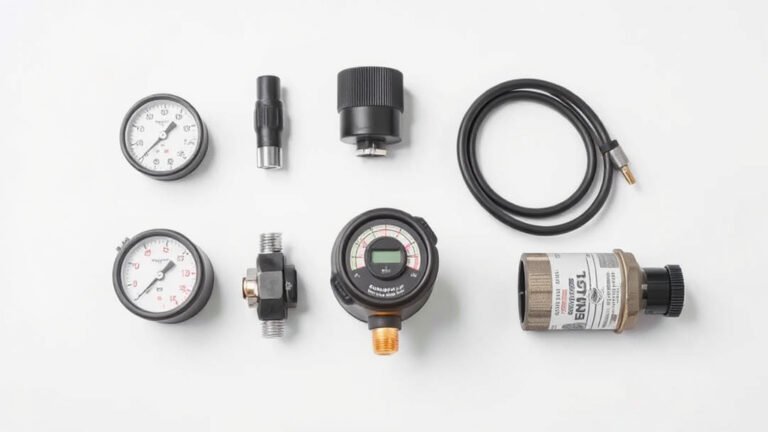
- Hoses and Fittings: Make sure you have the right air hoses and connectors to link your compressor to your spray gun.
- Safety Gear: This is non-negotiable. We’ll cover this more later, but think respirator, gloves, and eye protection.
- Filter/Regulator: A good regulator helps you control air pressure, and a filter removes moisture and oil from the air. This is super important for a clean finish!
Choosing the Right Spray Gun
Not all spray guns are created equal when it comes to staining. For a beautiful, even coat, you’ll want to consider a HVLP spray gun. These guns use less air volume but deliver more material at a lower speed. This means less overspray and a more controlled application. We found that HVLP guns are excellent for a smooth finish on furniture, cabinets, and decks.
We found that HVLP guns are excellent for a smooth finish on furniture, cabinets, and decks. They help the stain cling to the wood rather than bouncing off. Brands like Fuji, DeVilbiss, and Graco offer quality options.
Stain Preparation: The Secret to Success
You can’t just pour any old stain into your spray gun and expect magic. Proper preparation is absolutely critical. Think of it like prepping a canvas before painting.
Thinning Your Stain
Most oil-based stains will need to be thinned for spraying. Water-based stains might need less thinning or none at all. Always check the stain manufacturer’s instructions. You’re typically looking for a consistency similar to whole milk.
We found that using the recommended thinner for your specific stain is best. For oil-based stains, mineral spirits are common. For water-based, plain water often does the trick. Add thinner gradually and stir well. Test the consistency with a thin stick – it should drip off smoothly.
Stirring is Key
Stain often has pigments that settle at the bottom. If you don’t stir it thoroughly, your color will be uneven. Get a good stir stick and really mix it up. You want to ensure those pigments are fully incorporated before you even think about thinning or spraying.
Setting Up Your Air Compressor for Staining
Now that you have your gear and your stain ready, it’s time to set up the compressor. This is where you control the power and the flow.
Air Pressure Settings: The Magic Number
This is arguably the most important setting. Too much pressure will blow the stain everywhere, causing runs and unevenness. Too little, and you won’t get a good atomization, leading to a splotchy finish.
We found that the ideal air pressure usually ranges from 20 to 30 PSI (pounds per square inch) for spraying stain with a HVLP gun. However, this can vary. Always consult your spray gun’s manual for its recommended settings. You’ll adjust this using the regulator on your compressor or on the spray gun itself.
Regulator and Filter: Your Best Friends
A good air regulator allows you to precisely control the air pressure reaching your spray gun. Without it, you’re guessing. A moisture and oil trap filter is also essential. It cleans the air, preventing water droplets or oil from contaminating your stain finish.
Think of the filter like a tiny bodyguard for your stain. It stops unwanted contaminants from getting through. We’ve seen projects ruined by a single drop of water from a dirty air line. So, invest in a good filter and drain it regularly.
Testing Your Spray Pattern
Before you hit your project, you absolutely must test your spray pattern. This is your chance to dial in the settings.
Find a piece of scrap wood or cardboard. Hold the spray gun at a consistent distance (usually 6-10 inches) from the surface. Pull the trigger and move your arm in a smooth, even stroke. Observe the spray pattern. You’re looking for an even oval shape, not a round circle (which means too much pressure) or a wide, fan-like splattering (which might mean too little pressure or the wrong nozzle.
Adjusting for an Even Fan
If your pattern is too round, slightly decrease the air pressure. If it’s too wide and splotchy, you might need to increase the pressure a bit or adjust your gun’s fluid needle. You want a uniform spray from edge to edge.
Technique Matters: How to Apply the Stain
Once your setup is dialed in, it’s time to apply the stain. Technique is key to achieving that professional, smooth look.
Consistent Motion is Key
Always start your spray stroke before you pull the trigger and continue past the end of your stroke after you release the trigger. This prevents heavy starts and stops that can cause drips and uneven coverage. Overlap each pass by about 50%.
Keep your gun arm moving at a consistent speed. Try to maintain the same distance from the wood surface throughout. Imagine you’re painting a wall with a roller – you want smooth, even strokes.
Working with the Grain
Just like brushing, you’ll want to spray with the wood grain. This helps the stain absorb evenly and looks most natural. If you’re spraying a large surface, break it down into smaller sections you can manage.
Managing Runs and Drips
Runs and drips can happen, even to the pros! If you notice one forming, immediately ease off the trigger and lift the gun away. You can often wipe up a fresh run with a clean rag dipped in your stain thinner. For dried runs, you’ll need to sand them down.
To minimize runs, don’t apply the stain too thickly in one pass. It’s better to apply multiple thin coats with adequate drying time in between than one thick, wet coat.
Safety First: Always Protect Yourself
Working with an air compressor and stains involves potential hazards. Your safety is the absolute priority. Never skip these steps.
- Respirator: Stains and their thinners produce fumes. Always wear a respirator with organic vapor cartridges to protect your lungs. Even water-based stains can create fine mists. The CDC recommends using respirators in well-ventilated areas for protection against airborne particles and vapors (CDC).
- Eye Protection: Wear safety glasses or goggles to protect your eyes from stray spray or debris.
- Gloves: Use chemical-resistant gloves to protect your skin from stain and thinners.
- Ventilation: Work in a well-ventilated area, preferably outdoors or in a garage with doors open. Ensure good air circulation to dissipate fumes.
Remember, stain is flammable, so keep it away from open flames or sparks. Clean up spills immediately.
Conclusion
You’ve learned how to effectively spray stain using your air compressor! Remember, the key to a professional finish lies in proper setup, stain preparation, and consistent application technique. Taking the time to thin your stain correctly, set your air pressure within the recommended range, and practice your spray pattern will make all the difference. Always prioritize your safety by wearing the right gear and working in a well-ventilated area.
Your next project is waiting! Gather your materials and confidently tackle that staining job with your air compressor.
Frequently Asked Questions
What kind of stain can I spray with an air compressor?
You’ll want to use stains specifically formulated for spraying or those that thin well. Oil-based stains typically require thinning with mineral spirits, while water-based stains might need very little or no thinner. Always check the manufacturer’s recommendations for your specific product.
How much thinner should I add to the stain?
The amount of thinner varies by stain type and brand. A good starting point is to thin your stain to the consistency of whole milk. We recommend adding thinner gradually, stirring thoroughly, and testing the consistency on a scrap piece of wood before you begin spraying your project.
What’s the difference between a regular spray gun and a HVLP spray gun for staining?
A HVLP (High Volume Low Pressure) spray gun is generally preferred for staining. It uses less air volume but transfers more material to the surface at a lower speed, resulting in less overspray and a more controlled, even application compared to standard spray guns.
How do I prevent runs and drips when spray staining?
To avoid runs, maintain a consistent spray distance and speed. Start your spray before you pull the trigger and continue past the end of your stroke after releasing it. Apply the stain in thin, even coats, allowing adequate drying time between applications, rather than one thick, wet coat.
Can I spray stain in my garage?
Yes, you can spray stain in your garage, but good ventilation is absolutely critical. Open the garage door and any windows to ensure ample air circulation to dissipate the fumes from the stain and any solvents used.