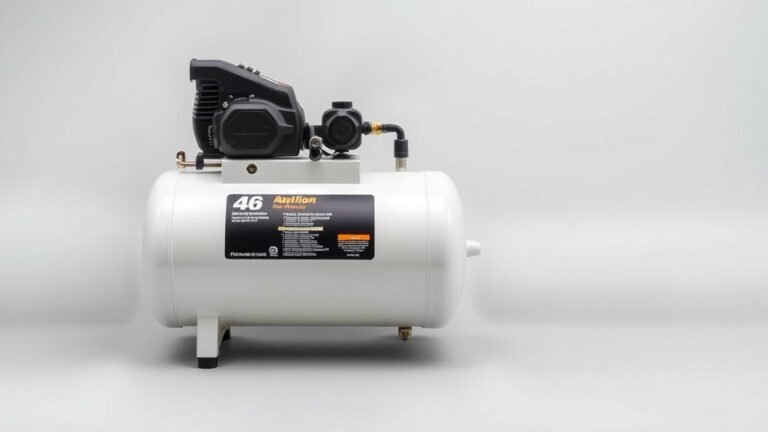
Craftsman 135 PSI Air Compressor: Your Ultimate Guide
Getting your Craftsman 135 PSI air compressor ready to use is easier than you think! You’ll want to start by connecting your air hose and then checking the oil level. Once those are set, you can plug it in and turn it on to let it build pressure. This process ensures you’re ready for any project.
Many folks wonder about the best way to get their new air compressor operational. We found that understanding a few key steps can make all the difference. It’s about ensuring your Craftsman air compressor runs smoothly and safely from the start.
- Connect your air hose securely.
- Check and add oil if needed.
- Plug in and turn on the compressor.
- Let it build up to its 135 PSI.
Ready to get your tools powered up? Let’s walk through exactly how to get your Craftsman 135 PSI air compressor set up and ready for action, step by step.
Getting Your Craftsman 135 PSI Air Compressor Running
You’ve got your Craftsman 135 PSI air compressor ready to go. That’s fantastic! Getting it set up correctly is the first step to powering all your projects, from inflating tires to running nail guns. We’ll walk you through the essential connections and checks to ensure smooth operation right from the start.
Connecting Your Air Hose
First things first, let’s get your air hose connected. This is your lifeline to the compressed air your compressor is generating. You’ll typically find a coupler on the compressor tank where your hose attaches. Make sure you have the right type of coupler for your hose fitting.
Most Craftsman compressors use a universal 1/4-inch quick-connect coupler. You’ll want to push the male end of your air hose fitting into this coupler. You should hear a distinct ‘click’ when it’s securely locked in place. A good connection is vital for preventing air leaks, which can make your compressor work harder than it needs to and drain precious air pressure.
We always recommend giving the connection a gentle tug after you hear the click. This little check ensures you haven’t accidentally bumped it or that the fitting wasn’t fully seated. A loose connection here is one of the most common reasons for air loss, and we want to avoid that frustration!
Checking and Adding Oil
Your Craftsman air compressor needs oil to keep its internal parts lubricated and running smoothly. Think of it like oil for your car – it’s essential for preventing wear and tear.
Where to Find the Oil Fill Cap
Locate the oil fill cap on your compressor. It’s usually a small cap, often with an oil can symbol on it, near the pump assembly. You might need to wipe away any dust or debris around it before you unscrew it.
What Type of Oil to Use
Craftsman typically recommends a specific type of oil for their compressors. You’ll usually find this information in your owner’s manual. Many are designed to run on a non-detergent, SAE 30 weight oil. Using the correct oil is important for the longevity of your compressor. Using the wrong type could lead to damage.
If you don’t have your manual handy, a quick search on the Craftsman website for your specific model number should provide the details. Many guidelines suggest checking the oil level before every use, just to be safe (API).
How to Check the Oil Level
Once the cap is off, you’ll see a dipstick or a sight glass. For a dipstick, pull it out, wipe it clean, reinsert it fully, and pull it out again. Your oil level should be between the ‘min’ and ‘max’ marks. If using a sight glass, the oil should be visible within a certain range. You want to ensure it’s adequately filled without overfilling.
Adding Oil Safely
If the oil level is low, use a funnel to slowly add the recommended oil. Add a little at a time, then recheck the level. It’s much easier to add more oil than it is to remove excess oil. Overfilling can cause issues like oil being pushed into the air lines, which you definitely want to avoid!
Powering Up Your Compressor
Now that your hose is connected and the oil is checked, it’s time to bring your compressor to life. This involves plugging it in and letting it do its thing: build that useful air pressure.
Plugging It In
Find a suitable power outlet for your compressor. Craftsman 135 PSI models usually run on standard household 120-volt outlets. Make sure the outlet is in good condition and can handle the power draw of the compressor. We recommend plugging it directly into the wall outlet rather than using an extension cord if possible.
If you must use an extension cord, it needs to be a heavy-duty one, rated for outdoor use and the correct gauge for the compressor’s amperage. An undersized cord can cause voltage drop, making your compressor struggle and potentially overheating. Always check your manual for specific extension cord recommendations.
Turning It On and Building Pressure
Once plugged in, locate the power switch. It’s usually a simple toggle or rocker switch. Flip it to the ‘on’ position. You’ll immediately hear the motor kick in and the pump start working.
The compressor will begin drawing in air, compressing it, and sending it into the storage tank. You’ll notice the sound of the motor and the pump working. As the tank fills, the pressure gauge will start to climb. You’re aiming to reach that 135 PSI mark.
You’ll hear the motor stop on its own once the tank reaches its maximum pressure. This is normal! The compressor has a pressure switch that automatically turns it off at the set maximum and on again when the pressure drops below a certain point. This automatic shut-off is a key safety feature.
Don’t be alarmed if it cycles on and off during use. That’s just the pressure switch doing its job, maintaining the air pressure in the tank for your tools. It’s designed to keep you supplied with air as you work.
Understanding the Pressure Gauge and Regulator
Your compressor has a main pressure gauge that shows you the current pressure inside the tank. This is useful for knowing when it’s fully charged or when it needs to build more pressure.
You’ll also find a regulator knob and likely another smaller gauge. This regulator allows you to control the output pressure that goes to your air hose and tools. Different tools require different air pressures to operate effectively and safely. For example, a framing nailer might need more pressure than a small airbrush.
We found that many users often forget about the regulator. It’s essential to set this to the correct PSI for your specific tool. Check your tool’s manual for its recommended operating pressure. Setting it too high can damage your tool, and setting it too low means it won’t perform as intended.
Pressure Release Valve Check
Most air compressors have a safety pressure relief valve. This is a small, spring-loaded valve designed to automatically release excess pressure if the pressure switch fails. It’s a critical safety component.
You can manually test this valve by gently pulling its ring. A hiss of air should be heard. If it doesn’t release air, or if it doesn’t reseal properly, it might need attention. Many safety organizations recommend checking this valve periodically (OSHA).
Final Checks Before Tool Use
Before you connect your first tool, let’s do a quick sanity check. Is the air hose securely connected? Is the regulator set to the correct pressure for your tool? Is the compressor tank at a sufficient pressure to run your tool? You don’t want to start a project only to find your compressor sputtering because it’s out of air or your tool isn’t getting enough power.
Here’s a quick checklist to run through:
- Air hose securely connected to compressor and tool.
- Oil level is within the recommended range.
- Compressor is plugged into a suitable power source.
- Pressure regulator set to the tool’s required PSI.
- Main tank pressure is adequate for the tool’s needs.
- Safety relief valve appears functional.
Once all these steps are confirmed, you are officially ready to start using your Craftsman 135 PSI air compressor with your tools! Enjoy the power and convenience compressed air brings to your DIY projects.
Conclusion
You’ve now learned the essential steps to get your Craftsman 135 PSI air compressor up and running smoothly. Remember to always secure your air hose, check your oil levels with the correct type of oil, and power up the unit to let it build pressure. Understanding your pressure gauge, regulator, and safety valve ensures you’re using your tools effectively and safely. Taking these few moments for setup means you’re ready for any task. Your next step? Gather the tools you need for your project, set your regulator to the right PSI, and start creating!
Frequently Asked Questions
How do I know if I’m using the right air hose for my Craftsman compressor?
For most Craftsman compressors, you’ll need a hose with a 1/4-inch quick-connect fitting that matches the coupler on your compressor tank. Ensure the hose is rated for the pressure your compressor can deliver and that the connection clicks securely into place to prevent leaks.
What happens if I overfill the oil in my Craftsman air compressor?
Overfilling the oil can cause it to be pushed into the air lines, which can contaminate your tools and projects. It can also lead to the compressor running hotter than it should. Always add oil slowly and recheck the level to stay between the ‘min’ and ‘max’ marks.
Can I use an extension cord with my Craftsman 135 PSI air compressor?
While plugging directly into a wall outlet is best, if you must use an extension cord, it needs to be a heavy-duty one. Ensure it’s rated for outdoor use and has the correct gauge for the compressor’s amperage to prevent voltage drop and overheating.
My compressor keeps cycling on and off; is that normal?
Yes, that’s perfectly normal! The compressor has a pressure switch that automatically turns it off when the tank reaches its maximum pressure (135 PSI) and turns it back on when the pressure drops. This maintains a consistent air supply for your tools.
How do I adjust the air pressure for my specific tool?
You’ll use the regulator knob, usually located near the main pressure gauge. Turn the knob while watching the smaller output gauge until it shows the PSI recommended for your specific tool. Always check your tool’s manual for its required air pressure.