Adjust Air Compressor Pressure: A Step-by-Step Guide
Adjusting your air compressor pressure is straightforward. You’ll mainly use a pressure regulator knob and watch the gauge. Turning the knob usually controls the output pressure.
Getting the right air pressure is key for any job. Too high, and you could damage your tools or workpiece. Too low, and your tools might not perform as they should. We found that understanding your compressor’s settings prevents common mistakes.
- Locate the regulator knob and pressure gauge.
- Turn the knob to adjust the air pressure.
- Always check the gauge to confirm your setting.
- Match pressure to your tool’s requirements.
Let’s walk through exactly how to adjust your air compressor pressure step by step, so you can get back to making things happen.
Getting Your Air Compressor Pressure Just Right
Setting the correct air pressure from your compressor is more important than you might think. It’s like tuning a musical instrument; you need everything in harmony for the best performance. We found that a few simple steps ensure your tools and projects get the precise air they need.
Understanding the Controls: Your Regulator and Gauge
Before you start tweaking, let’s get familiar with the main players. Your air compressor’s pressure control station is usually pretty straightforward. You’ll see two key components working together to manage the air flow and pressure.
The Pressure Regulator Knob: Your Main Adjuster
This is your primary tool for changing the output pressure. Most regulators have a knob that you can push in or pull out, and then turn. Think of it like a faucet for air pressure. Turning it one way will increase the pressure, and turning it the other way will decrease it.
We’ve seen many different designs, but the core function remains the same. When you turn the knob, you’re adjusting a valve inside that controls how much air from the compressor tank makes it to your hose and tool. Many experts recommend making small adjustments rather than big ones.
The Pressure Gauge: Your Trustworthy Witness
Next up is the pressure gauge. This is the dial that shows you exactly what pressure you’re setting. It’s crucial to always keep an eye on this gauge while you’re adjusting the regulator knob. It gives you immediate feedback.
Imagine trying to bake a cake without looking at the oven temperature. The gauge is your oven thermometer for air pressure. We found that a clear, easy-to-read gauge makes the entire process much less guesswork. Some gauges are analog, with a needle, while others are digital. Both serve the same important purpose.
Preparing Your Air Compressor for Adjustment
Getting ready is key to a smooth adjustment. Just like preparing ingredients before cooking, a little setup goes a long way. You want to be in a safe and organized space before you begin.
Ensure the Compressor is Running
Your air compressor needs to be on and building pressure for you to adjust the regulator effectively. You won’t be able to make changes if the compressor isn’t actively working. Many users find it best to let the tank fill up a bit first.
We recommend waiting until the compressor reaches its maximum tank pressure and shuts off, or at least builds up a good reserve. This ensures you have enough air to work with as you make your adjustments. This also allows the system to stabilize.
Connect Your Air Hose and Tool (Optional but Recommended)
While you can technically adjust the regulator without a tool attached, it’s often more practical to do it with your intended tool connected. This way, you’re setting the pressure under a load, which can sometimes be slightly different than with no load.
We found that connecting your air hose and tool allows you to see how the pressure behaves when air is actually flowing. It simulates the real-world scenario you’ll be working in. Just make sure the tool itself is turned off or set to its lowest setting.
Step-by-Step: How to Adjust the Air Pressure
Now for the main event! Following these steps will help you dial in the perfect pressure for your task. Remember, patience is your friend here.
Step 1: Check Your Tool’s Required Pressure
This is the **most critical first step**. Your tools aren’t all created equal. They have specific operating pressure ranges. Using a pressure that’s too high can damage the tool or the item you’re working on. Too low, and your tool won’t perform its job properly.
Where do you find this information? Usually, it’s printed directly on the tool itself. You can also check the tool’s manual or the manufacturer’s website. We found that consulting these resources prevents a lot of potential problems. Many common tools have standard pressure ranges, but always verify.
Common Tool Pressure Ranges
Here’s a general idea, but always confirm with your specific tool:
| Tool Type | Typical Pressure Range (PSI) |
|---|---|
| Brad Nailer | 30-70 PSI |
| Stapler | 50-100 PSI |
| Impact Wrench | 90-120 PSI |
| Spray Gun (Paint) | 20-50 PSI (fluid, 30-50 PSI air) |
| Air Ratchet | 90-110 PSI |
| Air Sander | 90 PSI |
Step 2: Identify Your Regulator and Gauge
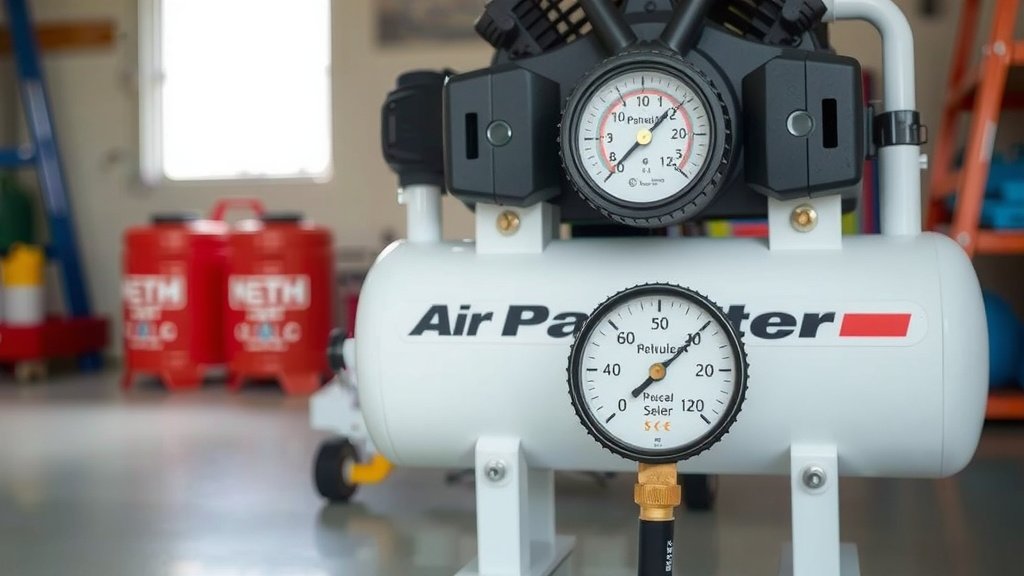
Locate these two components on your air compressor. They are usually found near the air outlet where you connect your hose. The gauge will have numbers showing pressure (often in PSI or BAR).
The regulator knob is typically below or next to the gauge. It might be a simple black knob, or it could be a more complex dial with markings. We found that compressors often have two gauges: one for tank pressure and one for regulated output pressure. Make sure you’re looking at the correct one for your output.
Step 3: Set the Desired Pressure
This is where you’ll be making adjustments. If you want to increase the pressure, you’ll typically pull the regulator knob outward (if it’s a pull/push type) and then turn it clockwise. To decrease the pressure, you’ll usually turn the knob counter-clockwise, and it may click inward or simply reduce pressure.
As you turn the knob, watch the output pressure gauge. Make small adjustments. If you overshoot your target, don’t worry. Just turn the knob the other way to decrease it until you reach the desired PSI. We found that making gradual changes is far more effective than trying to crank the knob all at once.
Step 4: Fine-Tune and Test
Once you’ve set the pressure on the gauge, it’s time for a quick test. If you have your tool connected, try operating it briefly. Does it feel right? Is it performing as expected?
If you’re not sure, or if the tool feels weak or overly powerful, make tiny adjustments to the regulator and test again. Many experts suggest running the tool for a few seconds to ensure the pressure remains stable. This also helps push out any initial air that might have been held in the line.
Troubleshooting Common Pressure Issues
Sometimes, things don’t go exactly as planned. Don’t get discouraged; these are common hiccups that can usually be resolved.
Pressure Won’t Go High Enough
If you’re turning the regulator knob, and the pressure gauge just won’t climb to where you need it, several things could be happening. First, check your tank pressure. Is the compressor tank itself at its maximum capacity? If not, it might be a compressor issue (like a leak or a failing pump). If the tank is full, the regulator might be faulty. We found that some older regulators can wear out and lose their ability to hold pressure effectively.
Pressure Drops Too Quickly
If you set your pressure, and it immediately starts to fall significantly, or if your tool runs weakly, you might have an air leak. Check all your connections: where the hose connects to the compressor, where the tool connects to the hose, and any fittings in between. A simple soap and water test can reveal leaks – look for bubbles.
Another reason for a rapid pressure drop is using a tool that requires more air than your compressor can supply consistently. This is known as the compressor’s CFM (Cubic Feet per Minute) rating. If your tool demands too much air volume, the pressure will inevitably drop, even if the initial setting was correct. Many sources recommend matching your compressor’s CFM output to your tool’s CFM requirement.
Quick Checklist for Setting Your Air Compressor Pressure
- Read your tool’s required pressure range.
- Ensure your compressor is running and has air in the tank.
- Locate the output regulator knob and gauge.
- Make small, incremental adjustments to the regulator.
- Constantly monitor the output pressure gauge.
- Test your tool and adjust as needed.
Conclusion
You’ve learned how to precisely set your air compressor pressure, a skill that makes a big difference. Remember, the key is understanding your tool’s needs and using the regulator and gauge to match them. Small adjustments and careful monitoring prevent damage and ensure your tools perform their best.
Always double-check your tool’s manual for the exact PSI. Now you’re ready to tackle your projects with confidence, knowing your air pressure is just right. Go make things happen!
Frequently Asked Questions
Can I adjust air pressure while the compressor is off?
No, you need the compressor running to adjust the output pressure. The regulator controls the flow of air from the tank. Without air flow, there’s no pressure to adjust. Allow your compressor to build some pressure before you start making changes.
What happens if I set the pressure too high?
Setting the pressure too high can damage your air tool, cause it to malfunction, or even break. It can also damage the material you’re working on, especially with sensitive projects like painting or delicate woodworking. Always err on the side of caution and check the recommended PSI.
My air pressure gauge isn’t moving when I turn the knob. What’s wrong?
If the compressor is running and building tank pressure, but the output gauge isn’t responding, your regulator might be faulty. It could be stuck or internally damaged. Check for any obvious obstructions or wear on the knob mechanism. You may need to replace the regulator assembly.
Is it okay to use a pressure setting that’s lower than recommended?
Using a pressure setting that’s too low generally won’t damage your tool. However, your tool will likely not perform as intended. For example, a nail gun might not drive nails fully, or an impact wrench might lack sufficient torque. It’s best to find the sweet spot within the recommended range.
Do I need to disconnect my tool to adjust pressure?
It’s often best to adjust pressure with the tool connected and ideally running briefly. This allows you to set the pressure under load, which can be slightly different than with no load. Testing under load ensures the pressure is stable and adequate for the tool’s operation.