Clothes Dryer Vent 101: What It Is and Why It Matters
A clothes dryer vent is the duct that carries hot, moist air from your dryer to the outside of your home. Its main job is to remove lint and humidity so your dryer works safely and efficiently. Without a proper vent, you risk fire hazards and poor drying performance.
You probably don’t think about this duct until something goes wrong. We found that a clogged or damaged vent is one of the most common reasons dryers take forever to dry clothes. It also creates an environment where mold can grow, and it can even push dangerous carbon monoxide back into your living space if you have a gas dryer.
- A dryer vent is a simple duct system that expels heat, moisture, and lint from your laundry room.
- It plays a critical safety role because lint buildup inside the vent is a leading cause of home dryer fires.
- A clean vent makes your dryer more efficient, cutting drying time and saving you money on your energy bill.
- Rigid metal ducts are the safest option, while plastic or foil accordion-style vents are prone to sagging and clogging.
- You should check and clean the vent at least once a year to keep your family safe and your machine running smoothly.
Below, we walk you through everything you need to know about dryer vents—from how they work and common problems to simple cleaning tips you can do yourself. Let’s get started.
Understanding How Your Dryer Vent Works
Think of your dryer vent as the exhaust pipe for your laundry machine. Every time you run a load, your dryer pulls in air, heats it up, and blows it through your tumbling clothes. That air picks up moisture and lint along the way. Then, the vent pushes that damp, fuzzy air outside.
The whole system depends on airflow. If air cannot move freely, your dryer suffocates. It runs longer, heats up more, and leaves your clothes damp. Research found that most dryers need around 100 to 125 cubic feet of air per minute to perform well (Dept. of Energy guidelines).
The Basic Components of a Dryer Vent System
Your vent is not just one tube. It is a small system with a few key parts. Each piece plays a role in getting that warm air out of your house safely.
- The exhaust port: This is the hole on the back or side of your dryer where air exits.
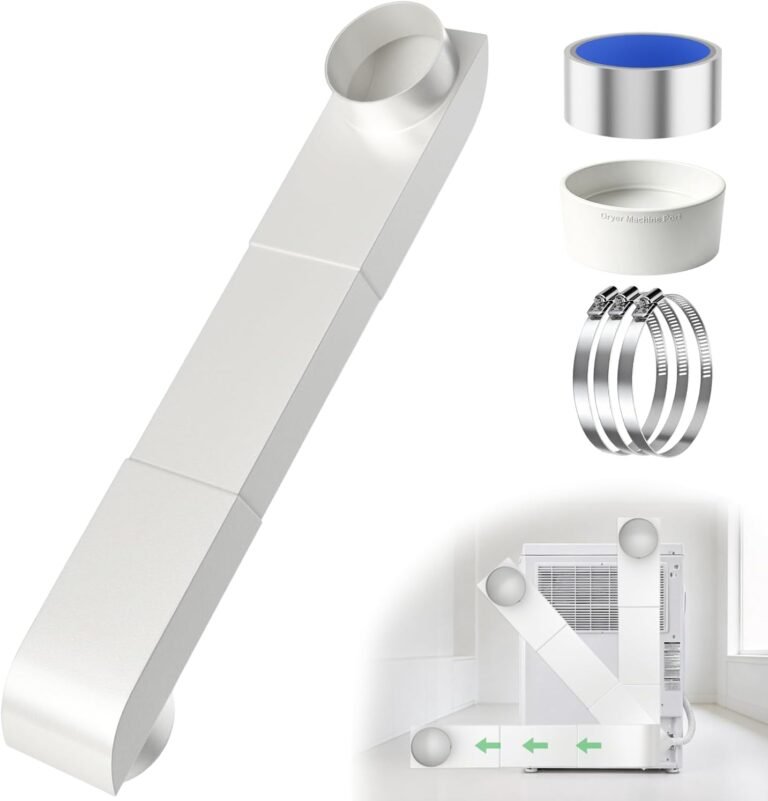
- The transition duct: A short flexible piece that connects the dryer to the wall or floor opening.
- The main duct: The long pipe that runs through walls, ceilings, or crawl spaces to the outside.
- The vent hood or cap: The outside flap with a louver that opens when air pushes out and closes when the dryer is off.
Each part needs to be intact. A crushed transition duct or a blocked outside flap kills airflow just as fast as a clog.
Why the Airflow Matters So Much
Here is a simple way to think about it. Your dryer is like a hair dryer pointing at a wet towel. If you cover the back vent of that hair dryer with your hand, it overheats quickly. The same happens with your clothes dryer. Airflow is not a luxury; it is the whole game.
When airflow drops, the heating element stays on longer. That wastes energy and puts extra strain on the machine. Many people we talked to thought their dryer was broken when, in reality, a simple vent blockage was the culprit.
The Safety Reasons Behind a Proper Dryer Vent
You might wonder why people make such a big deal about a metal pipe. Well, the numbers are pretty sobering. The U.S. Fire Administration reports that thousands of home fires each year start in laundry rooms. A huge percentage of those fires involve dryers where lint had built up inside the vent.
Lint is highly flammable. It is basically a ball of loose cotton fibers and fabric dust. When the heating element gets hot and the airflow is blocked, that lint can catch fire. This is the number one reason to keep your vent clear.
How Lint and Debris Build Up Over Time
Every load of laundry sheds lint. Most of it gets trapped in the dryer’s internal lint screen. But a lot sneaks past and coats the inside of the vent pipe. Over months and years, that coating gets thick.
We found that many homeowners clean the lint trap every time but never touch the actual duct. That is like cleaning your car’s air filter but never changing the oil. The vent needs attention too.
The Carbon Monoxide Danger with Gas Dryers
If your dryer runs on gas, the stakes get even higher. Gas dryers produce carbon monoxide as a byproduct of combustion. That gas is invisible and odorless. In normal operation, your vent carries it safely outside.
But if the vent is clogged, carbon monoxide has nowhere to go. It can back up into your living spaces. Many guidelines from the Centers for Disease Control and Prevention (CDC) point to proper venting as a key safety measure for gas appliances. You should also have a carbon monoxide detector near your laundry room (CDC).
Different Types of Dryer Vent Ducts
Not all ducts are created equal. The material of your duct matters a lot for safety and performance. When you buy a new dryer or replace old parts, you have choices. Some are cheap and dangerous, and some are worth every penny.
| Duct Type | Pros | Cons |
|---|---|---|
| Rigid metal (aluminum or steel) | Strongest, smooth surface, safest, resists crushing | Harder to install, more expensive |
| Semi-rigid metal | Easier to bend, still durable, good airflow | Can kink if bent too sharply |
| Foil (accordion style) | Cheap, easy to find | Sags easily, traps lint, easy to crush |
| Plastic or vinyl | Very cheap and flexible | Highly flammable, banned in many places, traps lint |
Many experts say that rigid metal is the only option you should consider for the main run. The smooth metal surface lets lint pass through easily. Foil and plastic have ridges that catch lint and slow down the air.
Why You Should Avoid Plastic Vents
Let us be blunt. If you have a plastic vent in your home, you should replace it soon. Plastic or vinyl ducts were used in older homes and often come with cheap dryer installations. They are a well-documented fire hazard because they melt and burn easily. Building codes in many areas now prohibit them.
The Problem with Long or Bending Ducts
Longer ducts create more resistance. Every bend or turn in the pipe slows down the air. The dryer’s ability to push air drops with each elbow joint. Dryer manufacturers usually warn against runs longer than 25 feet. Every 90-degree bend counts as about 5 feet of duct length. If your laundry room is far from an exterior wall, you need a more powerful dryer or a shorter path.
How to Tell If Your Dryer Vent Is Clogged
You do not have to wait for a fire to know something is wrong. Your dryer gives you warning signs. You just need to know what to look for. Some signs are obvious, and others are subtle. Here are the most common clues we found:
- Clothes take two or more cycles to dry. This is usually the first sign you notice.
- The outside of the dryer gets very hot. Heat should be exiting, not staying trapped.
- The laundry room feels humid and smells musty. That moisture is stuck inside.
- The vent hood flap outside barely moves. It should lift easily when the dryer runs.
- A burning smell while drying. That is lint overheating inside the duct.
- Lint visible around the outside vent opening. It is piling up because it cannot escape.
If you notice any of these, do not ignore them. A simple cleaning usually fixes the issue in under an hour.
How to Test the Airflow Yourself
Head outside and find your dryer vent hood. Turn the dryer on and hold your hand a few inches away. You should feel a steady, strong push of warm air. If you feel only a weak trickle or nothing at all, you have a blockage. Time to clean that vent.
Simple Steps for Cleaning Your Dryer Vent
You do not need to hire a professional every time. Routine cleaning is a doable DIY project. You just need a few tools and about thirty minutes. Many home improvement stores sell dryer vent cleaning kits with a brush and flexible rods. That is a good place to start.
Turn off the dryer and unplug it first. Safety comes before convenience. Then, pull the dryer away from the wall to access the duct. Disconnect the duct from the back of the dryer and from the wall. You want full access to the pipe.
Cleaning the Duct and Exterior Hood
Use your brush kit to scrub the inside of the duct. Push the brush through from the inside and pull it out from the outside. Repeat until you pull out very little lint. Then, clean the louvered flap on the outside vent hood. Remove any bird nests, leaves, or spider webs.
Do not forget the lint trap inside the dryer. Wash it with warm soapy water every few weeks. That removes the invisible residue that blocks airflow. Let it dry completely before putting it back.
When to Call a Professional
Some situations are above your skill level. If the duct runs through ceilings or a long crawl space, you might not reach every inch. If you feel a blockage that a brush cannot clear, you may need powered tools. Call a professional duct cleaning service when you have a very long run or a persistent clog. It is worth the cost for peace of mind.
How Often You Should Inspect Your Vent
You should inspect your dryer vent at least once a year. Some households need more frequent checks. Large families that run multiple loads daily create more lint. Homes with pets add fur and hair into the mix. Annual cleaning is the baseline for most households.
You should also check after any big home renovation. Construction dust and drywall particles can clog a vent quickly. And always inspect when you move into a new house. You have no idea how the previous owners maintained it.
Signs You Need a Professional Inspection Sooner
Do not wait for the yearly check if you notice these issues. You should get professional help right away if you smell a burning odor, if the drying time suddenly triples, or if you hear strange rattling noises. These signs point to a serious blockage or a damaged duct. Act fast on these.
Installing or Replacing a Dryer Vent the Right Way
If you are installing a new dryer or renovating your laundry room, install the vent correctly from the start. Use smooth, rigid metal ducts. Keep the run as short and straight as possible. Use metal tape or clamps at every joint.
Never use screws that protrude into the duct. Screws catch lint and cause clogs. The outside vent hood should have a flap that opens easily and closes tightly to keep out pests.
Choosing the Right Location for the Vent Exit
Pick an exterior wall that is close to the dryer. Avoid venting under decks, porches, or near windows. Warm moist air can damage those areas over time. Also, keep the exit away from air conditioning units and vents that pull outside air into your house.
Dealing with Short or Tight Spaces
Laundry closets and small utility rooms can force awkward bends. If you cannot create a straight path, use the least number of turns possible. Use a transition duct that is expandable but do not leave it fully extended. Tight and compressed is better than bunched up.
What Happens When You Ignore the Vent
Ignoring a dryer vent is like ignoring a strange noise in your car. It usually gets worse. We found that a neglected vent leads to higher energy bills, ruined clothes, and expensive dryer repairs. The motor works harder, the heating element burns out faster, and you end up buying a new dryer years before you should. None of that is necessary. A yearly check and a cheap cleaning kit can save you hundreds of dollars and keep your home safe. That is a deal you cannot pass up.
Before you start any project, remember the basic rules. Unplug the dryer, check for visible damage, and never use plastic ducting. Keep it clean, keep it short, and keep it metal. Your dryer will thank you with faster cycles and lower bills.
Conclusion
Your dryer vent is a small part of your home that does a big job. It keeps your family safe from fire risks and carbon monoxide. It also helps your dryer work faster and cost less to run. You do not need to be a handyman to stay on top of it.
Make it a habit to check your vent once a year. Look for signs like long drying times, a hot dryer, or a musty smell. Grab a cleaning kit and clear out the lint in about thirty minutes. If you have a long duct run or notice a burning smell, call a professional right away.
Start today by testing the airflow at your outside vent. Strong airflow means you are good to go. Weak airflow means it is time to clean. A little effort now saves you money and gives you peace of mind.
Frequently Asked Questions
Can I use a vacuum cleaner to clean my dryer vent?
Yes, you can use a shop vacuum to help. It works best when you combine it with a brush kit. Start by loosening the lint with the brush, then use the vacuum to suck it out. Do not rely on a regular household vacuum, as it may not have enough power.
Does a dryer vent need to go outside?
Yes, it absolutely does. The vent must push moist air and lint to the outdoors. Venting into your attic, crawl space, or garage creates mold and fire hazards. Always vent to the outside of your home.
How long can a dryer vent hose be?
Most manufacturers recommend a maximum length of 25 feet. Every bend in the pipe counts against that length. A 90-degree turn adds about 5 feet to your total. Keep the run short and straight for the best airflow.
Is a kinked dryer vent hose a fire hazard?
Yes, a kinked hose is a serious problem. It traps lint and blocks airflow just like a clog. This causes your dryer to overheat, which can lead to a fire. Straighten or replace any kinked hose right away.
Can a clogged dryer vent cause mold in the laundry room?
Yes, it can. When moist air cannot escape, it settles on walls and floors. That extra humidity creates the perfect spot for mold and mildew to grow. Cleaning your vent keeps your laundry room dry and fresh.