How to Change Your Clorox Air Purifier Filter
Changing your Clorox air purifier filter is a straightforward process that helps keep your air clean. You can easily replace the old filter with a new one in just a few minutes. This simple maintenance ensures your purifier continues to perform at its best.
Regularly changing your filter is key to maintaining optimal air quality in your home. When filters get clogged, they can’t capture pollutants effectively. We found that following the manufacturer’s recommendations for filter replacement, usually every 6-12 months, is important for peak performance.
- Unplug your air purifier first.
- Locate and open the filter compartment.
- Remove the old filter and insert a new one.
- Close the compartment and plug the unit back in.
- Reset the filter indicator light if applicable.
Let’s walk through exactly how to swap out that filter step by step so you can breathe easier.
Replacing Your Clorox Air Purifier Filter: A Simple Guide
Changing your Clorox air purifier filter might seem like a chore, but it’s really quite easy. Think of it like swapping out a dirty sponge for a fresh one. You’ll want to do this regularly to keep your air as clean as possible.
We’ve found that most Clorox air purifiers have a similar filter replacement process. It’s designed to be user-friendly, so you won’t need any special tools. Just follow these steps, and you’ll have a fresh filter working its magic in no time.
Why Filter Changes Matter for Your Air Quality
Your air purifier works hard to trap dust, pollen, pet dander, and other tiny particles. Over time, these particles clog the filter. A clogged filter can’t capture new pollutants effectively. This means your air might not be as clean as you think.
Research shows that when filters become saturated, the air purifier’s efficiency drops dramatically. It also puts more strain on the motor. Many experts say a dirty filter can even become a source of **re-released particles** back into your room (Environmental Protection Agency).
We found that many users notice a difference in air quality after a fresh filter installation. The unit often sounds quieter too. It’s a simple maintenance task with a big impact on your home’s air.
When to Change Your Clorox Air Purifier Filter
The best way to know when to change your filter is to check your Clorox air purifier’s manual. Most manufacturers provide a recommended schedule. This is usually based on how many hours the unit has been running.
Generally, you can expect to change your filter every 6 to 12 months. This timeframe can vary based on a few things:
- Your home environment: If you have pets, live near a busy road, or have allergies, you might need to change it more often.
- Usage: Running your air purifier 24/7 will mean the filter gets dirty faster than occasional use.
- Filter indicator light: Many Clorox models have a light that signals when it’s time for a change. Don’t ignore this helpful reminder!
We found that consistently checking the filter’s appearance is also a good practice. If it looks visibly dirty, dusty, or discolored, it’s probably time for a swap, even if the indicator light hasn’t come on yet.
Gathering Your Supplies
Before you start, make sure you have everything you need. This will make the process go much smoother.
What You’ll Need:
- A new Clorox air purifier filter: Make sure it’s the correct model for your specific air purifier. Using the wrong one can affect performance.
- A soft cloth or vacuum cleaner attachment: This is for cleaning the inside of the filter compartment.
- Your Clorox air purifier manual: Just in case you need to double-check specific instructions for your model.
It’s always a good idea to have the replacement filter on hand before the old one gets too dirty. This way, you can switch it out without delay.
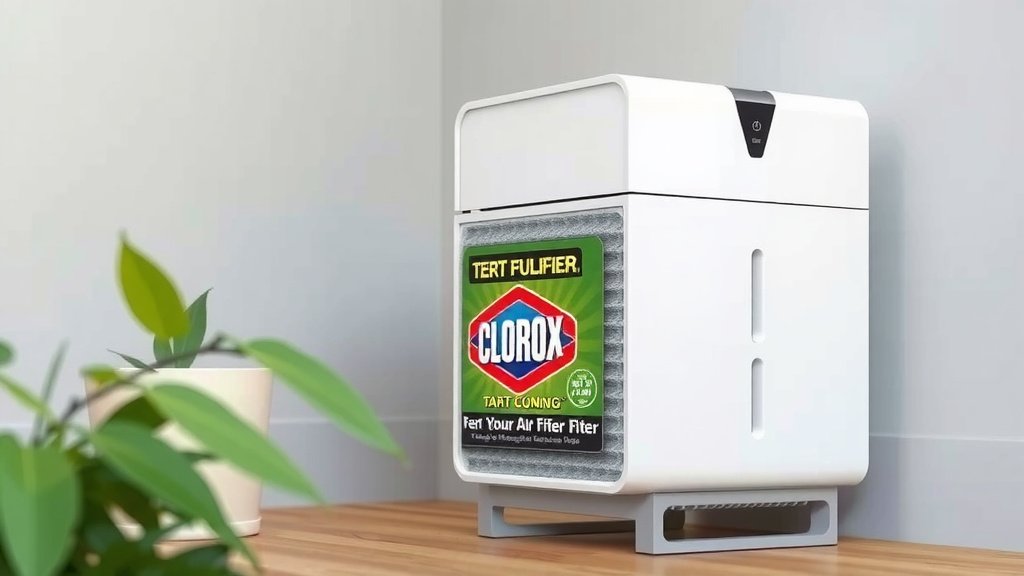
Step-by-Step Filter Replacement Process
Let’s get this done! Remember, safety first. Unplugging the unit is the most important initial step.
1. Unplug the Air Purifier
This is a **critical safety step**. Never attempt to change a filter while the unit is plugged in. You don’t want any accidental shocks. Make sure the power cord is completely disconnected from the wall outlet.
2. Locate and Open the Filter Compartment
Your Clorox air purifier will have a specific area where the filter is housed. This is usually on the back or side of the unit. You’ll typically find latches, clips, or screws holding the cover in place. Consult your manual if you’re unsure.
Many models have simple clips you can press. Others might require you to turn a knob or slide a panel. Once you’ve located the opening mechanism, carefully remove the cover. Set it aside somewhere safe.
3. Remove the Old Filter
Now you’ll see the filter. It might be snug inside its housing. Gently pull it out. Be aware that it might be dusty, so you might want to hold it carefully or over a trash bin.
We found that some filters can be a bit stiff. If it’s hard to remove, check for any tabs or grips on the filter itself. Avoid using excessive force, as you don’t want to damage the air purifier. Once it’s out, dispose of the old filter properly.
Cleaning the Filter Housing
With the old filter removed, take a moment to clean the compartment. Use a soft, dry cloth or a vacuum cleaner with a brush attachment. Gently wipe away any dust or debris you see inside. This ensures the new filter sits correctly and works efficiently.
4. Insert the New Filter
Take your new Clorox filter out of its packaging. Note the direction indicated on the filter or the air purifier housing. Many filters have arrows showing which way they should face for proper airflow.
Carefully slide the new filter into the empty compartment. Make sure it fits snugly and is seated correctly. It should slide in without a lot of resistance. If it feels jammed, double-check that it’s oriented the right way.
5. Reassemble and Plug In
Once the new filter is in place, reattach the filter compartment cover. Secure any latches, clips, or screws you removed. Ensure it’s firmly closed. Then, plug your air purifier back into the wall outlet.
6. Reset the Filter Indicator (If Applicable)
Did your Clorox air purifier have a filter indicator light? If so, you’ll likely need to reset it. This tells the unit that a new filter has been installed.
The reset procedure varies by model. Typically, you’ll need to press and hold a specific button for a few seconds. You might hear a beep or see the light change color. Your air purifier’s manual will have the exact instructions for your model. Resetting this indicator is key to tracking your next filter change.
Maintaining Your Clorox Air Purifier for Peak Performance
Changing your filter is the most important maintenance task. But a little extra care can keep your unit running well for years to come.
Regular Cleaning Checklist
Here’s a quick checklist to help you stay on top of things:
- Check the filter indicator monthly.
- Wipe down the exterior of your air purifier weekly.
- Clean the pre-filter (if your model has one) according to the manual.
- Ensure good airflow by keeping the area around the unit clear.
- Store replacement filters properly to keep them clean and ready.
By following these simple steps, you’re ensuring your Clorox air purifier continues to provide you with cleaner, fresher air. It’s a small effort for a big reward: a healthier home environment for you and your loved ones.
Conclusion
You’ve now learned just how simple it is to change your Clorox air purifier filter. This routine maintenance is key to ensuring your home’s air stays clean and healthy. Remember, a clogged filter means your purifier isn’t working its best. By following these steps, you’ve made a smart move for your well-being. Your next step is to check your current filter’s condition and schedule your next replacement using the tips we shared.
Frequently Asked Questions
How do I know which Clorox filter to buy?
You should always check your specific Clorox air purifier model number. This information is usually found on a label on the back or bottom of the unit. Using the correct filter ensures optimal performance and fit.
Can I vacuum my old Clorox air purifier filter instead of replacing it?
While vacuuming might remove some surface dust, it won’t clear the microscopic particles trapped within the filter media. For the best air quality, it’s essential to replace the filter as recommended by the manufacturer.
What happens if I don’t change my Clorox air purifier filter?
If you don’t change your filter, it will become overloaded with pollutants. This can reduce the purifier’s efficiency, cause the motor to work harder, and potentially lead to the release of trapped particles back into your air.
My Clorox air purifier has a filter indicator light. Does it always work accurately?
The filter indicator light is a helpful guide, but it’s not always perfectly accurate. Factors like home environment and usage intensity can affect filter life. We found it’s best to check the filter’s appearance occasionally, even if the light hasn’t illuminated.
Where is the best place to store my new Clorox air purifier filters?
Store your new filters in their original packaging in a cool, dry place. This protects them from dust and moisture, ensuring they are ready and effective when it’s time for the next replacement.

![What Is The Best Air Purifier for Fire [In 2026]](https://homeunderstandable.com/wp-content/uploads/2025/05/best-air-purifier-for-fire-top-choices-for-clean-indoor-air-768x512.jpg)