How to Drain Your Air Compressor Tank Safely and Easily
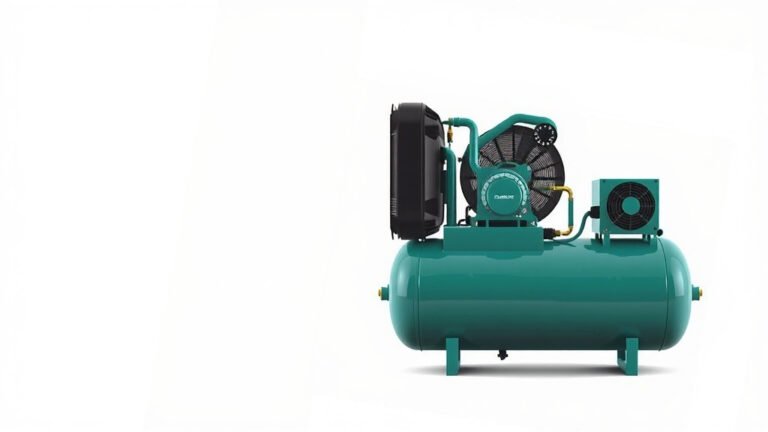
Draining your air compressor tank is simple. You’ll want to open the drain valve at the bottom of the tank. This lets out the stored air and any moisture that has collected inside. It’s a quick maintenance step that keeps your compressor running smoothly.
Why is this so important? Moisture inside the tank can lead to rust and corrosion. This can damage your compressor and even affect the air quality. Regularly draining prevents these issues, ensuring your tools get clean, dry air. Many experts agree this is a key part of compressor care.
- Open the drain valve.
- Let out all the air.
- Watch for moisture draining out.
- Close the valve when empty.
Ready to get started? Let’s walk through exactly how to drain your air compressor tank step by step.
How to Keep Your Air Compressor Tank Draining Properly
You’ve got your air compressor, and it’s ready to power your projects. But before you go blasting away, there’s a simple maintenance step that’s super important. It’s about draining the tank. This might sound basic, but doing it right makes a big difference. Let’s get into why and how you can do this easily.
Understanding the Need for Draining
Think of your air compressor tank like a soda bottle. When you fill it with air, some water vapor always comes along for the ride. This moisture is totally normal. But if you let it sit in your tank, it can cause some real problems over time. It’s like leaving water in a metal can; eventually, rust starts to form.
The Moisture Problem Explained
This collected moisture isn’t just a little annoying. It can lead to corrosion inside your tank. As rust builds up, it can flake off and get into your air lines. This means your tools could get dirty air, which can damage them and lead to costly repairs. Some sources even suggest this rust can weaken the tank itself over many years (NIOSH).
Impact on Air Quality
If you’re using your compressor for tasks where clean air is a must, like painting or powering delicate pneumatic tools, water in the tank is a big no-no. It can affect paint finishes and gum up fine machinery. So, draining the tank is really about protecting both your equipment and the quality of your work. It’s a small effort for big results.
Locating the Drain Valve
Finding the drain valve is usually straightforward. Most air compressors have a small valve located at the very bottom of the tank. It’s often the lowest point where any liquid would naturally collect. Don’t worry if it looks a little different on your model; they’re all designed to do the same job.
Common Valve Types You Might See
You’ll likely encounter one of a few common types of drain valves:
- Ball Valve: These typically have a lever handle that you turn 90 degrees. When the lever is in line with the pipe, it’s open. When it’s across the pipe, it’s closed. These are very common and easy to use.
- Petcock Valve: This type often looks like a small spigot with a wingnut or thumbscrew. You’ll turn this to open it. They can sometimes be a bit trickier to get a good grip on if they’re tight.
- Quick-Release Drain: Some newer or higher-end compressors might have a push-button or pull-tab type of drain. You simply push or pull a mechanism to release the air and water.
Take a quick look under your tank. You’ll spot it! If you’re having trouble, your compressor’s manual is your best friend here. It will show you exactly where it is and how to operate it.
Step-by-Step Draining Procedure
Okay, you’ve found the valve. Now, let’s get that tank drained. It’s a simple process that won’t take long at all. Just remember to have a plan for where the water will go!
Step 1: Ensure the Compressor is Off and Depressurized
This is the most important safety step. Never try to drain a pressurized tank. First, turn off your air compressor. Then, disconnect the power source – unplug it from the wall or turn off the circuit breaker. This prevents accidental startups.
Next, you need to release any air still in the tank. You can do this by opening a tool attached to the compressor (like an air hose with a nozzle) and letting it run until no more air comes out. Or, some compressors have a separate pressure release button. We want the tank to be at zero pressure before we touch the drain valve.
Step 2: Position a Container
You’ll want something to catch the draining water and air. A shallow pan or bucket works perfectly. Place it directly under the drain valve. This prevents a big mess on your floor. Sometimes, a little hiss and spurt can happen, so having that container ready is smart.
Step 3: Open the Drain Valve Slowly
Now for the main event! Slowly turn or pull the drain valve to open it. You’ll hear the air escaping. At first, it might be just air. But soon, you should start seeing water dribbling out into your container.
If you have a ball valve, a quarter-turn will open it. For a petcock, you might need to turn a thumbscrew a few times. Don’t force it if it feels stuck. A little gentle wiggling might help. Remember, you’re just letting pressure out, so a slow and controlled opening is best.
Step 4: Let It Drain Completely
Allow all the air and water to escape. This might take a few minutes, depending on how much moisture has collected. You’ll know it’s done when you only hear air hissing out, with no more water. Keep an eye on your container; it’s fascinating (and a little gross) to see how much water can build up!
Step 5: Close the Drain Valve
Once you’re sure all the liquid has drained and only air is coming out, it’s time to close the valve. Turn it back to its original closed position. Make sure it’s snug, but don’t overtighten it, as this can damage the valve seat. You don’t want any air leaks here.
When to Drain Your Air Compressor
How often should you perform this little maintenance ritual? It really depends on how much you use your compressor and the environment it’s in. Here’s a general guide:
| Usage Frequency | Recommended Draining Schedule |
|---|---|
| Daily Use (more than 1 hour) | After each use |
| Frequent Use (a few times a week) | Once a week |
| Occasional Use (once a month or less) | After each use, or at least monthly |
| High Humidity Environments | Increase frequency (e.g., daily or every other day) |
Many experts recommend making it a habit to drain the tank at the end of every workday or project. This ensures that moisture doesn’t have a chance to sit and cause problems. It’s a small habit that can prevent a lot of headaches later on. Some guidelines suggest draining even if you haven’t used it, especially if it’s been sitting for a while (Occupational Safety and Health Administration).
Troubleshooting Common Issues
What if things don’t go as smoothly as planned? Don’t sweat it. Here are a few common hiccups and how to handle them.
The Valve Won’t Open
If your drain valve is stuck, don’t force it too hard. Sometimes, sediment can cause it to seize up. Try gently tapping around the valve with the handle of a screwdriver. You can also try opening and closing the main tank valve slightly to jostle things. If it’s still stuck, you might need to spray a little penetrating oil around the valve stem, let it sit for a bit, and then try again. If all else fails, it might be time to replace the valve.
Leaking After Draining
If you close the valve and still hear air hissing, the valve might not be sealing properly. Check for any debris caught in the valve seat. You might be able to clear it by briefly opening and closing the valve a couple of times. If it continues to leak, the valve seal could be worn out and need replacement.
Quick Drain Checklist
Here’s a handy checklist to keep your air compressor tank in top shape:
- Turn off and unplug the compressor.
- Release all built-up air pressure.
- Place a container under the drain valve.
- Slowly open the drain valve.
- Let all air and moisture escape.
- Close the drain valve securely.
Following these simple steps will help ensure your air compressor runs efficiently and lasts for years to come. Happy compressing!
Conclusion
You’ve learned that draining your air compressor tank is a simple yet vital maintenance task. It effectively prevents rust and corrosion by removing collected moisture. This keeps your compressor and tools in better condition and ensures cleaner air for your projects. Remember to always turn off and depressurize the unit before you start. By making this a regular habit, especially at the end of each use or workday, you’ll significantly extend the life of your air compressor. So, grab that bucket and get draining – your equipment will thank you for it!
Frequently Asked Questions
Can I drain my air compressor tank while it’s still pressurized?
No, you absolutely should not attempt to drain a pressurized air compressor tank. This is a critical safety step. Always ensure the compressor is turned off, unplugged, and all air pressure has been released from the tank before you open the drain valve.
What happens if I never drain my air compressor tank?
If you never drain your air compressor tank, moisture will build up inside. This can lead to rust and corrosion, damaging the tank and potentially contaminating your air supply. Over time, this can reduce the efficiency of your compressor and shorten its lifespan.
How much water should I expect to come out?
The amount of water that drains out can vary. It depends on how long the compressor has been used, the humidity of your environment, and how often you typically drain it. Sometimes it’s just a small amount, while other times, you might be surprised by how much collects.
What’s the difference between a ball valve and a petcock valve on an air compressor?
A ball valve typically uses a lever that you turn 90 degrees to open or close. A petcock valve often looks more like a small spigot and might have a wingnut or thumbscrew that you turn. Both serve the same purpose: to allow you to drain the tank.
Is it okay to leave the drain valve slightly open when the compressor is not in use?
Leaving the drain valve slightly open is generally not recommended, especially for ball valves. It can lead to air leaks, which makes your compressor work harder. It’s best to ensure the valve is fully closed after draining to maintain optimal performance and prevent air loss.