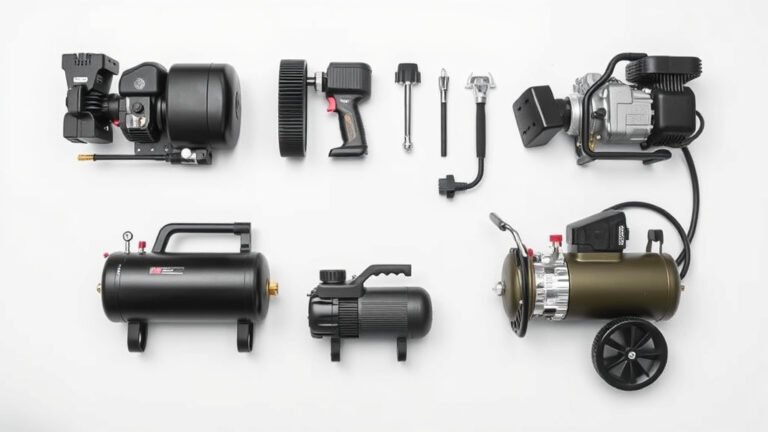
How to Drain Your Porter Cable Air Compressor Safely
Draining your Porter Cable air compressor is a simple but essential maintenance task. You can easily drain the tank by slowly opening the drain valve located at the bottom of the compressor. This releases built-up moisture and prevents rust, keeping your compressor running smoothly.
Regularly draining the tank is key to its longevity. Moisture buildup can lead to internal damage and reduced performance. Many users overlook this step, but it’s one of the most effective ways to ensure your Porter Cable compressor serves you well for years to come. It’s a quick fix with big benefits.
- Open the drain valve slowly.
- Allow all air and moisture to escape.
- Close the valve securely when finished.
- Do this regularly to prevent rust. Do this regularly to prevent rust. Our guide discusses factors influencing your draining frequency.
Ready to get your hands dirty? Let’s walk through exactly how to drain your Porter Cable air compressor step by step.
Keeping Your Porter Cable Compressor Healthy: Draining the Tank
Draining the air compressor tank is a simple maintenance task. It helps prevent rust and corrosion. This keeps your tool working reliably for a long time. You can do it in just a few minutes. Following a few steps ensures you do it correctly.
Why Draining Your Compressor Matters
Your air compressor works by compressing air. This process naturally creates moisture. As the air cools inside the tank, water vapor turns into liquid water. This water settles at the bottom of the tank. If left unchecked, this moisture can cause a lot of problems.
The Dangers of Standing Water
Standing water inside your compressor tank is like leaving a puddle in your garage. Over time, it leads to rust. This rust can flake off and get into your tools. It can also clog the drain valve. In severe cases, rust can weaken the tank itself. This is a safety concern. Many compressor manufacturers highly recommend regular draining.
Protecting Your Tools
When you use your compressor, some of that moisture can get pushed out with the air. This “wet” air can damage your pneumatic tools. Tools like nail guns or paint sprayers can corrode internally. This shortens their lifespan. Draining the tank ensures you’re getting clean, dry air.
Locating the Drain Valve
Your Porter Cable air compressor has a drain valve. This is where you’ll release the moisture. It’s usually located at the very bottom of the air tank. It might look like a small knob or a faucet-like handle.
Common Drain Valve Types
Porter Cable uses a few different types of drain valves. The most common is a simple knob valve. You turn this by hand. Some models might have a ball valve. This has a lever you rotate 90 degrees. A few older or larger models might have a plug you need to unscrew. Always check your owner’s manual if you’re unsure.
Pre-Draining Checks
Before you drain, make sure the compressor is unplugged. Safety first! You don’t want the compressor to accidentally turn on. Also, ensure the tank has no residual pressure. If the gauge shows pressure, you’ll need to release that air first. This is usually done by running the compressor briefly and then unplugging it, or by using a tool to let air out slowly.
The Step-by-Step Draining Process
Now, let’s get to the actual draining. It’s straightforward. You’ll want to have a bucket or some rags handy. Water can spray out, especially at first.
Step 1: Prepare Your Workspace
Place a bucket or container directly under the drain valve. This will catch the water and any debris. If you’re worried about splashing, spread some old rags around the base. This step is especially important for larger compressors that can hold a lot of water.
Step 2: Slowly Open the Valve
Gently turn the drain valve counter-clockwise. Do this slowly and steadily. If it’s a knob, a quarter or half turn is usually enough to start. If it’s a lever, move it to the open position. You should hear air hissing out. If you hear a lot of air escaping, the valve might be fully open.
What to Expect
At first, you’ll likely hear a rush of air. Then, water will start to drip or spray out. The color of the water can vary. It might be clear, cloudy, or even have a rusty tint. This is normal. The goal is to let all the air and moisture out.
Step 3: Let it Drain Completely
Allow the tank to drain until no more water comes out. This could take a few minutes or longer, depending on how much moisture has built up. You might see some sediment or rust particles come out. This is why regular draining is so important. Keep the valve open until you’re sure it’s empty. Some experts suggest letting it drain for an extra minute after the water stops.
Step 4: Close the Valve Securely
Once all the air and moisture are gone, you need to close the drain valve. Turn it clockwise until it’s snug. Be careful not to overtighten it. You don’t want to strip the threads. Just make sure it’s securely closed so no air leaks out during the next use.
How Often Should You Drain Your Compressor?
The frequency depends on how often you use your compressor and the humidity in your area. We found that a good rule of thumb is to drain it after every use. If you use it daily, drain it daily. If you use it weekly, drain it weekly.
Factors Affecting Moisture Buildup
High humidity is the biggest culprit. If you live in a tropical climate, you’ll need to drain it more often. Also, how long you run the compressor matters. Longer run times mean more air compressed, and therefore, more potential moisture. Many mechanics suggest checking the tank visually once a month if usage is infrequent.
A Simple Checklist for Maintenance
To make this routine easier, consider a quick checklist:
- Unplug the compressor.
- Place a bucket under the drain valve.
- Slowly open the drain valve.
- Let all air and moisture escape.
- Close the valve tightly.
- Check your tools for dry air before use.
Troubleshooting Common Issues
Sometimes, things don’t go perfectly. What if the valve is stuck? What if it won’t stop leaking?
Stuck Drain Valve
If your drain valve is difficult to turn, try wiggling it gently. Sometimes, a bit of rust can seize it. You can try applying a penetrating lubricant (like WD-40) around the valve stem. Let it sit for a bit, then try turning it again. If it’s still stuck, you might need to unscrew the valve itself and clean or replace it. Always refer to your manual.
Leaking After Draining
If the valve continues to drip after you’ve closed it, it might be damaged or have debris caught in the seal. Try opening and closing it a few times again. If it persists, you may need to replace the valve or its seal. This is a task many users can handle with basic tools and a replacement part from the manufacturer.
Conclusion
You’ve now learned that draining your Porter Cable air compressor is a simple yet vital part of its maintenance. By regularly releasing the built-up moisture, you’re actively preventing rust and corrosion, which protects both your compressor’s tank and the pneumatic tools you use. It’s a quick process that saves you from costly repairs and ensures you’re always working with clean, dry air. Make it a habit to drain the tank after each use, or at least weekly, and your compressor will thank you with reliable performance for years to come. So, grab that bucket and give your compressor the care it deserves!
Frequently Asked Questions
How often should I drain my Porter Cable air compressor?
It’s best to drain your Porter Cable air compressor after every use. If you don’t use it daily, aim for at least once a week, especially in humid environments. This consistent draining prevents moisture buildup.
What happens if I don’t drain the moisture from my compressor?
If you neglect draining, moisture can lead to rust and corrosion inside the tank. This can weaken the tank, damage your tools with “wet” air, and clog the drain valve over time.
My Porter Cable drain valve is stuck. What can I do?
Try gently wiggling the valve or applying a penetrating lubricant around the stem. If that doesn’t work, you might need to carefully unscrew the valve to clean or replace it, consulting your owner’s manual for guidance.
Is it safe to drain the compressor if there’s still pressure in the tank?
No, always ensure the compressor is unplugged and depressurized before attempting to drain it. If there’s pressure, run the compressor briefly and unplug, or use a tool to release air slowly until the gauge reads zero.
What if water keeps leaking after I close the drain valve?
A persistent drip suggests the valve might be damaged or have debris in its seal. Try opening and closing it a few more times. If the leak continues, you’ll likely need to replace the valve or its seal.