How to Hardwire an Air Compressor Safely and Efficiently
Yes, you can absolutely hardwire an air compressor directly to your electrical system. This often provides a more reliable power source than using extension cords. You’ll be able to run your compressor without worrying about cord length or power drops.
Connecting your air compressor directly involves working with your home’s wiring. It’s a project that requires careful planning and attention to electrical safety. Many DIYers find it manageable with the right guidance, ensuring their tools have the consistent power they need.
- Hardwiring provides a stable power connection.
- It’s a DIY-friendly project with proper steps.
- Ensures consistent power for your compressor.
- Prioritize electrical safety throughout the process.
Let’s walk through exactly how to get your air compressor hardwired safely and effectively.
Directly Connecting Your Air Compressor: A Step-by-Step Guide
Hardwiring your air compressor offers a steady, dependable power flow. This is key for tools that need consistent energy. We’ll guide you through the process so you can get this project done safely.
Planning Your Hardwired Air Compressor Setup
Before you grab your tools, let’s get organized. Proper planning prevents headaches later. You need to know where your compressor will live and where the power will come from.
Choosing the Right Location
Think about where you’ll use the compressor most. Is it a dedicated workshop or garage space? Good ventilation is also important. Air compressors can get warm during operation.
Make sure the spot is relatively clean and dry. You don’t want dust or moisture interfering with the electrical connections. Consider noise too; compressors can be loud! Placing it away from main living areas might be wise.
Assessing Your Compressor’s Power Needs
Your air compressor has specific electrical requirements. You’ll find this information on its data plate or in the user manual. Look for the voltage and amperage ratings.
Most DIY compressors run on standard 120-volt circuits. However, larger or more powerful units might need a 240-volt circuit. Getting this right ensures you don’t overload your wiring or the compressor itself. It’s like picking the right size shoe; it has to fit!
Understanding Your Home’s Electrical Panel
Your home’s electrical panel is the command center for power. You’ll need to add a new circuit breaker here. This breaker will be dedicated solely to your air compressor.
If your panel is already crowded, you might need to make space. Some older panels don’t have enough room for new breakers. In such cases, an electrician can help you update or expand your panel. This is a good time to check if your panel is up to code too.
Gathering Your Materials and Tools
Having everything ready makes the job go smoother. Think of it like preparing ingredients before cooking.
Essential Electrical Components
- Dedicated Circuit Breaker: Match the amperage required by your compressor.
- Proper Gauge Electrical Wire: Use the type and gauge recommended for your compressor’s amperage and the distance from the panel. This is crucial for safety.
- Conduit: Protects the wiring from damage.
- Outlet Box: A sturdy box to house the electrical connections.
- Receptacle (Outlet): The correct type for your compressor’s plug.
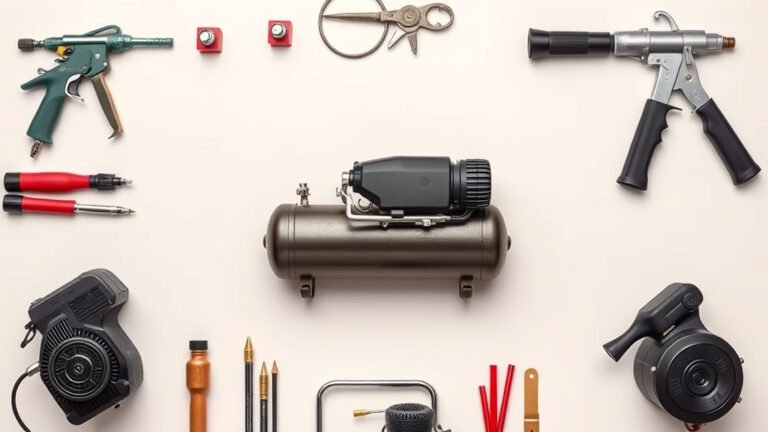
Necessary Tools
- Screwdriver set
- Wire strippers
- Pliers
- Voltage tester (non-contact is helpful)
- Drill and drill bits
- Fish tape (for pulling wire through conduit)
- Safety glasses
- Work gloves
Safety First: Working with Electricity
This is the most important step. Electricity is powerful and can be dangerous if not handled correctly. Always prioritize your safety.
Disconnecting Power
Always turn off the main power to the circuit you’ll be working on at your electrical panel. Use your voltage tester to confirm the power is indeed off. Double-check this step. It’s not worth the risk.
Understanding Wire Gauges and Amperage
The thickness of your electrical wire is critical. It’s measured in gauges, with smaller numbers meaning thicker wires. Thicker wires can handle more electrical current (amperage) without overheating.
Using wire that’s too thin is a fire hazard. Many electrical guides and your compressor’s manual will specify the correct gauge. For example, a 20-amp circuit often needs 12-gauge wire. We found that referencing the National Electrical Code (NEC) is wise for specific applications (NEC).
Using Conduit Safely
Conduit is a protective pipe for your electrical wires. It shields them from physical damage, moisture, and pests. Make sure the conduit is properly secured and sealed where needed. This adds an extra layer of safety and longevity to your installation.
The Installation Process: Step-by-Step
Now for the actual connection. Remember to work methodically and check your connections at each stage.
Installing the New Circuit Breaker
Open your electrical panel. Locate an available slot for a new breaker. Snap the new, dedicated circuit breaker into place. Ensure it clicks securely. This breaker will control the new circuit for your compressor.
Running the Electrical Wire
This is often the most physically demanding part. You’ll need to run the appropriate gauge wire from your electrical panel to the location of your air compressor. Feed the wire through conduit as you go. You might need to drill holes through studs or joists.
If you’re pulling wire through long runs or tight spaces, fish tape can be a lifesaver. Be patient here. Avoid sharp bends that could damage the wire. Secure the conduit firmly as you progress.
Connecting the Wires at the Panel
With the power still OFF, connect the wires from your new circuit to the new breaker. Typically, you’ll connect the hot wire (often black) to the breaker and the neutral wire (white) to the neutral bus bar in the panel. The ground wire (bare copper or green) connects to the ground bus bar.
Ensure all connections are tight and secure. Loose connections can cause overheating and electrical arcing. Consult your panel’s diagram if you’re unsure about specific terminal locations.
Connecting the Wires at the Compressor End
At the compressor’s location, connect the wires to your new outlet box and receptacle. Again, the hot wire goes to one terminal, the neutral to another, and the ground wire to the grounding screw. Ensure the receptacle is properly mounted in the box.
Testing the New Circuit
Once everything is connected and secured, it’s time to test. Turn the main power back on at your electrical panel. Then, flip the new circuit breaker to the ON position.
Use your voltage tester at the new receptacle to confirm you have the correct voltage (e.g., 120V or 240V). Plug in your air compressor and turn it on. Listen for any unusual noises and check that it runs smoothly. This confirms your hardwiring is successful.
Checklist for a Successful Hardwire Installation
- Confirm compressor voltage and amperage requirements.
- Select the correct wire gauge and type for the job.
- Ensure the circuit breaker matches the wire capacity and compressor needs.
- Always disconnect power before working on wiring.
- Test connections with a voltage tester before plugging in the compressor.
- Secure all wiring and conduit properly for safety.
Conclusion
You’ve learned how to hardwire your air compressor, giving it a reliable power source. This DIY project boosts performance by ensuring consistent energy flow. Remember to always plan carefully and prioritize safety, especially when working with electricity. Taking these steps means your compressor will be ready when you need it most. Now that you’re equipped with this knowledge, you can confidently tackle the installation for a more dependable setup.
Frequently Asked Questions
Can I use an extension cord instead of hardwiring?
While an extension cord might seem easier, it’s generally not recommended for hardwiring an air compressor. Extension cords can cause power drops, especially over longer distances, and may not handle the compressor’s continuous power draw safely. This can lead to reduced compressor performance and potential overheating of the cord.
What happens if I use the wrong wire gauge?
Using an incorrect wire gauge can be dangerous. If the wire is too thin for the amperage, it can overheat, posing a fire hazard. It can also lead to voltage drops, preventing your compressor from running at full capacity or causing it to cycle improperly. Always consult your compressor’s manual and electrical codes for the correct gauge.
Do I need to turn off the power at the main breaker or just the circuit breaker?
For safety, you should always turn off the main power supply to your home at the main breaker before working inside your electrical panel. While turning off the specific circuit breaker is a good practice, working with the main power off ensures there’s no live electricity anywhere in the panel, significantly reducing the risk of shock.
How do I know if my air compressor needs a 240-volt circuit?
You can find out if your air compressor requires a 240-volt circuit by checking its data plate or the user manual. Look for the voltage (V) and amperage (A) ratings. Most smaller, portable compressors use 120V, but larger stationary units often require the higher voltage and amperage of a 240V circuit for adequate power.
What is the purpose of conduit in this installation?
Conduit serves as a protective sleeve for your electrical wiring. It shields the wires from physical damage, moisture, and potential chewing by pests. Properly installed conduit ensures the longevity and safety of your wiring, especially when it runs through areas like walls, attics, or garages where it could be bumped or exposed.