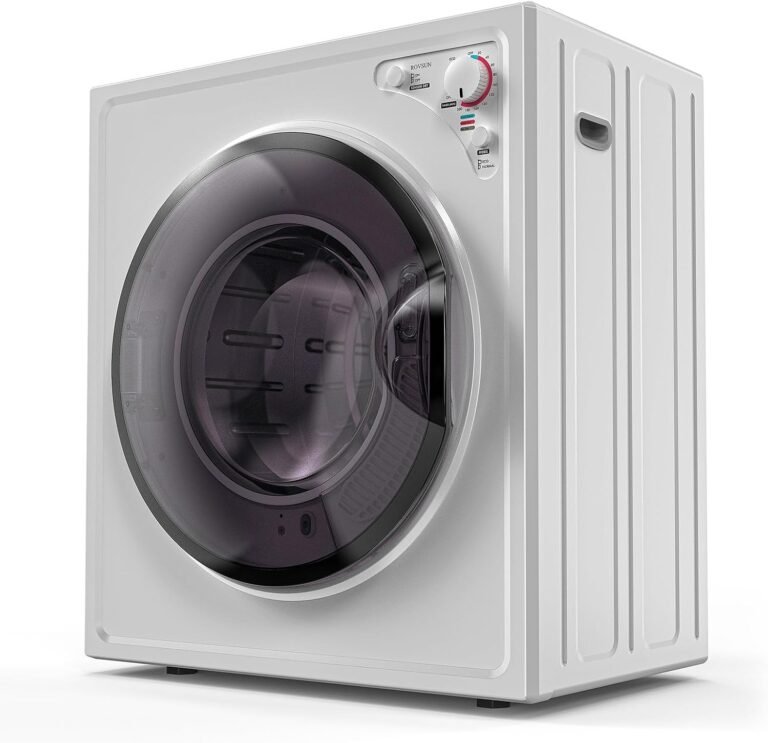
How to Replace a Dryer Vent Hose in 7 Steps
To replace a clothes dryer vent hose, start by unplugging the dryer and pulling it away from the wall. Then, loosen the clamps on both ends of the old hose, slide it off, and attach the new hose before tightening everything back up. This is a simple DIY project you can finish in about 30 minutes with just a screwdriver.
That old, crushed, or lint-filled hose is more than just an eyesore. We found that a damaged vent hose is one of the leading causes of dryer fires and can seriously increase your energy bills. Replacing it not only keeps your home safe but also helps your clothes dry faster and your machine last longer.
- Why replace it: A crushed or clogged hose restricts airflow, causing longer dry times and potential fire hazards.
- What you need: A new hose (rigid metal is best), two hose clamps, and a screwdriver.
- The core steps: Unplug, disconnect the old hose, attach the new one, and secure it with clamps.
- Pro tip: Keep the new hose as short and straight as possible for maximum airflow.
- Final check: Always re-check the connections after pushing the dryer back into place.
Below, we break down everything you need to know about swapping out that old vent hose, including what type to buy and the common mistakes to avoid. Let’s walk through the process step by step so you can get back to laundry day with peace of mind.
Replacing Your Dryer Vent Hose Step by Step
You can handle this job with basic tools and a little patience. We found that most homeowners finish in under an hour. The key is to work slowly, keep the new hose as straight as possible, and double-check every connection before you plug the dryer back in.
Before you start, grab a flashlight and take a quick peek at the back of your dryer. You will see where the hose connects to the dryer and where it runs toward the wall. This quick look helps you plan your moves and makes the swap much easier.
Gathering Your Tools and Materials
You do not need a fancy toolkit for this project. We found that a simple screwdriver and a pair of gloves are enough for most dryers. The gloves protect your hands from sharp metal edges on the old hose.
- New vent hose (rigid metal or semi-rigid aluminum)
- Two hose clamps (usually 4-inch size)
- Screwdriver (flathead or Phillips, depending on your clamps)
- Work gloves for protection
- Flashlight to see behind the dryer
- Vacuum with hose attachment for cleaning up lint
Many hardware stores sell vent hose kits that include the clamps. This saves you a trip and ensures everything fits together. We recommend spending a few extra dollars on a quality kit because cheap hoses crush easily and cause problems later.
Choosing the Right Hose Material
You will see several options at the store, and the choice matters more than you might think. We found that rigid metal pipes are the safest and most durable choice. They do not crush, they resist lint buildup, and they handle heat extremely well.
Semi-rigid aluminum hoses are a good middle ground. They bend more easily than rigid pipes, which helps in tight spaces. Just be careful not to kink them during installation. Flexible foil hoses are the cheapest option, but we strongly advise against them because they trap lint and crush very easily.
Unplugging and Moving Your Dryer
Safety comes first, so start by unplugging the dryer from the wall outlet. Never skip this step. Even with the dryer off, there is a risk of electrical shock if you touch the wrong parts. We also recommend turning off the gas supply if you have a gas dryer, just to be extra safe.
Pull the dryer straight away from the wall. You may need to wiggle it gently to break the hose’s connection. If the dryer is heavy, ask a friend to help you move it. Trying to do this alone can strain your back or damage the floor.
Handling Gas Dryers with Extra Care
For gas dryers, you have one more step. Locate the gas shut-off valve behind the dryer and turn it to the closed position. This valve usually has a handle that sits perpendicular to the gas line when closed. If you are unsure, call a professional for help.
Once the gas is off and the power is unplugged, you can move the dryer safely. Just remember to turn the gas back on and check for leaks before using the dryer again. You can test for leaks by applying soapy water to the connection and looking for bubbles.
Removing the Old Vent Hose
Now that your dryer is out in the open, you can see the old hose clearly. Use your flashlight to inspect both ends of the hose. You will find a clamp where the hose meets the dryer and another where it meets the wall or floor vent.
Loosen the clamp on the dryer end first. Most clamps have a screw that you turn counterclockwise to loosen. Once loose, slide the clamp down the hose and wiggle the hose off the dryer’s exhaust port. You might need to twist it back and forth to break the seal.
Detaching the Wall Connection
After the dryer end is free, move to the wall connection. Loosen the second clamp the same way. Pull the hose straight off the wall vent. Old hoses can be stiff and brittle, so work slowly to avoid cracking them and scattering lint everywhere.
We found that having a trash bag nearby helps. Drop the old hose directly into the bag to keep lint from spreading across your floor. The lint inside an old hose is extremely fine and can make a mess if you are not careful.
Cleaning the Vent Opening
With the old hose removed, you have a perfect opportunity to clean the vent opening. Use your vacuum with a hose attachment to suck out any loose lint. This simple step improves airflow and reduces fire risk.
You can also reach into the wall vent with a long brush to dislodge stubborn lint. Many guidelines suggest doing a thorough vent cleaning at least once a year (U.S. Fire Administration). Taking care of this now means better dryer performance and peace of mind.
Installing Your New Dryer Vent Hose
Take your new hose and slide one clamp over the end before attaching it to the dryer. This is a common mistake people make — they attach the hose first and then realize the clamp is missing. Slide the clamp on first, then push the hose onto the dryer’s exhaust port.
Push the hose on until it fits snugly over the port. You should feel it seat firmly against the metal. Then slide the clamp into position over the connection and tighten the screw. Make sure it is secure but do not overtighten, as this can warp the hose.
Keeping the Hose Short and Straight
Here is where many DIYers go wrong. We found that long, twisted hoses dramatically reduce airflow. The shorter and straighter your hose is, the better your dryer will perform. Think of it like a drinking straw — a straight straw is easier to sip through than a bent one.
If your hose is too long, cut it down to size with tin snips. Most dryers only need 4 to 6 feet of hose. Any extra length is just inviting kinks and lint buildup. You can always trim a little more if needed, but you cannot add length back.
Avoiding Sharp Bends and Kinks
Sharp bends are the enemy of good airflow. When you route the hose, aim for gentle curves rather than tight 90-degree angles. Each sharp bend creates a choke point where lint collects and airflow slows down.
If you must make a turn, use a metal elbow fitting instead of bending the hose. These fittings are inexpensive and keep the airflow smooth. We also recommend avoiding any screws or nails that could puncture the hose as you push the dryer back into place.
Securing the Wall End Connection
Now repeat the same process on the wall side. Slide the second clamp onto the hose before connecting it. Push the hose onto the wall vent opening and tighten the clamp securely. Give the hose a gentle tug to make sure it does not come loose.
This wall connection is just as important as the dryer connection. A loose fit here allows warm, moist air to escape into your laundry room. That wasted air leads to higher energy bills and can cause mold problems over time.
Double-Checking Every Connection
Before you move the dryer back, do a full inspection. Run your hand along the entire hose to feel for any kinks or sharp bends. Check both clamps to make sure they are tight. We found that taking this extra minute saves you from pulling the dryer out again later.
You can also do a quick airflow test. Turn the dryer on for a few minutes and place your hand near the outside vent opening. You should feel warm air moving through. If the airflow feels weak, re-check the hose for kinks or blockages.
Pushing the Dryer Back into Place
Now comes the careful part. Push the dryer back toward the wall slowly. Watch the hose as you move so it does not get pinched or crushed. Many people rush this step and end up with a crushed hose that ruins all their hard work.
We recommend pushing the dryer back a few inches at a time. Stop and check the hose’s position each time. If you feel resistance, stop and adjust the hose. It is much easier to fix a kink now than to pull the dryer out again later.
Reconnecting Power and Testing
Plug the dryer back into the outlet. If you have a gas dryer, turn the gas valve back on and check for leaks with soapy water. Run the dryer on a normal cycle to confirm everything works. Listen for any unusual noises that might indicate a problem.
Check the outside vent while the dryer runs. You should feel a steady stream of warm air. We found that clothes dry noticeably faster after a fresh hose installation. If your clothes still take forever to dry, the problem might be deeper in the wall vent system. If your dryer still underperforms after a new hose, our DIY dryer repair guide covers common fixes.
Checklist for a Successful Dryer Vent Hose Replacement
Use this quick checklist to keep yourself on track. It covers all the critical steps we discussed and helps you avoid common mistakes.
- Unplug the dryer and turn off gas if applicable
- Pull the dryer away from the wall for full access
- Loosen both clamps on the old hose
- Remove and discard the old hose properly
- Clean the vent opening with a vacuum
- Attach the new hose and tighten both clamps
- Push the dryer back and check for kinks
- Test the airflow at the outside vent
Keep this checklist handy while you work. Checking off each item gives you confidence that you did the job right. We also suggest keeping your new hose free of obstructions for at least the first few months to ensure optimal performance.
Comparing Hose Types at a Glance
If you are still deciding which hose to buy, this comparison table should help. We found that the right material makes a big difference in safety and longevity.
| Hose Type | Durability | Airflow | Fire Risk | Best For |
|---|---|---|---|---|
| Rigid Metal | Excellent | Excellent | Very Low | Long-term use |
| Semi-Rigid Aluminum | Good | Good | Low | Tight spaces |
| Flexible Foil | Poor | Poor | High | Short-term use |
Rigid metal is our top recommendation for most homes. It costs a bit more, but the safety and performance benefits are worth it. Many experts and fire safety organizations recommend rigid metal for dryer vents (National Fire Protection Association).
When to Call a Professional Instead
Sometimes the problem is not just the hose. If you notice that your vent duct inside the wall is crushed or severely clogged, you might need a professional. The same goes for vents that run long distances through the attic or crawl space.
We also suggest calling a pro if you feel unsure about any step. A small mistake can lead to a serious fire hazard. It is always better to ask for help than to risk your home’s safety over a do-it-yourself project.
Conclusion
Replacing your dryer vent hose is one of those small projects that pays off big. You will cut your fire risk, speed up drying times, and save money on your energy bill. We walked through the entire process, from choosing the right hose to double-checking your connections. The whole job takes about 30 minutes with basic tools.
Now it is your turn. Grab a rigid metal hose and two clamps from your local hardware store this weekend. Follow the steps we laid out, and take that extra minute to test the airflow. Your dryer will thank you with faster, safer loads of laundry for years to come.
Frequently Asked Questions
How often should I replace my dryer vent hose?
You should inspect your hose every year and replace it every 3 to 5 years. Flexible foil hoses wear out faster and may need swapping sooner. If you notice crushed sections, visible holes, or heavy lint buildup, replace it right away.
Can I use duct tape to seal my dryer vent hose connections?
No, do not use duct tape on dryer vents. The heat will cause the tape to dry out, crack, and fall off over time. Use metal hose clamps instead. They create a tight, durable seal that lasts.
Why does my dryer vent hose keep getting crushed when I push the dryer back?
This usually happens when the hose is too long or too flexible. Try shortening the hose so it has less slack to kink. You can also use a protective dryer vent standoff or a metal elbow to keep the hose away from the wall.
Is it okay to run my dryer with the vent hose disconnected?
Never run your dryer without a vent hose connected. This releases lint, moisture, and carbon monoxide into your home. It is a serious fire hazard and can also lead to mold growth. Always reconnect the hose before testing the unit.
What is the maximum length for a dryer vent hose?
You should keep the total vent run under 25 feet for best performance. Every bend in the hose counts as extra length, so subtract 5 feet for each 90-degree turn. Longer runs reduce airflow and increase the risk of lint clogs.