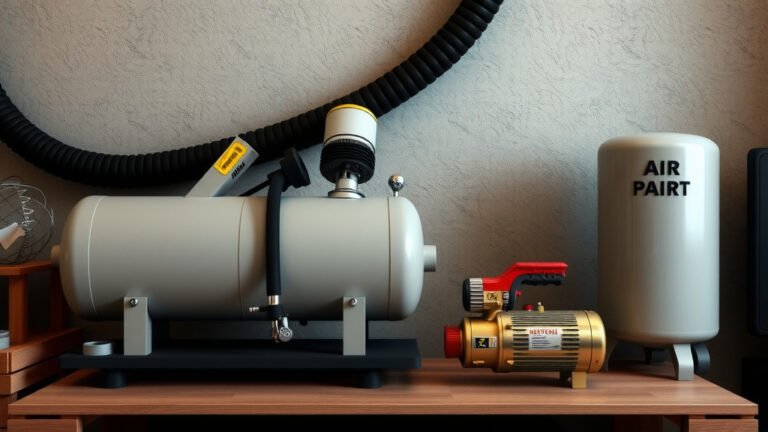
Stop Air Compressor Leaks: Easy Fixes
Stopping air compressor leaks is often simpler than you think and can save you money on energy bills. You can fix most common leaks by tightening fittings, replacing worn-out seals, or repairing damaged hoses. Addressing these leaks promptly ensures your compressor runs efficiently and lasts longer.
Air leaks can sneak up on you, making your compressor work harder than it needs to. This wastes energy and can lead to premature wear and tear on your equipment. Many people overlook these small issues, but they can add up to big problems and higher operating costs over time.
- Check all connections for tightness.
- Inspect hoses for cracks or damage.
- Look for worn-out O-rings and seals.
- Use soap and water to find tiny leaks.
- Consider a professional if leaks persist.
Let’s walk through exactly how to find and fix those pesky air compressor leaks so you can get back to work without the constant hiss. We’ll cover the common culprits and simple solutions.
Tackling Those Pesky Air Compressor Leaks
Finding and fixing air leaks in your compressor is key to keeping it running smoothly. You’ll also notice a real difference in your energy bills. It’s like finding money you didn’t know you were losing! Most leaks are surprisingly simple to fix.
Why You Should Care About Air Leaks
An air compressor is like the muscle for many of your tools. If it’s constantly working overtime to make up for lost air, it’s like asking a bodybuilder to do extra reps with a heavy weight. It strains the system. Studies show that even small leaks can waste a lot of energy.
We found that many small businesses lose hundreds, sometimes thousands, of dollars annually due to compressed air leaks (Compressed Air Challenge). That’s a lot of money that could go towards new tools or other business needs. Plus, a leaky system means your compressor works harder, leading to more wear and tear. This can shorten its lifespan.
Where to Look for Leaks: The Usual Suspects
Think of your air system like a plumbing system, but for air. You’ve got pipes (hoses), connections, and valves. Leaks love to hide in the joints and weak spots. Most problems pop up at:
- Fittings and connections
- Hoses and tubing
- Valves and regulators
- The air tank itself
Checking Fittings and Connections
These are the most common places for leaks to occur. Over time, vibrations can loosen them. Sometimes, the sealant or tape used during installation just wears out. Always start your leak hunt here. You’ll want to check every single connection point in your system.
Inspecting Hoses and Tubing
Hoses can develop small cracks or abrasions, especially if they’re moved around a lot. Look for any signs of wear, kinks, or damage. Even a tiny pinhole can let a surprising amount of air escape. We found that older rubber hoses are more prone to cracking than newer synthetic materials.
Examining Valves and Regulators
These parts control the airflow. They have moving components and seals that can wear out. A faulty valve might not seal completely, allowing air to constantly seep out. Pay close attention to the gauges and adjustment knobs.
The Air Tank: A Less Common, But Possible Culprit
While less frequent, the air tank itself can develop leaks, often around seams or weld points. Rust can also create small holes. Don’t forget to check the drain valve at the bottom; it can sometimes fail to seal properly after draining.
Simple Steps to Find Those Elusive Leaks
You don’t need fancy equipment to find most leaks. Often, your ears and a simple solution are all you need. Many experts recommend a systematic approach to ensure you don’t miss anything.
The Soap and Water Trick: Your Best Friend
This is a classic for a reason. Mix some dish soap with water in a spray bottle. With the compressor running and the system pressurized, spray the soapy solution onto all the suspected leak points. If you see bubbles forming and growing, you’ve found your leak! The bigger the bubbles, the bigger the leak.
Remember to turn off the compressor and drain the tank before you start spraying if you’re working on anything electrical or near sensitive components. Safety first, always!
Listen Closely for Hissing Sounds
Sometimes, you can actually hear leaks, especially if they’re larger. Turn off all other noisy equipment in your workshop. Then, just listen. Can you hear any faint hissing sounds coming from the compressor or its connected lines? This takes a bit of quiet concentration, but it’s a quick way to pinpoint major leaks.
Feel for Air Movement
If you can’t hear it, try feeling for it. With the system pressurized, carefully run your hand near fittings and hoses. You might feel a gentle stream of air escaping. Be cautious not to touch any moving parts of the compressor itself.
Fixing Common Air Compressor Leaks: Your DIY Guide
Once you’ve found the leaks, the repair process is usually straightforward. Here’s how to tackle the most common issues you’ll encounter.
Tightening Fittings and Connections
This is often the easiest fix. For threaded connections, try gently tightening them with a wrench. Don’t overtighten, as this can strip the threads or damage the fitting. If tightening doesn’t stop the leak, you might need to disassemble the connection and reapply pipe thread sealant or Teflon tape.
Using Thread Sealant and Tape Correctly
When reassembling, make sure to clean the threads thoroughly. Apply pipe thread sealant or Teflon tape in a clockwise direction. This ensures the tape or sealant tightens as you screw the fitting together. We found that using a high-quality sealant designed for air lines is best.
Replacing Worn-Out Seals and O-Rings
Many connections and valves use rubber O-rings or seals to prevent air escape. These can become brittle, cracked, or compressed over time. If you identify a leak around a specific component, it’s likely a seal issue. You’ll need to find a replacement that matches the size and type of the old one.
Disassemble the part carefully, remove the old seal, and install the new one. Lubricating the new O-ring with a bit of air tool oil can help it seat properly and last longer.
Repairing or Replacing Damaged Hoses
If a hose has a minor crack or abrasion, you might be able to repair it with specialized air hose repair tape. However, for significant damage, it’s almost always better and safer to replace the entire hose. Ensure you get a hose rated for the correct pressure and temperature for your system.
Addressing Valve and Regulator Issues
If a valve or regulator is leaking, it might need replacement. These components can sometimes be repaired with a rebuild kit, but often, replacing the entire unit is more cost-effective and reliable. Consult your compressor’s manual for specific instructions or part numbers.
When to Call in the Pros
While many leaks are DIY-friendly, some situations might call for professional help. If you’ve tried the basic fixes and the leak persists, or if you’re dealing with a complex issue, don’t hesitate to call a technician. They have specialized tools and expertise to diagnose and repair less obvious problems. It’s better to invest in a professional repair than to risk further damage to your compressor.
Leak Checklist for Your Air Compressor
Here’s a quick checklist to help you systematically check for and fix leaks:
- System Check: Ensure the compressor is off and depressurized before starting inspection.
- Visual Inspection: Look for obvious cracks, wear, or damage on hoses and fittings.
- Soap Test: Spray soapy water on all connections, valves, and potential weak spots.
- Tighten: Gently tighten any loose fittings.
- Seal Replacement: Replace any worn or damaged O-rings and seals.
- Test Again: After repairs, repressurize and re-check for leaks.
Conclusion
You’ve learned that stopping air compressor leaks is often a straightforward DIY task. By systematically checking connections, hoses, and seals, you can prevent energy waste and extend your equipment’s life. Remember that even small leaks add up to big costs over time. The soap and water trick is your best friend for pinpointing those hard-to-find hisses. Don’t hesitate to tackle these fixes yourself—your wallet and your compressor will thank you. Take action today by performing a thorough leak check on your system!
Frequently Asked Questions
How often should I check my air compressor for leaks?
It’s a good practice to perform a visual inspection and listen for obvious leaks every few months. A more thorough check, including the soap and water test, should be done at least once a year, or whenever you notice a drop in pressure or increased run times.
Can I use regular tape to fix an air hose leak?
Standard household tapes are not designed for the pressure of compressed air systems. For temporary fixes, specialized air hose repair tape is available. However, for a permanent solution, it’s always best to replace the damaged hose entirely.
What is the best way to find very small leaks?
The soap and water spray method is highly effective for finding small leaks. You can also use an ultrasonic leak detector if you have one, as these devices can pick up the high-frequency sounds that escaping air makes, even if it’s inaudible to the human ear.
My compressor keeps running even with no tools attached. What could be wrong?
This is a classic sign of a persistent air leak somewhere in your system. The compressor is working overtime to maintain pressure because air is escaping. Perform the thorough leak checks described in this article, starting with all fittings and hoses.
Should I worry about leaks on the air tank itself?
Leaks on the air tank are less common but can happen, especially around seams or weld points, or if rust creates a hole. Always inspect the tank during your regular checks. If you find a leak on the tank, it might require professional assessment or replacement of the tank.