Portable Clothes Dryer Guide: Setup, Use, and Safety
The easiest way to use a portable clothes dryer is to plug it in, load it with damp clothes, and select the right cycle. You don’t need a vent or a permanent hookup, making it perfect for apartments and small spaces. We found that a little prep work goes a long way for faster, fresher results.
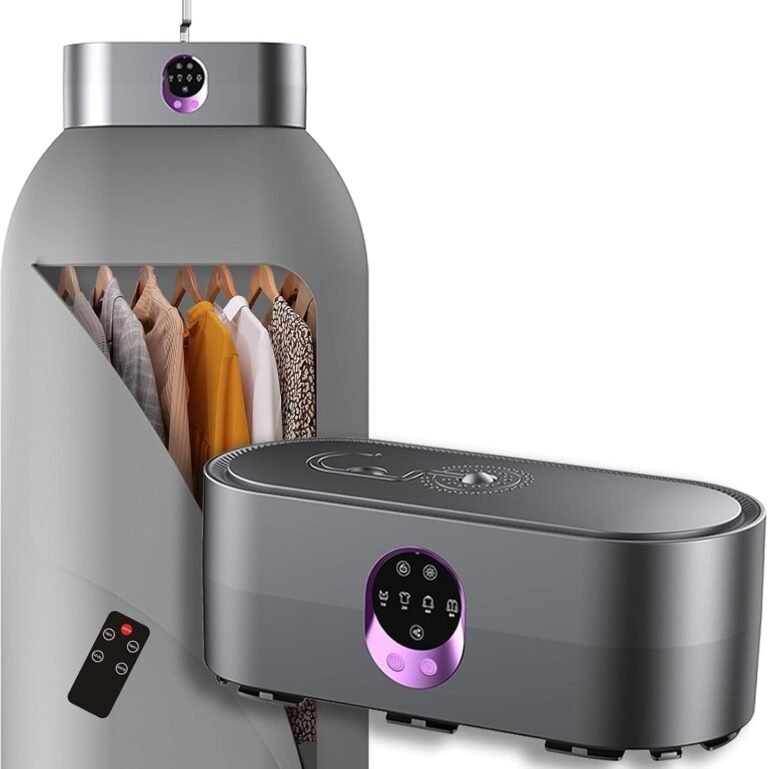
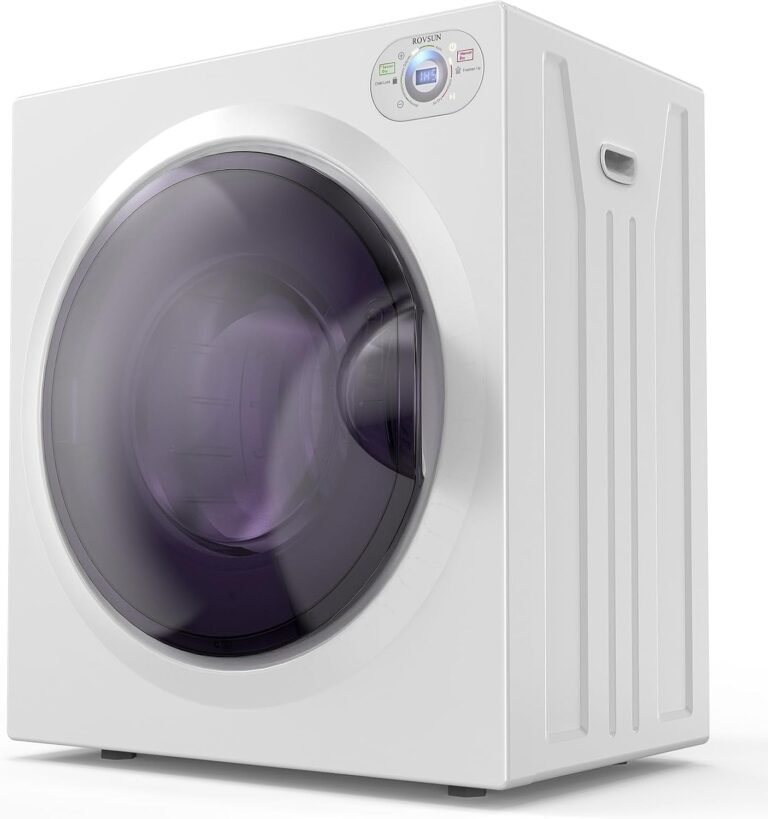
Portable dryers are compact, but they work hard. You can use them on a countertop, a sturdy shelf, or even mount them on a wall. They handle small loads of everyday laundry, delicates, and workout gear with ease. We found that understanding your machine’s settings is the key to avoiding wrinkles and overdrying.
- Place the dryer on a flat, stable surface with enough space for airflow.
- Load the drum with like items and never overstuff it.
- Choose a cycle based on the fabric type, like delicate or heavy-duty.
- Clean the lint filter before and after every single load.
- Remove clothes promptly to prevent wrinkles and save energy.
Below, we break down everything you need to know about using a portable clothes dryer, from setup to maintenance. Let’s walk through it step by step so you can get perfectly dry clothes without the hassle.
Getting Started With Your Portable Clothes Dryer
You can start drying clothes within minutes of unboxing. That is the beauty of these compact machines. Most models need zero installation. We found that plugging in and pressing start is truly that simple.
Think of a portable dryer as a mini version of a full-size unit. It does not need a vent hose or a wall mount. You just need an outlet and a stable surface. This makes it a smart pick for dorm rooms, RVs, and city apartments.
Finding the Right Spot for Setup
Placement matters more than you might think. A flat, firm countertop or a sturdy table works best. You want the dryer to sit level so the drum spins smoothly. Check the surface with a small level if you have one.
Airflow is another key part of setup. Leave a few inches of space around the machine. This prevents overheating and helps the machine breathe. Avoid placing it right against a wall or inside a closed cabinet.
Checking the Power Source
Standard models run on a regular 120-volt outlet. Look for a dedicated outlet that is not shared with other big appliances. Sharing can trip a breaker. We found that plugging straight into the wall beats using an extension cord.
Check the cord length before setup. Some cords are short. You might need to position the dryer close to the outlet. This is worth planning ahead so you are not stuck later.
Using the Drainage System
Some portable dryers collect water in a tank. You must empty this tank after each load. It slides out from the front or side, just like a dehumidifier.
Other models have a hose that drains into a sink. Many guidelines point to checking your manual for the right setup (Consumer Reports). A gravity drain works well if you can position it near a laundry sink.
Preparing Your Laundry Before Drying
A little prep goes a long way. Damp clothes that are separated and shaken out dry faster. We found that skipping this step leads to soggy spots and wrinkles. Spend two minutes prepping and save twenty minutes later.
Start by pulling items out of the washer promptly. Letting them sit creates mildew smells. Give each piece a gentle shake to loosen twists and tangles. This opens up the fabric so air can flow through.
Sorting Loads Like a Pro
Portable dryers work best with small, single-fabric loads. Mixing heavy jeans with light t-shirts is a recipe for uneven drying. The heavy items hog the heat, while the light ones overdry and shrink.
Group your laundry by weight and fabric type. Towels go together, and delicates go together. We found that this simple habit improves results dramatically. Your machine will thank you, too.
Checking Labels for Heat Settings
Read the care tag before you load anything. That little symbol tells you the right heat level. Some fabrics like silk or spandex only tolerate air fluff. Others, like cotton, can handle high heat.
When in doubt, start with a lower heat setting. You can always add time, but you cannot undo shrinkage. Many experts say this is the number one mistake people make with any dryer (Good Housekeeping).
Loading the Dryer Correctly
Overloading is the fastest way to ruin a portable dryer. These machines are small for a reason. They handle one to three items at a time, depending on size. Cramming in more means damp, wrinkled clothes.
You want clothes to tumble freely inside the drum. A good rule is to fill the drum only half full. This leaves space for hot air to circulate. We found that smaller loads actually finish faster than big ones.
How Much Can You Fit?
Think of it like a salad bowl. You would not pile it to the top and expect to toss it. The same logic applies to your dryer. Here is a quick guide for common items:
- Heavy items like bath towels: dry one to two at a time.
- Medium items like jeans or hoodies: dry two to three.
- Light items like t-shirts or blouses: dry three to four.
- Delicates like bras or silk tops: dry five to six small pieces.
Balancing the Load Inside the Drum
An unbalanced drum is loud and inefficient. It can also damage the machine over time. Place items evenly around the drum rather than in one tight clump.
If the dryer starts shaking, pause it and rearrange. You might need to add or remove an item. We found that fixing the balance right away prevents mid-cycle jams.
Selecting the Best Drying Cycle
Every portable dryer has a set of cycle options. Some are simple, with just low and high heat. Others are fancy, with timed settings and sensors. Knowing what each cycle does saves you from guesswork.
Match the cycle to the fabric, not your mood. That is the golden rule. We found that using the wrong cycle is the main reason people get frustrated with these machines.
Comparing Heat Settings and Timers
High heat is for heavy cottons and towels. Low heat is for synthetic blends and knits. Air fluff uses no heat at all, just tumbling. It is perfect for freshening up pillows or removing pet hair.
Timers let you set a specific drying length, like 30 or 60 minutes. Sensor cycles stop when clothes are dry. We found that sensors are more energy-efficient and prevent overdrying. Check your model to see which option you have.
| Cycle Type | Best For | Heat Level |
|---|---|---|
| High Heat / Heavy Duty | Towels, jeans, thick cotton | High |
| Medium / Normal | Mixed loads, t-shirts, socks | Medium |
| Low / Delicate | Synthetics, activewear, lingerie | Low |
| Air Fluff / No Heat | Pillows, sneakers, freshening items | None |
Tips for Faster Drying Times
Nobody wants to wait forever for one shirt to dry. The good news is that you can speed things up. A few simple tricks cut drying time by a significant margin. We found that these hacks work with every portable dryer brand.
First, wring out excess water before loading. If your washer has a high spin cycle, use it. The less water in the fabric, the less work the dryer has to do. It is basic math, really.
Using Dryer Balls and Clean Filters
Dryer balls are a game changer for portable machines. They bounce around and separate fabric layers. This lets hot air reach every fiber. Wool balls also absorb moisture and cut static without harsh chemicals.
Check your lint filter after every single load. A clogged filter blocks airflow and prolongs drying. We found that cleaning it with a soft brush adds minutes to the machine’s life. It is a tiny step with big results.
Speeding Up With Half Loads
Drying half a load is always faster than a full load. That might sound obvious. But many people still overstuff, then complain about slow cycles. Trust the math: less fabric equals less time.
If you are in a rush, split one larger load into two smaller batches. The first batch dries while the second waits. You actually save time overall compared to one dense load.
Removing Clothes and Preventing Wrinkles
The timing of removal matters. Leaving clothes sitting in the drum after drying creates deep wrinkles. We found that pulling items out right away keeps them looking fresh. It also lets you fold them while they are still warm.
Set a timer or stay nearby during the last few minutes. The moment the machine stops, open the door. Do not walk away and forget about it. That is how you end up ironing a load of t-shirts.
The Shake-and-Fold Technique
Take each item out and give it a sharp snap. This relaxes the fabric fibers and releases creases. Lay the item flat for a moment before folding. This tiny ritual makes a visible difference.
Hang delicate items immediately after shaking. Dresses, blouses, and button-downs fare better on hangers. We found that this keeps them wrinkle-free and also saves drawer space.
Maintaining Your Portable Dryer
Portable dryers need regular care to perform well. They are compact, but they still work hard. A few minutes of maintenance each week prevents costly breakdowns. We found that most issues come from neglect, not wear.
Start with the lint filter after every load. Then move on to the exhaust area. Even if your model is ventless, check for lint buildup in the seams. This keeps airflow strong and reduces fire risk (National Fire Protection Association).
Weekly Cleaning Routine
Wipe down the drum interior with a damp cloth once a week. This removes residue from fabric softeners and detergents. It also keeps the drum smelling fresh between loads.
Check the water collecting tank, if your model uses one. Empty it after every use, not just when it looks full. Stagnant water leads to mold and mildew. We found that a quick rinse of the tank prevents odors too.
When to Deep Clean the Unit
Once a month, do a deeper clean. Use a small vacuum attachment to clear dust from the vents. Wipe down the door seal and hinges with a mild soap solution. This area collects lint and moisture over time.
If you see a musty smell, run an empty cycle with a cup of white vinegar. This natural deodorizer works wonders. It breaks down buildup without harsh chemicals. It is a simple fix that costs pennies.
Safety Tips You Should Never Skip
Portable dryers are safe when used correctly. But they are electrical appliances with heat. That means basic precautions are non-negotiable. We found that reading the manual is the smartest first step.
Never run the dryer unattended for long periods. Check on it periodically, especially on high heat. This matters if you live alone or have pets that might knock the machine over.
Keeping Flammables Away
Do not dry items stained with oil, gasoline, or cooking oil. These are fire hazards even after washing. The heat can cause residual oils to ignite. Many safety reports stress this warning (U.S. Consumer Product Safety Commission).
Check pockets before loading. Remove lighters, batteries, and lip balms. These items can melt or even burst in high heat. It takes five seconds and protects your machine.
A Handy Checklist for Every Load
Follow this list each time you use your portable dryer. It keeps the process smooth and your clothes looking great.
- Place the dryer on a level, heat-safe surface away from water sources.
- Sort items by fabric weight and read all garment tags.
- Shake out each piece before placing it in the drum.
- Load only half full so clothes can tumble freely.
- Choose the right cycle and heat level for the fabric.
- Clean the lint filter and empty the water tank when done.
Keep this checklist near your dryer. It is a handy reminder for busy weeks. You can even snap a photo with your phone and save it as a favorite. That way, it is always within reach.
Conclusion
Using a portable clothes dryer is all about working with its size, not against it. You get the best results when you place it on a level surface, sort your laundry by fabric type, and always load the drum only halfway. Remember to match the heat setting to the fabric, and never skip cleaning the lint filter.
These small machines reward a little attention to detail. A fast shake-out before loading and a prompt fold after the cycle ends go a long way. We believe you will find the routine becomes second nature within just a few loads. Try applying this checklist to your very next batch of laundry to see how smooth the process can be.
Frequently Asked Questions
Can you plug a portable dryer into a regular wall outlet?
Yes, you can use a standard 120-volt outlet for most portable dryers. This is what makes them so convenient for apartments and dorms. Just avoid using a long extension cord. Plug the dryer directly into the wall to keep it running safely.
How long does a portable clothes dryer take to dry towels?
Expect heavy towels to take anywhere from 60 to 90 minutes. The exact time depends on the size of the load and your machine’s heat output. We found that drying just one or two towels at a time speeds things up. Using a high spin cycle in your washer also cuts down this time.
Is it okay to leave a portable dryer running while you sleep?
We strongly advise against running any dryer unattended. This includes portable models that sit on a countertop. The combination of heat and electricity means you should stay awake and alert. Plan your laundry time so you can check on the machine periodically.
Why does my portable dryer shut off before the clothes are dry?
This is often caused by a clogged lint filter or a full water tank. A full tank triggers the auto-shutoff feature on many models. You should also check the heat setting you selected. A low heat setting might not be strong enough for thick fabrics like denim.
Can you put wet clothes directly into a portable dryer?
Technically you can, but you will get better results if you do not. Wring out your clothes first or run a high-spin cycle in the washer. Removing extra water prevents the dryer from working overtime. This simple step reduces wear on your machine and saves energy. We found it prevents weird damp spots on heavier items too.