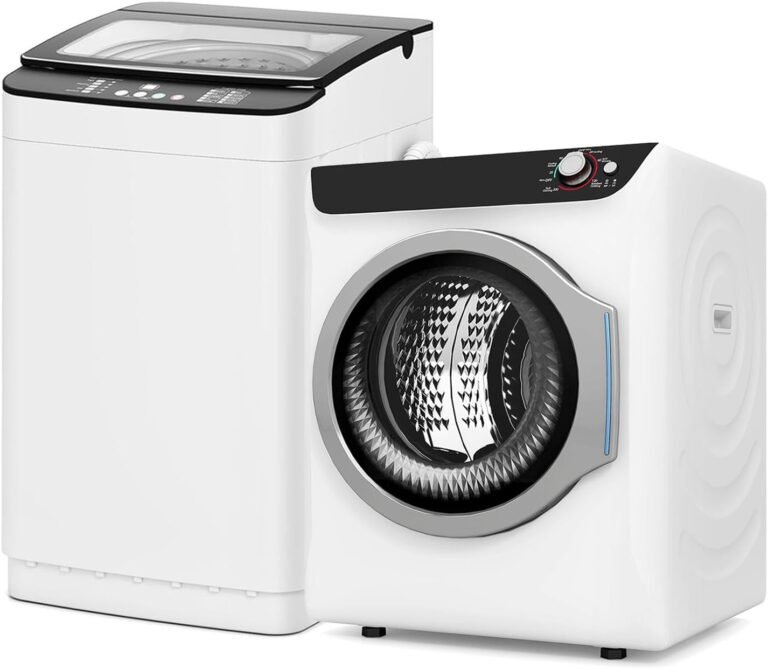
How to Work a Clothes Dryer: Easy Settings Guide
To work a clothes dryer, sort your laundry by fabric type and weight, then load the drum loosely, select the right cycle and heat setting, and press start. You’ll also want to clean the lint filter before every load to prevent fires and cut drying time. That’s the whole job in one sentence—simple, right?
We found that most dryer mishaps come from guessing instead of checking the dials. Your machine likely has a bunch of buttons, but you really only need to master a few key ones: cycle type (delicates, normal, heavy-duty), heat level (low, medium, high), and the moisture sensor if you have it. Get those right, and you’ll stop shrinking your favorite sweaters and wasting energy on over-dried towels.
- Sort properly: Keep heavy items like jeans separate from light fabrics like t-shirts so they dry evenly.
- Don’t overload: Your dryer needs room for air to circulate; fill it no more than three-quarters full.
- Match the cycle: Use delicate/low heat for synthetics and workout gear, and high heat for towels and cotton sheets.
- Clean the lint filter: Do this every single load—it speeds up drying and prevents a major fire hazard.
- Shake it out: Give clothes a quick shake before tossing them in to reduce wrinkles and clumping.
Below, we break down everything you need to know about working your dryer like a pro—from decoding those confusing buttons to fixing common problems. Let’s walk through it step by step so you never pull out a damp, wrinkled mess again.
Mastering Your Dryer Settings Without the Guesswork
Your dryer’s control panel might look like a spaceship cockpit. But we found that most machines follow the same basic logic. Once you crack that code, you’ll feel like a laundry wizard.
The key is understanding what each setting actually does. The cycle name tells you how long it runs. The heat level tells you how hot the air gets. And the sensor tells the machine when to stop. That’s really all there is to it.
Decoding the Control Panel in Plain English
Walk up to any dryer and you’ll see similar options. Let’s break down the common ones so you can make confident choices.
Automatic vs. Timed Dry is the biggest fork in the road. Automatic dry uses moisture sensors to stop when clothes are dry. Timed dry just runs for a set period, regardless of what’s inside.
Cycle names like “Normal,” “Casual,” and “Heavy Duty” mostly adjust the heat and tumble speed. “Delicates” uses low heat and gentle motion. “Sanitize” uses extra-high heat to kill germs.
Temperature buttons let you override the default heat. This is handy when you have a bulky comforter that needs low heat but a long tumble time.
When to Use Automatic vs. Timed Dry
We found that automatic dry is the best choice for most loads. It prevents over-drying, which saves energy and protects your clothes. It also stops the moment things are dry, so you don’t get that crunchy, static-filled mess.
Timed dry is your backup. Use it for small loads or items the sensor might miss, like a single jacket or a pair of sneakers. Just keep an eye on the clock to avoid over-drying.
Heat Settings Explained Simply
Heat is where most people go wrong. High heat feels efficient, but it’s the reason your shirts shrink and your towels lose their fluff. We recommend matching heat to fabric type instead of picking the hottest option.
Low heat (delicates) is for rayon, silk, spandex, and workout gear. It’s also great for anything with elastic, like underwear or fitted sheets. The gentle warmth gets the job done without melting synthetic fibers.
Medium heat (permanent press) fits most everyday items like t-shirts, jeans, and casual blouses. This is a safe middle ground if you’re unsure. It prevents excessive wrinkling while still drying thoroughly.
High heat (heavy duty) belongs to towels, cotton sheets, and jeans. These thick fabrics need the extra warmth to dry completely. Just don’t leave them in too long or they’ll come out stiff.
Getting Your Laundry Ready for the Dryer
We know you just want to toss everything in and hit start. But a little prep work goes a long way. Two minutes of sorting can save you two hours of re-washing later.
The dryer isn’t magic. It needs air to move freely around each item. That means paying attention to what you load and how you load it. Here’s what we found works best.
Sorting by Weight and Fabric Type
Heavy items like denim and towels trap moisture. Light items like t-shirts dry in half the time. If you mix them, the heavy stuff will still be damp when the lights are already dry.
- Keep heavyweight items (towels, jeans, hoodies) in one load.
- Put lightweight items (t-shirts, underwear, blouses) in another.
- Separate delicates (lingerie, silk, lace) into a mesh bag or air-dry them.
- Check pockets for pens, tissues, and ChapStick before loading.
- Zip zippers and fasten hooks to prevent snags on other clothes.
How Full Should You Pack the Drum?
We found that most people overload their dryers. It’s tempting to cram everything in for one cycle. But a packed drum leaves no room for air, and air is what actually dries your clothes.
Fill the drum to about three-quarters full. This allows clothes to tumble freely and fluff up. If you can’t see any space between items, you’ve put too much in. Take some out and run a second load.
Step-by-Step Guide to Running a Load
Alright, let’s walk through this together. Think of it as a simple recipe. Follow these steps in order and you’ll get consistent results every time.
Once you do this a few times, it becomes muscle memory. You won’t even have to think about it. But for now, let’s go through the motions together.
Step 1: Clean the Lint Filter Every Time
This is non-negotiable. A clogged lint filter blocks airflow, which means longer drying times and higher energy bills. More seriously, it’s a major fire hazard. The CDC and fire safety experts agree on this point.
Pull out the filter, peel off the fuzz, and you’re done. Do this before every single load. If the filter looks clogged even after cleaning, wash it with soap and water, then let it dry completely.
Step 2: Give Your Clothes a Quick Shake
Before tossing items in, give each piece a firm shake. This separates tangled fabrics and reduces wrinkles. It also lets air reach every inch of the garment during the cycle.
We found that shaking also helps items dry more evenly. Clothes that are bunched up tend to stay damp in the middle. A simple shake can cut your drying time by a noticeable margin.
Step 3: Load and Choose Your Settings
Load the drum loosely and close the door. Now, pick your cycle and heat level based on what’s inside. When in doubt, start with the permanent press cycle and medium heat. It’s the safest all-around bet.
If your machine has options like “Wrinkle Guard” or “Steam,” feel free to use them. These add a few extra minutes but keep your clothes looking fresh. The main settings matter most, though.
Step 4: Press Start and Check Mid-Cycle
Hit start and let the machine work. For most loads, you’ll want to check on progress around the halfway point. Open the door and feel a few items. If they’re still very wet, let the cycle continue.
We recommend pulling clothes out as soon as the cycle ends. Leaving them sitting inside lets wrinkles set in. And if you’re using timed dry, set a timer so you don’t forget about the load.
Choosing the Right Dryer Cycle for Any Load
So what cycle should you actually pick? The answer depends on what’s in the drum. We found that matching the cycle to the heaviest item in the load is a smart rule of thumb.
Here’s the simple breakdown we use for ourselves. Keep it handy until you memorize it.
Cycle-by-Cycle Quick Reference
| Cycle Name | Best For | Heat Level |
|---|---|---|
| Delicates | Silk, rayon, spandex, bras | Low |
| Permanent Press | Work shirts, blouses, casual wear | Medium |
| Normal/Cotton | T-shirts, jeans, everyday clothes | Medium-High |
| Heavy Duty | Towels, sheets, thick blankets | High |
| Air Fluff | Dusting off, refreshing, no heat | None |
This table is your cheat sheet. It covers about 90 percent of your laundry needs. The rest is just knowing when to make exceptions for special items.
What About Workout Clothes and Activewear?
Most activewear is made of synthetic fabrics like polyester and spandex. These melt or warp under high heat. We found that low heat and a gentle cycle is the only way to go.
Bras, swimsuits, and anything with elastic also deserve low heat. High heat breaks down elastic over time, leaving you with saggy waistbands and stretched-out straps. Treat them right and they’ll last longer.
Common Dryer Problems and How to Fix Them
Sometimes things go wrong, even when you do everything right. We’ve rounded up the most common dryer complaints and the simple fixes that resolve them.
Before you call a repair person, try these solutions. You might just save yourself a service fee and a headache. Most of these take less than five minutes.
Clothes Still Damp After a Full Cycle
First, check the lint filter. Even a thin layer of fuzz can slow drying significantly. Next, make sure you haven’t overloaded the drum. Both are easy fixes.
If the filter is clean and the load is small, check the vent hose behind the dryer. A clogged vent restricts airflow and causes damp loads. Many experts say this is a common culprit, and cleaning it twice a year helps. Learn how to clean your dryer vent to prevent clogs and fires.
Clothes Come Out Too Hot or Shrunken
Your heat setting is likely too high for the fabric. Switch to a cooler setting next time. Also, check that you’re not using the heavy-duty cycle for light items. The two go hand in hand.
If shrinkage is a recurring issue, try pulling clothes out slightly before the cycle ends. Hang them to finish drying. Air-drying is the only way to guarantee zero shrinkage.
Static Cling and Wrinkles
Static happens when clothes are over-dried. Your dryer sensor should prevent this, but timed dry often pushes past that point. Use the automatic cycle and pull clothes out promptly.
For wrinkles, the best defense is shaking clothes before loading. And don’t let finished laundry sit in the drum. The longer it rests, the more creases appear. Wrinkle Guard settings help, too.
Energy-Saving Tips That Actually Matter
Dryers are energy hogs. According to the U.S. Department of Energy, they’re one of the biggest electricity consumers in your home. But you don’t need to give up your dryer to save money.
We found that a few simple habits cut energy use substantially. Start with these and you’ll notice the difference on your next utility bill.
Use the Moisture Sensor Feature
If your dryer has an automatic sensor mode, use it. This feature stops the machine the moment clothes are dry. It prevents wasted energy and spares your fabric from heat damage.
Timed dry runs the full duration, even if clothes dried earlier. That’s wasted electricity and unnecessary wear. The sensor mode takes the guesswork out of every load.
Dry Similar Fabrics Together
When you mix heavy towels with light t-shirts, the machine runs longer to dry the towels. By then, the t-shirts are over-dried. Sorting properly means the cycle finishes faster for everything.
It also means you won’t need to run touch-up cycles. One clean pass through the dryer is all it takes when loads are matched correctly. Your clothes will thank you.
Dryer Safety Checklist for Every Household
We get it. Safety checklists sound dull. But dryer fires are real, and most are preventable with basic habits. The National Fire Protection Association lists dryer fires as a leading cause of home fires.
You don’t need to become a safety expert. Just adopt these five habits and you’ll reduce your risk dramatically.
- Clean the lint filter after every single load without exception.
- Inspect the vent hose annually for kinks, cracks, or blockages.
- Never run the dryer overnight or while you’re away from home.
- Keep the area clear of flammable items like boxes and cleaning supplies.
- Don’t dry items with oil stains or grease residue on them.
- Read care labels on new items
Conclusion
You’ve got everything you need to run your dryer like a pro. The secret isn’t fancy technology. It’s consistent habits. Clean the lint filter every time. Load the drum loosely. Match the heat setting to your fabric.
Start with the permanent press cycle and medium heat when you’re unsure. That safe combo works for most everyday loads. Then, pull your clothes out right when the cycle ends. You’ll save energy, prevent shrinkage, and skip the wrinkles.
Your next load is your practice round. Try one new habit today—maybe shaking your clothes before you toss them in. Small changes add up to better results.
Frequently Asked Questions
How long does a typical dryer cycle take?
Most standard cycles run between 30 and 45 minutes. Automatic dry stops when sensors detect your clothes are dry. Timed dry runs for whatever duration you set. Large loads like towels or heavy bedding can take up to 60 minutes.
Can you put wet clothes directly in the dryer?
Yes, wet clothes are actually ideal for the dryer. The tumbling action works best when items are freshly spun from the washer. Just shake out each piece before loading. Excessively dripping clothes will just add extra drying time.
Is it cheaper to run the dryer at night?
It depends on your utility plan. Some providers offer lower rates during off-peak hours. Check your energy bill or call your provider to confirm. Otherwise, running the dryer during the day doesn’t cost more on standard plans.
Why does my dryer stop before clothes are fully dry?
Your moisture sensor might be dirty or blocked. Find the sensor strips inside the drum and wipe them clean. You could also be overloading the drum, which confuses the sensor. Try smaller loads and clean the sensor monthly.
Should you unplug the dryer when it’s not in use?
Unplugging is a safety bonus, but you can leave it plugged in. The dryer uses minimal electricity when idle. If you’re worried about lightning strikes or power surges, unplugging is a smart habit. Just make sure the area around the outlet stays clear.