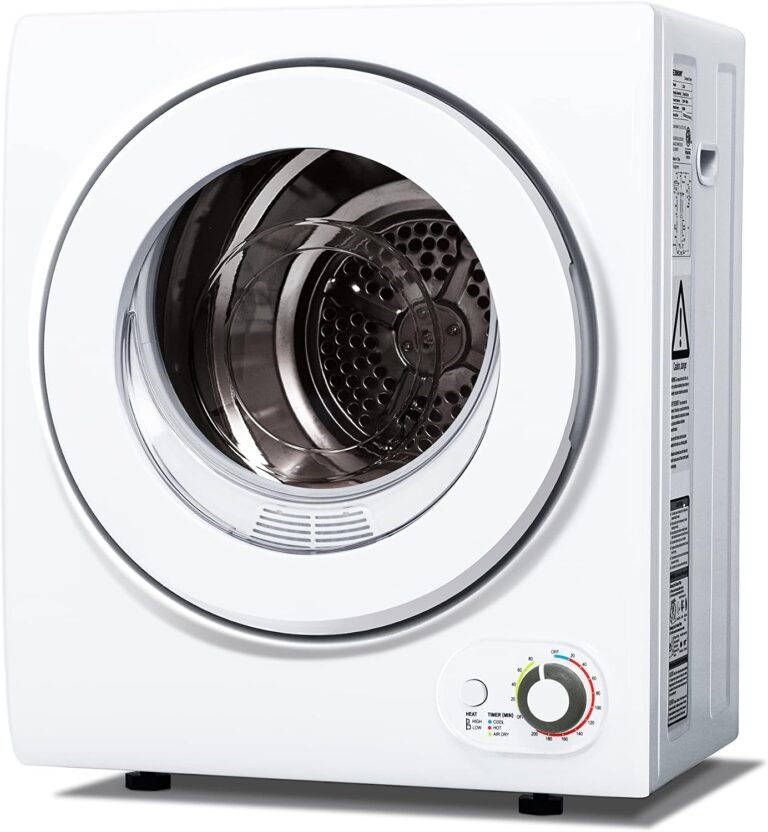
Why Is My Clothes Dryer Squeaking? Top Causes
Your clothes dryer is squeaking because a moving part likely needs lubrication or has worn out. The most common culprits are the drum support rollers, idler pulley, or the drive belt. We found that these parts dry out over time, which creates that annoying high-pitched noise you hear.
That squeak usually gets worse the longer you ignore it. It’s your dryer’s way of telling you something is rubbing together when it shouldn’t be. While it might be tempting to just turn up the TV, fixing this early can save you from a costly breakdown later. Many experts say a simple tune-up is all you need to get things quiet again.
- The squeak is rarely dangerous – it’s usually a worn part, not a fire hazard.
- Lubricating the rollers and pulley fixes most common squeaks in under 30 minutes.
- A worn drive belt can also cause a squeak, and it’s easy to check.
- Ignoring the sound can damage the drum and lead to a much bigger repair bill.
- You can fix it yourself with basic tools and a few affordable parts.
Below, we break down exactly how to pinpoint the source of that squeak and walk you through the simple steps to silence it for good. Let’s get your laundry room quiet again.
Common Causes of That Loud Dryer Squeak
You hear that high-pitched squeak every time the drum turns. It happens on every cycle, and it gets louder as the load gets bigger. We found that the noise almost always comes from one of three areas: the drum rollers, the idler pulley, or the drive belt. These parts work together to spin your clothes. When one of them wears out or dries up, it rubs against metal or plastic and squeals.
The trick is figuring out which one is the problem. You can do this by listening closely and checking a few simple things. Most of the time, you won’t need a repair technician. You just need some time, a few tools, and a replacement part that costs less than twenty bucks (Consumer Reports).
Drum Support Rollers
The drum support rollers hold the drum steady while it spins. They sit on the rear of the dryer and take a lot of friction. Many experts say these are the #1 cause of a squeaking dryer. Each roller has a small plastic wheel and a metal axle. Over time, the grease dries out and the plastic grinds against the metal.
You can test this without taking the dryer apart. Stop the cycle and reach inside the drum. Spin it by hand. If you hear a rough squeak or feel a grinding sensation, the rollers are likely your culprit. You will need to replace them. Most dryers have two or four rollers, and it is smart to replace them all at once.
How to Check the Rollers
Unplug the dryer first. Never work on a dryer while it is plugged in. Pull the dryer away from the wall and remove the back panel with a screwdriver. You will see the rollers mounted near the drum. Spin each one with your finger. If the wheel wobbles, feels stiff, or makes noise, it needs replacing. We found that a stuck roller is the reason most dryers start squealing suddenly.
The Idler Pulley and Tension Spring
The idler pulley is a small wheel that keeps the drive belt tight. It sits on a spring-loaded arm and presses against the belt. As it spins, the pulley wheel rides on a metal stud. When the grease dries, you get a rhythmic squeak that speeds up as the dryer runs. This sound often comes from the bottom of the dryer.
You can listen for this one. A bad idler pulley makes a steady, almost musical squeal. It often sounds like a bird chirping. Replacing the pulley is a common DIY fix that takes about twenty minutes. The part is cheap, and you can usually find it online (Appliance Repair forums).
Signs It Is the Pulley
Turn the dryer on and listen to the front bottom area. If the squeak is steady and does not change with different loads, it is the pulley. You can also open the door and press the drum down slightly. If the squeak stops, the belt tension is off, and the pulley is failing.
Worn Drive Belt
The drive belt wraps around the drum and connects to the motor. It is a long rubber strap with grooves. When the belt wears down, it can slip and squeak. A frayed belt also rubs against the metal frame. Many experts say that a worn belt often makes a squeaking sound that comes and goes during the cycle.
To check the belt, unplug the dryer and look underneath. If the belt has cracks, shiny spots, or chunks missing, replace it. A new belt is usually less than fifteen dollars. We found that replacing the belt at the same time as the rollers saves you from doing the same disassembly job twice.
Belt vs. Roller Noise
Here is a quick way to tell them apart. A bad belt makes a lower-pitched, almost groaning squeak. A bad roller makes a sharp, high-pitched squeal. A bad pulley sounds like a chirp. If you are unsure, check the belt for wear first because it is the easiest to see.
Other Less Common Reasons for the Squeak
Sometimes the squeak is not the usual suspect. We found that a few other parts can make noise, and these often surprise people. Do not skip this list before you call a repair service. You might catch an easy fix that saves you a service fee.
Drum Glides and Felt Seals
The drum glides are strips of felt or plastic that sit at the front of the drum. They help the drum slide smoothly inside the cabinet. Over time, these wear down. When they do, the metal drum rubs directly against the metal frame. That makes a metallic, screeching sound that almost sounds like nails on a chalkboard.
Check the front edges of the drum. If you see any wear marks on the metal, or if the felt is loose and flapping, replace the glides. They are very cheap and snap right in. Many appliance repair guides suggest replacing the glides whenever you replace the rollers (RepairClinic resources).
Motor Bearings or Blower Wheel
The motor sits at the bottom of the dryer. It has its own bearings that can dry out. A bad motor bearing makes a low rumble that escalates into a squeak. The blower wheel pushes hot air through the dryer. If a small item, like a sock or loose change, gets lodged in the blower, it can scrape and squeak.
Listen to the back of the dryer near the floor. If the squeak comes from that spot, it is usually the motor or blower. Fixing these is more involved. You might want a professional for motor issues. But check for debris first. A penny stuck in the blower wheel causes a lot of noise, and removing it takes five minutes.
Loose Drum Bearings and Padding
The rear of the drum sits on a bearing. This bearing can wear out, especially on older dryers. A worn bearing makes a constant, heavy squeak that gets louder with heavy loads. You may also see rust dust around the rear of the drum. If the drum feels loose when you wiggle it up and down, the rear bearing is shot.
Replacing the rear bearing is a bigger job. You have to slide the drum out to access it. We found that this repair takes about an hour for a beginner. But it is doable with a socket set and some patience.
How to Diagnose the Squeak Step by Step
You do not need to be a handyman to figure this out. We found that a simple process of elimination works best. Start with the easiest checks and move to the harder ones. This saves you time and money. Here is the exact roadmap we recommend.
Tools You Need Before You Start
You will need a few basic items. Most of these are already in your toolbox:
- A Phillips-head screwdriver for the panels.
- A nut driver or socket set for the rollers.
- A putty knife to pop off front clips.
- Shop towels to clean up old grease and lint.
- Lithium grease for the pulley and rollers (optional for new parts).
- A work light so you can see into the dark corners.
Quick Sound and Movement Tests
Run an empty dryer on air fluff for a couple of minutes. Listen to where the squeak comes from. Is it front or back? High or low pitch? Now stop the dryer and open the door. Spin the drum by hand. Does it resist or grind? Check the belt tension by pressing on the bottom of the drum. If it feels loose, the tensioner is failing.
These tests point you to the right part before you take anything apart. We found that people who skip this step often replace the wrong piece and still have the squeak.
Step-by-Step Fix for the Most Common Squeak
Here is the process for replacing the drum rollers and belt. This combo fixes the majority of dryer squeaks. You can do this in under an hour. We found that even first-timers handle it without issues.
Unplug and Prep the Dryer
Pull the dryer out and unplug it. Shut off the gas valve if you have a gas dryer. Remove the lint screen and the front panel screws. On most dryers, the front panel pops off after you release a couple of clips at the top. Set the screws aside in a small bowl so they do not roll away.
Remove the Drum and Replace the Parts
With the front off, you will see the belt wrapped around the drum. Take a photo with your phone so you remember how it goes back. Lift the drum slightly and slide the belt off the pulley. Pull the drum out carefully and set it on a soft surface. Now you can access the rollers. Remove the bolts holding them and slide in the new ones. Put the new belt around the drum with the grooves facing inward. Replace the drum and hook the belt back onto the pulley. Reinstall the front panel and screws.
Pro Tips for a Smooth Install
Use a marker to note the belt path before you remove the drum. Spin the rollers by hand after installing to make sure they turn freely. Most new rollers come pre-greased. If yours are dry, add a thin layer of lithium grease. Do not over-grease, or it will attract lint and cake up.
When to Call a Professional Instead
You can handle most squeaks yourself. But some situations are better left to a pro. If the squeak is accompanied by a burning smell, stop using the dryer immediately. That could be an electrical issue. If the motor bearings are bad, you will need a licensed technician. The motor is the heart of the dryer, and replacing it involves wiring.
We found that a service call costs between 100 and 200 dollars for diagnosis and labor. If you have an older dryer that is over ten years old, it might be smarter to buy a new machine. Compare the repair cost to the price of a new dryer. Many consumer guides say if the repair is more than half the cost of a new dryer, replace it.
Preventive Maintenance to Keep It Quiet
The best way to handle a squeak is to stop it before it starts. A little routine care goes a long way. We found that dryers last much longer when you do these simple tasks every six months.
Clean the Lint and Vacuum the Interior
Lint builds up around the motor and rollers. It traps heat and causes friction. Vacuum the bottom of the dryer with a hose attachment. Clean the lint trap after every single load. This is the single best thing you can do for your dryer (U.S. Fire Administration guidance).
Lubricate Moving Parts Regularly
Apply a small amount of high-temperature grease to the roller axles and the idler pulley stud. We found that greasing every six months keeps the parts spinning freely. Use only appliance-grade grease. Do not use WD-40. It dries out quickly and leaves a sticky residue that attracts lint.
Quick Checklist Before You Decide
Here is a handy checklist to run through before you call anyone. Check each item and mark it off.
- Is the dryer unplugged before any inspection? Yes or no.
- Did you spin the drum by hand to feel for grinding?
- Did you check the belt for cracks or shiny spots?
- Did you inspect the rollers for stiffness or wobble?
- Did you listen near the bottom for a pulley chirp?
- Did you clear the blower wheel of any trapped items?
Working through this list takes ten minutes. It points you to the right fix and saves you from buying parts you do not need.
Final Thoughts on Silencing the Squeak
A squeaking dryer is annoying, but it is also a friendly warning. It tells you a part is wearing out before it breaks completely. You can almost always fix it yourself with a little research and basic tools. We found that the confidence you gain from fixing your own appliance is worth the effort. You save money, and you keep your dryer running for years longer.
So grab your screwdriver, unplug the machine, and get to work. Your laundry room will be quiet in no time.
Conclusion
That squeaking dryer is just asking for a little attention. You now know the usual suspects: drum rollers, the idler pulley, and the drive belt. Start with the easy checks, grab your screwdriver, and work through the list we gave you. Most squeaks are a quick DIY fix that costs less than twenty dollars in parts.
We found that tackling this today saves you from a ruined drum and a big repair bill later. You are fully capable of silencing that noise. Unplug the dryer, take a deep breath, and get started. Your laundry room will be quiet before you know it.
Frequently Asked Questions
Can I spray WD-40 on the dryer drum to stop the squeak?
No, do not use WD-40 on your dryer. It dries out quickly and leaves a sticky film that attracts lint. That lint will cake onto the rollers and pulley, making the squeak worse over time. You need a high-temperature lithium grease made for appliance parts.
How much does it cost to fix a squeaking dryer?
A DIY repair costs between $10 and $25 for replacement parts like rollers or a belt. If you call a repair technician, expect to pay $100 to $200 for the service call and labor. We found that the DIY route is almost always worth trying first.
Is it safe to run my dryer while it is squeaking?
Yes, it is generally safe in the short term. That squeak is a worn part rubbing together, not an immediate fire hazard. But we recommend fixing it quickly. The longer you run it, the more damage you do to the drum and other components, which can lead to a costly breakdown.
Why does my dryer squeak only when it is heating up?
Heat causes metal and plastic parts to expand slightly. That expansion can make a worn roller or pulley rub harder against its mounting, which triggers the squeak. You likely have a part that is already wearing out and just needs to be replaced.
How often should I lubricate my dryer to prevent squeaks?
We recommend applying high-temperature grease to the roller axles and idler pulley stud every six months. That simple maintenance step takes about ten minutes. It keeps the moving parts spinning freely and stops that annoying squeak before it even starts.