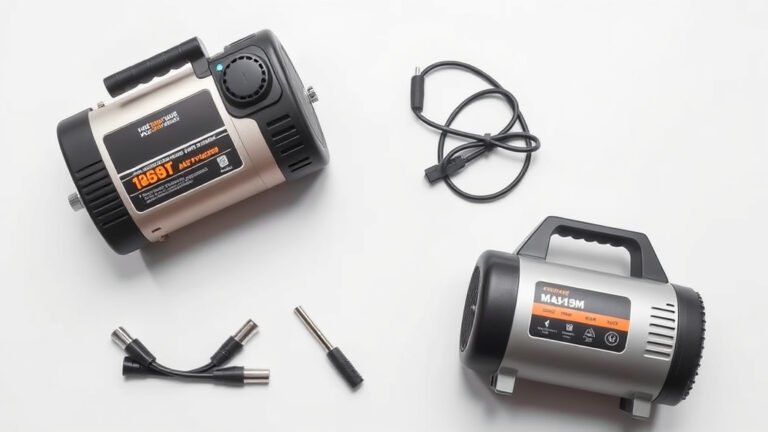
Air Compressor Painting: Your Complete House Painting Guide
Yes, you can absolutely paint your house with an air compressor, and it can be a game-changer for efficiency. Using an air compressor with the right sprayer attachment lets you apply paint much faster than traditional methods. This approach is perfect for achieving a smooth, even finish on large surfaces. You’ll need to consider your compressor’s size and the type of paint sprayer you choose. You’ll need to consider your compressor’s size and the type of paint sprayer you choose. Our guide can help you buy a suitable air compressor.
Painting an exterior wall or even a whole house this way can drastically cut down your project time. Many professionals swear by this method for its speed and consistent results. It’s a smart way to tackle big painting jobs, especially when you want to cover a lot of ground quickly and effectively. Proper preparation, of course, is still key to a great outcome.
- Air compressors can speed up house painting significantly.
- Choose the right compressor and sprayer for the job.
- Proper prep work remains essential for a good paint job.
- It helps achieve a smooth and even paint finish.
- This method is great for large exterior surfaces.
Let’s dive into the details and walk you through exactly how to paint your house using an air compressor, step by step.
Painting Your Home Exterior with an Air Compressor: A Step-by-Step Guide
Using an air compressor for painting your house is a fantastic way to speed up the process and achieve a beautiful, professional-looking finish. Many homeowners and professionals alike have found this method to be incredibly efficient for large jobs. You’re essentially using compressed air to atomize and spray paint, covering broad areas quickly and evenly.
This guide will walk you through everything you need to know. We’ll cover the equipment you’ll need, how to prepare your surfaces, the actual painting process, and important safety tips. Let’s get your house looking its best!
Choosing the Right Air Compressor and Sprayer
The heart of this painting method is your air compressor and the paint sprayer attachment. Getting these two right is key to a smooth, successful project. You don’t want a compressor that’s too small, or you’ll be waiting around a lot.
Understanding Air Compressor Specifications
When you’re looking at air compressors, two main specs matter most: CFM and PSI. CFM stands for Cubic Feet per Minute, and it measures the volume of air the compressor can deliver. PSI is Pounds per Square Inch, indicating the pressure it can maintain.
Think of CFM like the width of a river. A wider river (higher CFM) can carry more water. For painting, a higher CFM means your sprayer can keep up without stuttering. For exterior house painting, most experts recommend a compressor that delivers at least 5 CFM at 90 PSI. You might find a larger compressor is a worthwhile investment if you plan to do a lot of painting.
Selecting the Ideal Paint Sprayer Type
There are a few types of paint sprayers that work with air compressors. The most common for house painting are HVLP (High Volume Low Pressure) sprayers and airless sprayers (though airless often have their own motor, some can be powered by compressors). For DIYers, HVLP sprayers are often a great choice. There are a few types of paint sprayers that work with air compressors, including various air compressor spray guns.
HVLP sprayers use a large volume of air at a lower pressure to atomize the paint. This results in less overspray and more paint actually landing on your wall. This is great for both efficiency and minimizing waste. They are known for giving a very smooth finish.
Air-powered sprayers (also called conventional sprayers) use a high-pressure air stream to atomize paint. These can offer a very fine finish but often produce more overspray. You’ll need a robust compressor to run these effectively.
We found that for exterior walls, an HVLP sprayer with a larger tip size often provides the best balance of speed and control. Make sure the sprayer you choose is rated for the type of paint you’re using. Some sprayers are better for latex, others for oil-based paints.
Preparing Your Surfaces for Painting
No matter how fancy your equipment, a great paint job starts with excellent surface preparation. This is often the most time-consuming part, but skipping it can lead to peeling paint and a messy finish down the line. You absolutely don’t want to do all that spraying work only to have it fail!
Cleaning the Exterior Walls
Before you even think about paint, your house needs to be clean. Remove dirt, dust, cobwebs, mildew, and any chalky residue. A pressure washer can be a big help here, but use it carefully. You don’t want to force water into your siding.
You can also use a scrub brush and a good cleaning solution. Many people use a mixture of water and TSP (trisodium phosphate) or a milder cleaner designed for exterior walls. Rinse thoroughly afterward. Allow the walls to dry completely before painting. Moisture trapped under new paint is a recipe for disaster.
Scraping, Sanding, and Repairing
Next, inspect the walls for any loose, peeling, or bubbling paint. Scrape away all the old, compromised paint. You’ll then want to sand the edges where the old paint meets the bare surface. This helps create a smooth transition and ensures the new paint adheres properly. Many guidelines suggest sanding until the edges are feathered out (smooth).
Fill any cracks, holes, or gaps with an appropriate exterior-grade caulk or filler. Smooth it out so it’s flush with the surrounding surface. Once dried, sand these repaired areas smooth as well. A smooth surface is crucial for that uniform look you’re aiming for with a sprayer.
Priming Bare Surfaces
Any areas where you scraped down to bare wood or stucco will need a coat of primer. Primer helps the topcoat of paint adhere better and provides a uniform base color. This is especially important if you’re making a drastic color change. You can apply primer with your air compressor setup or use a roller/brush for smaller areas.
Ensure the primer is completely dry before moving on to the paint. Check the manufacturer’s instructions for drying times. This is another step where patience pays off.
Setting Up Your Air Compressor and Sprayer
Once your surfaces are prepped and ready, it’s time to get your equipment set up. Proper setup ensures you can work efficiently and safely.
Connecting the Compressor and Sprayer
You’ll connect your air compressor to your paint sprayer using an air hose. Make sure the hose is rated for the pressure your compressor will produce and is long enough to give you freedom of movement. You’ll typically connect the hose to the inlet on the sprayer’s air cap or handle assembly.
Some sprayers have inline air regulators, or you’ll use the regulator on your compressor to set the correct air pressure. This is a critical step. Too much pressure can cause overspray and runs, while too little pressure won’t atomize the paint properly. The sprayer’s manual will give you recommended settings.
Choosing the Right Paint and Thinning
Not all paints are created equal when it comes to sprayers. You’ll want to use a paint specifically designed for or compatible with spray application. Latex paints are common for house exteriors, and most can be thinned for spraying.
Thinning is often necessary. You’ll likely need to add a paint thinner or extender to achieve the right consistency. Too thick, and it won’t spray well. Too thin, and it might run or not cover properly. Always consult the paint manufacturer’s recommendations for thinning ratios. We found that using a small amount of water for latex paint, or the recommended thinning agent for oil-based paints, works best.
You can test the consistency by doing a “drip test” or using a viscosity cup, if your sprayer kit came with one. The goal is a smooth, steady flow when you test spray.
Testing the Spray Pattern
Before you aim at your house, always test your spray pattern on a piece of cardboard or scrap wood. Adjust the air pressure, paint flow, and nozzle settings until you achieve a consistent, even fan pattern with no “tails” (thin lines of paint at the edges of the spray). A good pattern looks like an oval with the spray evenly distributed.
You want a slightly wider, flatter pattern for broad surfaces like walls. If the pattern is too round or has heavy tails, you need to adjust your settings. This testing phase is crucial for avoiding frustration and ensuring a quality finish.
The Spray Painting Process
Now for the fun part! With your compressor humming and your sprayer dialed in, you’re ready to apply that paint.
Technique for Even Coverage
Hold the sprayer about 10-12 inches from the surface. Keep your arm moving in a steady, sweeping motion. Start your spray stroke just before you reach the edge of your previous pass, and continue spraying slightly past the opposite edge. This overlapping technique is key to avoiding lap marks and ensuring uniform coverage.
Keep the sprayer perpendicular to the surface as you move. If you angle the sprayer, you’ll get uneven paint thickness. Work in sections, one wall at a time. Don’t try to paint the whole house at once.
Managing Overspray and Runs
Even with HVLP sprayers, some overspray is inevitable. Be mindful of overspray when painting near windows, doors, or landscaping. You may need to use masking tape and plastic sheeting to protect areas you don’t want painted. Many painting professionals use masking paper and tape extensively.
Runs, or drips of paint, can happen if you apply too much paint too quickly or if the paint is too thin. If you see a run forming, stop spraying and immediately smooth it out with a brush or rag while the paint is still wet. It’s much easier to fix small mistakes while the paint is fresh.
A Quick Checklist for Success
Here’s a quick rundown of what to keep in mind:
- Ensure your compressor meets CFM/PSI needs for your sprayer.
- Thoroughly clean and prep all surfaces.
- Mask off any areas you don’t want painted.
- Test your spray pattern and settings before painting the house.
- Maintain a consistent distance and speed while spraying.
- Overlap your spray passes for even coverage.
Cleaning and Storing Your Equipment
After you’re done painting, cleaning your equipment properly is essential for its longevity. Don’t let paint dry in your sprayer or hoses! Clean all parts according to the paint and equipment manufacturer’s instructions immediately after use.
For water-based paints, this usually involves flushing the system with water, followed by a bit of mild soap. For oil-based paints, you’ll need mineral spirits or the recommended solvent. Once clean, dry everything thoroughly and store it in a protected area.
Conclusion
You’ve learned how painting your house with an air compressor can dramatically speed up your project and provide a professional finish. Remember, the key lies in choosing the right compressor and sprayer for your needs. Proper surface preparation, including thorough cleaning and repairs, is still the foundation of any great paint job. Taking the time to properly set up your equipment, thin your paint, and test your spray pattern will prevent frustration and ensure a beautiful, even result.
So, are you ready to tackle your next big painting job with confidence? Gather your gear, follow these steps, and you’ll be well on your way to a beautifully painted home exterior.
Frequently Asked Questions
What size air compressor do I really need for house painting?
For most exterior house painting projects, you’ll want an air compressor that can deliver at least 5 CFM at 90 PSI. This ensures your sprayer has enough consistent airflow to atomize the paint properly. Check your sprayer’s manual for its specific CFM requirements.
Can I use any type of paint with an air compressor sprayer?
While many paints can be sprayed, you’ll often need to thin them to the correct consistency. Latex and oil-based paints are common for exterior work. Always check the paint manufacturer’s recommendations for thinning ratios and compatible thinning agents.
How do I avoid getting paint runs or drips when spraying?
Runs typically happen when you apply paint too thick or too quickly. Maintain a consistent spraying distance of about 10-12 inches and move your arm at a steady pace. Overlap your spray passes, and stop spraying before you reach the end of a stroke.
Is an HVLP sprayer better than a conventional air sprayer for house painting?
For most DIY house painting, an HVLP (High Volume Low Pressure) sprayer is often recommended. They use less air pressure, which means less overspray and more paint directed onto the wall. This makes them more efficient and easier to control for large surfaces.
How much preparation is truly necessary before spraying paint?
Surface preparation is extremely important. You must thoroughly clean your house exterior to remove dirt, mildew, and chalking. Scrape loose paint, sand rough edges, fill cracks, and apply primer to any bare spots. Skipping these steps will lead to a poor finish and premature paint failure.