Master Your Bostitch Air Compressor Nail Gun: A Quick Guide
Using your Bostitch air compressor nail gun is simpler than you might think! To get started, you’ll want to make sure your compressor is properly set up and connected to the nail gun. Then, you’ll load your nails and adjust the depth setting for your project. This lets you drive nails precisely where you want them without damaging the wood.
Many DIYers and pros alike find that a few simple steps make all the difference. We’ve found that understanding the air pressure and the type of nails you’re using is key. Getting these details right means fewer jams and a much smoother experience for your projects.
- Connect compressor and nail gun.
- Load the correct nails.
- Adjust air pressure for your project.
- Set the nail depth for precision.
- Always follow safety guidelines.
Ready to get those nails flying straight? Let’s walk through exactly how to use your Bostitch air compressor nail gun step by step, so you can tackle your next project with confidence.
Getting Started with Your Bostitch Air Nailer
So you’ve got a Bostitch air compressor nail gun, and you’re ready to build something awesome. That’s fantastic! We’ve found that getting familiar with your tool is the first step to success. This guide will walk you through each stage, making sure you feel confident and safe.
Setting Up Your Air Compressor
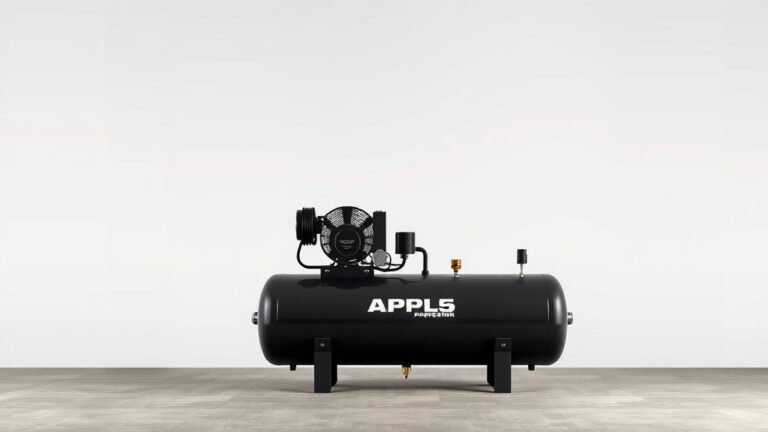
Before you even think about firing a nail, your air compressor needs to be ready to go. This is the heart of your nail gun system. You’ll want to make sure it’s on a stable, level surface. Research shows that compressors work best when placed away from direct heat or moisture.
Connecting the Air Hose
Connecting the air hose from your compressor to your Bostitch nail gun is pretty straightforward. Look for a quick-connect fitting on both the compressor’s regulator and the nail gun’s air inlet. Give the fitting a gentle push and twist until you hear a click. This confirms it’s securely locked in place. We found that a good, solid click means it’s ready for action. If it feels loose, double-check the connection.
Adjusting the Air Pressure
This is perhaps the most critical step for proper nail gun function. Your Bostitch nail gun, like most pneumatic tools, has a recommended operating pressure range. You’ll find this information in your nail gun’s manual. Generally, most framing nailers run between 70-120 PSI (pounds per square inch). Trim or brad nailers might operate at lower pressures. This is perhaps the most critical step for proper nail gun function; our guide explains the recommended operating pressure for your tool.
You adjust the pressure using the regulator dial on your air compressor. Many experts suggest starting at the lower end of the recommended range and increasing it if needed. Why start low? Too much pressure can lead to nails being driven too deep, damaging your workpiece. It can also cause jams. We’ve found that experimenting slightly will help you find that sweet spot for your specific project. Always keep an eye on the pressure gauge while working.
Loading Your Bostitch Nail Gun
Loading your nail gun correctly prevents jams and ensures a smooth workflow. It’s not complicated, but doing it wrong can cause a lot of frustration. Let’s break it down.
Choosing the Right Nails
Bostitch offers a wide variety of nails for different applications. Using the wrong type of nail is a common mistake. Check your nail gun’s specifications to know the correct nail size, collation angle (the angle at which the nails are held together), and type (e.g., brad, finish, framing).
For example, a framing nailer might use 30-34 degree clipped-head or round-head nails, while a brad nailer uses much smaller, straight-collated nails. Using nails that are too long or too short for the magazine can cause jams or misfires. We found that always referencing the nail gun manual or the magazine itself for compatibility information is best.
Inserting the Nails into the Magazine
Most Bostitch nail guns have a slide-out magazine. You’ll typically pull back a spring-loaded follower or a latch to open the magazine. Then, you’ll slide the strip of nails into the channel, making sure the nail heads are facing the correct direction (usually upward or downward, depending on the gun’s design). Gently release the follower, which will hold the nails in place.
A helpful tip: make sure the nails lie flat and aren’t at an angle within the magazine. If they are, they could bind up. Gently tap the follower forward if needed to seat the nails properly. Some professionals suggest pre-loading a few nails to ensure the follower mechanism is engaged from the start.
Setting Up for Precision Nailing
Now that your compressor is ready and your gun is loaded, it’s time to fine-tune for the job at hand. Precision is key to a professional finish.
Adjusting Depth Control
Most Bostitch nail guns come with an adjustable depth control feature. This allows you to set how deep the nail penetrates the material. You’ll often find a small dial or lever near the nose of the gun. Turning this dial will raise or lower the depth setting.
For softwoods, you’ll want a shallower setting. This prevents the nail head from sinking too far into the wood. For hardwoods or situations where you need the nail head completely countersunk, you’ll adjust for a deeper setting. We discovered that doing a test nail on a scrap piece of the same material is the best way to dial this in. Many project guides recommend this practice.
Using Sequential vs. Contact Trip Modes
Your Bostitch nail gun likely offers different firing modes. The two most common are sequential trip (also called “touch-start” or “single shot”) and contact trip (also called “bump fire”).
Sequential trip: You must first press the nose of the nailer against the work surface, then pull the trigger to fire one nail. This is ideal for precision placement and safety. It’s like carefully placing each shot. Many building codes require this mode for safety reasons (Occupational Safety and Health Administration).
Contact trip: You hold the trigger down, and each time you bump the nose of the gun against the workpiece, a nail fires. This is much faster for applications where speed is important, like installing trim or subflooring. However, it requires more practice to control and can lead to accidental nail firing if not handled carefully. Always make sure your trigger is released when not actively nailing in this mode.
Safety First, Always!
Working with pneumatic tools means you’re dealing with compressed air and flying projectiles. Safety is non-negotiable. We’ve found that developing good safety habits from the start makes all the difference.
Here’s a quick checklist to keep you safe:
- Always wear safety glasses. Eye protection is a must.
- Keep your air pressure within the recommended range for your tool.
- Never point the nail gun at yourself or anyone else.
- Ensure the nail gun is disconnected from the air source when loading or performing maintenance.
- Understand and use the appropriate firing mode for your task.
- Keep your work area clear of debris and trip hazards.
By following these steps, you’ll be using your Bostitch air compressor nail gun like a pro in no time. Happy building!
Conclusion
You’ve learned how to set up your Bostitch air compressor nail gun for success. Remember, proper air pressure and the right nails are your best friends for a smooth operation. Setting the depth control and choosing the correct firing mode ensure precision for any project. We’ve seen how these steps make a big difference. Now, take a moment to review your nail gun’s manual once more. Then, confidently tackle your next DIY build with your fully prepared Bostitch nailer!
Frequently Asked Questions
What if my Bostitch nail gun isn’t driving nails all the way in?
This usually means your air pressure is set too low. Check the recommended PSI for your specific Bostitch nailer model in its manual. You may need to increase the pressure on your air compressor regulator. Also, ensure you’re using the correct type and size of nails for your gun.
How often should I disconnect the air hose from my nail gun?
You should always disconnect the air hose when loading nails, making adjustments, or performing any maintenance. It’s also a good safety practice to disconnect it when you’re finished using the tool for the day. This prevents accidental firing and protects you and others.
Can I use any brand of nails with my Bostitch nail gun?
While many brands make compatible nails, it’s always best to use Bostitch-branded nails or those specifically recommended for your model. Using the wrong size, angle, or type of nail can cause jams, damage the gun, or result in poor performance. Always check your nail gun’s specifications.
What is the best way to test the depth setting before I start nailing?
The most reliable method is to fire a test nail into a scrap piece of the same material you’ll be working with. This allows you to see exactly how deep the nail penetrates. You can then make fine adjustments to the depth control dial until you achieve the desired result.
My Bostitch nail gun keeps jamming. What could be the problem?
Nail jams are often caused by using the wrong type or size of nails, or by nails that are bent or damaged before loading. Ensure your nails are seated correctly in the magazine without any binding. Incorrect air pressure, either too high or too low, can also contribute to jams, so verify your settings.