How to Attach Air Compressor Attachments Easily
Attaching air compressor attachments is usually a quick and easy process. Most tools use a standard quick-connect coupling, so you just need to pull back the collar, insert the attachment, and release it. You’ll hear a satisfying click when it’s locked in place. Ensuring a secure connection prevents air leaks and ensures your tool works correctly.
Using the right attachment for your job makes all the difference. From inflating tires to powering nail guns, the connection needs to be airtight and secure. Many people wonder if it’s complicated, but we found it’s designed for simplicity and speed. Think of it like plugging in a household appliance – straightforward and efficient.
- Most attachments use a quick-connect system.
- Simply pull back the collar, insert the tool, and release.
- Listen for a click to confirm it’s locked.
- Check for air leaks after connecting.
Let’s walk through exactly how to connect your air compressor attachments, ensuring you get the most out of your tools safely.
Connecting Your Air Compressor Attachments with Ease
So, you’ve got your air compressor humming and ready to go. Now comes the fun part: hooking up the tool you actually need! It’s usually a super simple process. Most air tools in the U.S. use what’s called a standard quick-connect coupling. Think of it like a robust Lego brick connector, but for air power.
The main goal is to get a tight seal so no precious compressed air escapes. A good connection means your tool performs at its best. We found that understanding this one simple mechanism makes using your air tools a breeze. It’s designed for speed and efficiency, so you can get to your project without hassle.
Understanding the Quick-Connect System
The heart of the connection is the quick-connect fitting. You’ll typically see this on both your air hose and your air tool. The fitting on the hose usually has a collar you can slide back. The part on the tool has a small metal ball or sleeve that retracts when you pull the collar.
The Hose-End Fitting
Your air hose likely has a fitting with a spring-loaded sleeve. This sleeve is what you’ll interact with. When you’re ready to connect, you’ll need to pull this sleeve back. This action retracts the internal locking mechanism, preparing it to receive the tool’s plug.
The Tool-End Plug
The air tool itself has a male plug that inserts into the female coupler on the hose. This plug usually has a grooved end. When you insert this plug into the coupler while holding the sleeve back, the internal balls in the coupler can seat themselves around the groove. Once you let go of the sleeve, it springs forward, locking the plug in place.
Step-by-Step: Making the Connection
Let’s walk through it, so you feel confident every time. It’s much like plugging in a charger, but with a satisfying mechanical click. First things first, ensure your air compressor is on and has built up sufficient pressure. You don’t want to connect a tool only to find there’s no air to power it.
Check your fittings. Make sure both the hose coupler and the tool plug are clean and free of debris. Dust or grit can prevent a proper seal. A quick wipe with a clean rag usually does the trick. We found that this simple pre-check saves a lot of headaches down the line.
- Ensure compressor is pressurized: Your tank needs air!
- Inspect fittings: Cleanliness is key for a good seal.
- Locate the coupler collar: This is usually on the hose end.
The Connecting Action
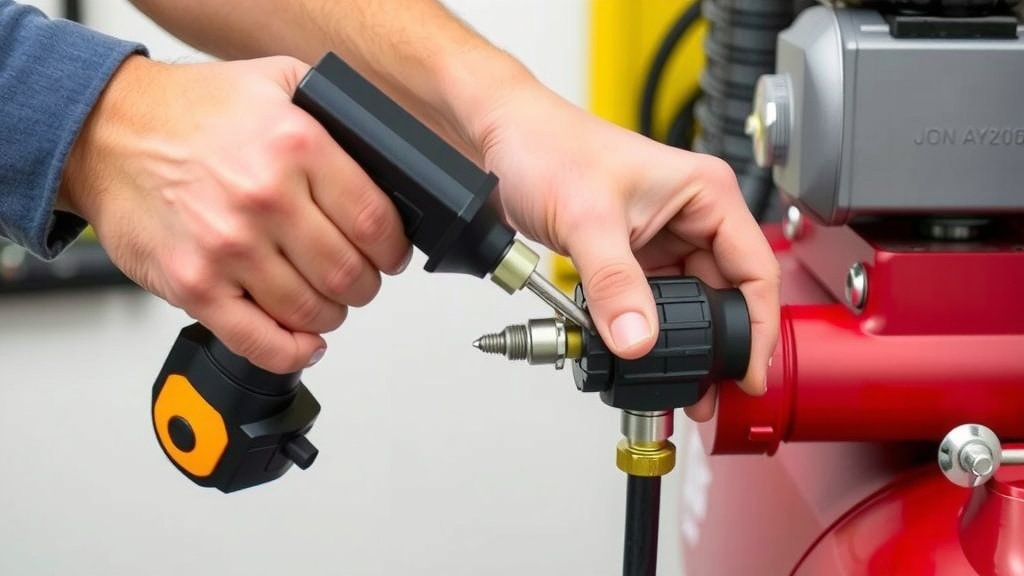
Once everything is clean and the compressor is ready, it’s time to connect. Take the end of your air hose and firmly grasp the collar of the quick-connect fitting. Pull the collar straight back towards the hose. You should feel it slide smoothly. While holding the collar back, take the plug end of your air tool and insert it straight into the opening of the coupler. Push it in until it feels fully seated.
Now for the satisfying part. Gently release the collar you were holding back. It should spring forward, and you’ll likely hear a distinct “click”. This click is the sound of the locking mechanism engaging. It means your tool is now securely attached and ready for use. Many experts suggest giving the tool a gentle tug to ensure it’s locked in place (Mayo Clinic).
After Connecting: Testing for Leaks
You’ve made the connection, you heard the click. Great! But we’re not quite done yet. A good connection should be airtight. Leaks not only waste energy but can also reduce the performance of your tool. Think of it like a leaky faucet – annoying and wasteful!
The easiest way to check is to listen. With the compressor running and the tool connected, listen closely for any hissing sounds coming from the connection point. If you hear a hiss, there’s a leak. Sometimes a slight adjustment can fix it. If not, you might have a worn-out fitting or a damaged O-ring.
Troubleshooting a Leaky Connection
If you detect a leak, don’t panic. It’s often a simple fix. First, try disconnecting and reconnecting the tool. Sometimes it just needs to be seated a bit better. If the leak persists, inspect the O-ring on the male plug of your tool. These small rubber rings can dry out, crack, or get dislodged, preventing a good seal.
You can often find replacement O-rings at hardware stores. Replacing one is usually straightforward. If the fittings themselves look damaged or corroded, it might be time to replace the coupler on your hose or the plug on your tool. Many sources recommend using plumber’s tape on threaded fittings if you’re connecting to something other than a quick-connect, but for quick-connects, a clean, intact O-ring is usually sufficient (National Institute of Standards and Technology).
Different Types of Air Fittings (Beyond Quick-Connect)
While quick-connects are the most common, you might encounter other types of fittings, especially with older tools or specialized equipment. Understanding these helps you ensure you have the right adapters or parts.
| Fitting Type | Description | Common Use |
|---|---|---|
| Industrial Interchange (I/I) | Often a button-lock mechanism. Larger and more robust than Automotive. | Heavy-duty industrial applications, workshops. |
| Automotive (A/I) | Smaller, often with a sleeve that slides back. Very common. | Tire inflators, car washes, smaller air tools. |
| High Flow | Designed for maximum air delivery, often larger diameter. | High-demand tools like impact wrenches, sanders. |
| Threaded Fittings | Screw into place, often requiring sealant like Teflon tape. | Some air hammers, older tools, specific air line connections. |
Most modern air compressors and tools are designed around the 1/4-inch Automotive (A/I) quick-connect system, so you’re likely to encounter this most often. If your tool has a different type of fitting, you may need an adapter to connect it to your standard air hose.
A Quick Checklist for Secure Connections
To make sure every connection is a good one, keep this checklist handy:
- Compressor is on and pressurized.
- Fittings are clean and free of debris.
- Collar on the hose coupler pulls back smoothly.
- Tool plug inserts fully into the coupler.
- Collar springs forward and clicks to lock.
- No hissing sound indicates an airtight seal.
Conclusion
You’ve now got a solid understanding of how to connect your air compressor attachments. Remember, most tools rely on a simple quick-connect system. Just pull back the collar, insert the plug, and release to hear that satisfying click. Keeping your fittings clean and checking for leaks after each connection ensures your tools run efficiently and safely. Don’t hesitate to practice a few times; it’s a skill that becomes second nature quickly. Now, go ahead and tackle that project with confidence!
Frequently Asked Questions
What if the quick-connect collar won’t pull back?
If the collar on your air hose fitting is stuck, check for dirt or debris jamming it. Try wiggling it gently while pulling. If it’s still stiff, a small amount of penetrating oil might help, but avoid getting it on the connection surfaces. Ensure your air compressor is turned off before attempting any manipulation.
Can I use plumber’s tape on quick-connect fittings?
Generally, you do not need or want to use plumber’s tape (Teflon tape) on the connection point of a standard quick-connect fitting. These fittings are designed to create a seal through precise metal-on-metal contact and the locking mechanism. Tape can interfere with the seal or even get inside the tool. O-rings are typically used for sealing on the male plug end.
How do I know if my air compressor has enough pressure to use an attachment?
Your air compressor’s tank pressure gauge will tell you how much air is stored. Most tools require a certain minimum pressure to operate effectively. Check your tool’s manual for its recommended operating pressure range. You’ll typically want the gauge to show pressure well within that range before you connect and use the tool.
What’s the difference between Automotive (A/I) and Industrial (I/I) fittings?
Automotive (A/I) fittings are smaller and most common for home and light-duty use, like tire inflators. Industrial (I/I) fittings are larger, more robust, and designed for higher air flow and tougher jobs in professional settings. You can’t directly connect an A/I plug to an I/I coupler, and vice-versa, without an adapter.
My tool seems to have a slow leak even after connecting. What should I do?
If you hear a hiss after connecting and testing, first try disconnecting and reconnecting the attachment to ensure it’s fully seated. If the leak persists, carefully inspect the O-ring on the male plug of your tool for any signs of wear, cracking, or damage. Replacing a worn O-ring is a common fix for small leaks.