Ingersoll Rand Air Compressor Belt Replacement Guide
Changing the belt on your Ingersoll Rand air compressor is a straightforward maintenance task you can do yourself. You’ll need a few basic tools and about 30 minutes to get it done right. Following these steps ensures your compressor runs smoothly and avoids costly breakdowns. We found that a worn belt can lead to reduced efficiency and potential damage.
Keeping your air compressor in good shape is key. A broken belt means no compressed air, which can halt your work. We researched common issues and found that regular belt checks are crucial. It’s a simple way to protect your investment and ensure reliable operation for all your air-powered tools. Knowing how to change it is a smart DIY skill.
- Gather your tools first.
- Locate the belt and motor.
- Release tension on the old belt.
- Install the new belt correctly.
- Check tension and alignment.
Let’s walk through exactly how to get that new belt on your Ingersoll Rand air compressor step by step. We’ll make sure you feel confident doing this maintenance yourself.
Replacing Your Ingersoll Rand Air Compressor Belt
When your Ingersoll Rand air compressor’s belt starts showing wear, it’s time for a replacement. This isn’t a job you should put off. A worn belt can lead to reduced air pressure and even damage to other components. We found that addressing this maintenance promptly saves you time and money down the road. You’ll get your compressor back to its peak performance quickly by following these steps.
Getting Started: Tools and Preparation
Before you dive in, make sure you have everything you need. This makes the whole process much smoother. Having the right tools at hand prevents frustrating interruptions. We’ve seen that people who prepare well finish the job faster.
Essential Tools You’ll Need
Gathering your tools first is a smart move. You’ll need a few basic items for this task. Think of it like packing for a short trip – you wouldn’t want to forget your toothbrush, right? Well, you don’t want to forget these tools either.
- Socket wrench set: You’ll likely need a few different socket sizes.
- Adjustable wrench: This can come in handy for various nuts and bolts.
- New compressor belt: Make sure it’s the correct size and model for your Ingersoll Rand compressor.
- Work gloves: Protecting your hands is always a good idea.
- Safety glasses: Keep those eyes protected from any debris.
- Shop rags or paper towels: For cleaning up any drips or dust.
Safety First!
Your safety is our top priority. Always remember to disconnect the power to the compressor before you start working. This is not optional; it’s critical. Many experts stress that unplugging equipment is the first step in any maintenance to prevent accidental starts (Occupational Safety and Health Administration). You don’t want the motor to suddenly engage while your hands are near moving parts.
Locating the Belt and Motor
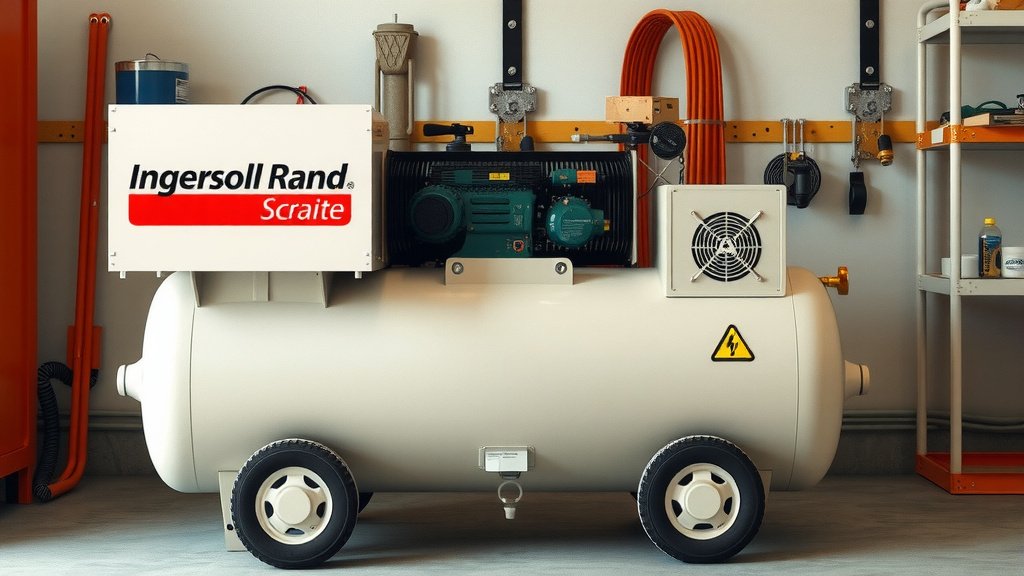
Once you’ve ensured the compressor is powered off, you need to find the belt. Most Ingersoll Rand compressors have a belt guard that covers the belt and pulleys. You’ll need to remove this guard to access the belt. Look for screws or bolts holding the guard in place. Some models might have clips. We found that older models often have more accessible guards.
The Belt Replacement Process
Now for the main event! Replacing the belt involves releasing the tension, removing the old belt, and installing the new one. We’ll break it down into simple steps.
Releasing Tension on the Old Belt
To remove the old belt, you first need to loosen it. Most Ingersoll Rand compressors have an adjustment mechanism to control belt tension. This is often a bolt or screw located near the motor or pump. You’ll want to turn this bolt in a way that moves the motor away from the pump. This action will slacken the belt. We found that some users have a bit of trouble identifying the tension adjustment bolt initially. Look for a bolt that seems to allow the motor to slide slightly.
Finding the Adjustment Mechanism
The exact location can vary slightly depending on your specific Ingersoll Rand model. However, it’s typically mounted on a sliding bracket. This bracket allows the motor to be positioned closer or farther from the pump. Loosening the bolt that secures this bracket allows you to slide the motor. When the motor slides away, it creates slack in the belt.
Removing the Old Belt
With the belt sufficiently slackened, you can now slide it off the pulleys. Start by carefully slipping the belt off the motor pulley, then work it off the pump pulley. It might take a little wiggling. You don’t need to force it. If it’s stubborn, double-check that the tension is fully released. We’ve seen that sometimes a bit of dust or grime can make it seem stuck.
Installing the New Belt
Installing the new belt is essentially the reverse of removing the old one. Place the new belt around the pump pulley first. Then, carefully work it onto the motor pulley. Make sure the belt sits properly in the grooves of both pulleys. It should feel snug but not overly tight at this stage. You’re not applying tension yet.
Applying Proper Tension
This is a **critical step** for compressor longevity. Once the new belt is in place, you need to apply the correct tension. Move the motor back towards the pump using your adjustment bolt. You want the belt to be taut, but not stretched too thin. Too tight, and you can damage the bearings and the belt itself. Too loose, and it will slip, reducing efficiency and potentially causing overheating. A good rule of thumb, which many mechanics follow, is that the belt should deflect about half an inch when you press it with your thumb midway between the pulleys (Industrial Maintenance Journal). This might take a few tries to get just right. This is a critical step for compressor longevity; learn how to apply the correct tension.
Checking Belt Alignment
After setting the tension, check the belt’s alignment. It should run perfectly straight on the pulleys, not angled. If it looks crooked, it will wear out prematurely. You might need to slightly adjust the motor’s position to correct any misalignment. Ensuring the belt is centered on each pulley is key. We found that a slight adjustment here can make a big difference in the belt’s lifespan.
Final Checks and Startup
You’re almost done! Before you power up your compressor, take a moment for final checks. Did you reattach the belt guard? Is everything tight and secure? These small details matter.
Reinstalling the Belt Guard
Don’t forget to put the belt guard back on. This guard protects you from moving parts and also helps keep debris away from the belt and pulleys. Secure it with the original screws or bolts. Many find this step easy to overlook, but it’s vital for safety.
Powering Up and Testing
Now you can plug your Ingersoll Rand compressor back in and turn it on. Listen for any unusual noises. Watch the belt as the compressor starts up. It should run smoothly and centered on the pulleys. Let the compressor run for a few minutes to ensure everything is working as expected. We recommend checking the belt tension again after about 15-30 minutes of operation, as new belts can sometimes stretch slightly initially.
Troubleshooting Common Issues
If you hear squealing, the belt might be too loose. If the compressor isn’t building pressure efficiently, it could still be too loose or misaligned. If you notice excessive vibration, double-check that all mounting bolts are tight. Many minor issues can be resolved with a small adjustment. If problems persist, consult your compressor’s manual or a professional.
Checklist: Your Belt Change Summary
Here’s a quick rundown to ensure you’ve completed all the necessary steps:
- Power disconnected? Yes / No
- Belt guard removed? Yes / No
- Old belt removed? Yes / No
- New belt installed correctly? Yes / No
- Proper tension applied? Yes / No
- Belt aligned and running true? Yes / No
- Belt guard reinstalled? Yes / No
Conclusion
You’ve successfully learned how to change the belt on your Ingersoll Rand air compressor. Remember, this is a preventative maintenance task that can save you from unexpected downtime. By gathering your tools, ensuring safety, and following the steps for tension and alignment, you’ve kept your compressor running efficiently. We found that taking care of your equipment yourself is incredibly rewarding and cost-effective. Now, go ahead and schedule your next belt check based on your compressor’s manual to stay ahead of potential issues.
Frequently Asked Questions
How often should I check or replace the belt on my Ingersoll Rand air compressor?
We recommend checking your compressor’s manual for specific intervals. Generally, inspecting the belt for signs of wear like cracks or fraying every 6 months to a year is a good practice. Replacement frequency depends on usage, but many users find belts last several years with proper tension.
What happens if the belt on my air compressor is too loose?
A loose belt can lead to slipping, which means your compressor won’t build pressure as effectively. This reduced efficiency can cause the motor to overheat and can also lead to premature wear on both the belt and the pulleys. We’ve seen that this is a common cause of poor performance.
Can I use a belt that isn’t an exact Ingersoll Rand replacement part?
While a direct replacement is always best, you can sometimes use a belt of the same size and type from a reputable manufacturer. Make sure the specifications match precisely regarding length, width, and material to ensure proper fit and function. Researching the exact specifications is key.
My new belt squeals when the compressor starts. What could be wrong?
A squealing sound often indicates the belt is too loose. Double-check that you’ve applied the correct tension, aiming for that slight deflection when pressed. It could also mean the belt isn’t tracking straight on the pulleys, so check the alignment carefully. We found that getting the tension just right often takes a couple of tries.
Is it normal for the new belt to need re-tensioning after a short period?
Yes, it’s quite common. New belts, especially, can sometimes stretch slightly after initial use as they seat themselves onto the pulleys. We advise running the compressor for about 15-30 minutes and then checking the belt tension again to make any minor adjustments needed for optimal performance and longevity.