How to Clean Your Honeywell Air Purifier Filter
The easiest way to clean your Honeywell air purifier filter is by gently vacuuming it with a soft brush attachment. For a deeper clean, you can also rinse it with cool water, but always ensure it’s completely dry before reinserting. Keeping your filter clean is key to ensuring your Honeywell purifier runs efficiently and keeps your air fresh.
You might be wondering how often you should be doing this. Regular maintenance, like cleaning your filter, can significantly improve your air quality. It also helps prevent dust buildup that can clog the filter and reduce its effectiveness. We found that cleaning your filter every 2-4 weeks is generally recommended for most users.
- Vacuum with a soft brush attachment.
- Rinse with cool water if needed.
- Ensure the filter is completely dry.
- Clean filters every 2-4 weeks.
- This boosts air quality and purifier efficiency.
Ready to get your Honeywell air purifier back in top shape? Let’s walk through exactly how to clean your filter step by step.
Keeping Your Honeywell Air Purifier Filter Clean
You’ve got a Honeywell air purifier, and you’re wondering how to keep that filter in tip-top shape. We get it! A clean filter is the secret sauce to breathing easy. It’s not complicated, and doing it regularly means your purifier works its best. Let’s break down how to give that filter a good spruce-up.
Why Cleaning Your Honeywell Filter Matters So Much
Think of your air purifier filter like a tiny, hardworking bouncer for your air. Its job is to catch all the unwanted guests – dust bunnies, pollen, pet dander, and other microscopic troublemakers. Over time, these guests clog up the filter’s doorway, making it harder for fresh air to get through.
Boosted Air Quality for Your Home
A dirty filter simply can’t do its job effectively. It’s like trying to breathe through a thick blanket. When you clean it, you’re restoring its ability to capture those airborne particles. Many experts agree that regular filter cleaning is **essential for improving indoor air quality** (CDC). This means less sneezing, fewer allergy flare-ups, and just generally fresher air.
Extending Your Purifier’s Lifespan
Your Honeywell air purifier is an investment. Keeping its filter clean helps protect the motor and other internal components. When the filter is clogged, the motor has to work much harder. This extra strain can shorten the life of your appliance. So, a little cleaning goes a long way in ensuring your purifier serves you well for years to come.
Step-by-Step Guide to Cleaning Your Honeywell Filter
Ready to get your hands a little dusty? Don’t worry, it’s a straightforward process. Most Honeywell filters are designed for easy maintenance. You’ll want to have a soft brush attachment for your vacuum cleaner handy.
First Things First: Safety and Preparation
Before you start, always **unplug your Honeywell air purifier**. This is super important for your safety. You don’t want any unexpected power surges while you’re working on it. Once it’s unplugged, gently open the purifier to access the filter. The exact method can vary slightly by model, but usually, there’s a back panel or a front cover that easily lifts or unclips.
The Gentle Vacuum Method: Your Go-To Cleaning Technique
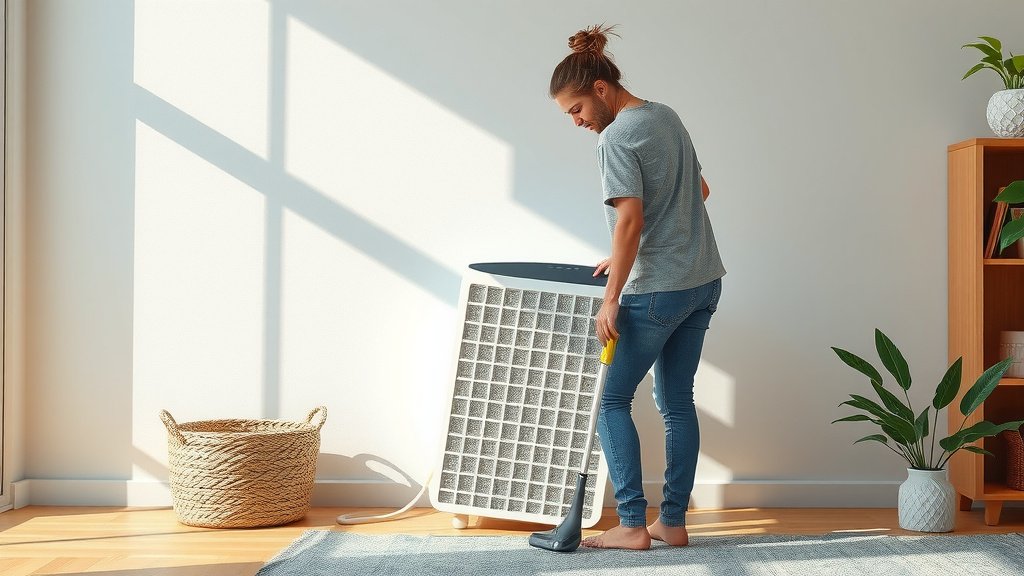
For most Honeywell filters, especially the permanent or pre-filters, a good vacuuming is all you need.
- Take your vacuum cleaner and attach the **soft brush accessory**. This is key; you don’t want to scratch or damage the filter material.
- Gently go over the filter’s surface. Work in one direction. Focus on areas where you see dust accumulating.
- Pay attention to the pleats if your filter has them. This is where dust loves to hide.
We found this method works wonders for removing loose dust and debris. It’s quick and effective for regular upkeep. Many users find that doing this every few weeks keeps their filters in great shape.
Deeper Cleaning: Rinsing Your Filter
If your filter looks particularly grimy, or if you’ve had it for a while and want to give it a thorough clean, a rinse might be in order. This is typically for washable pre-filters. Always check your specific Honeywell model’s manual to confirm if your filter is washable.
Rinsing Procedure
- Once you’ve removed the filter, take it to a sink or an outdoor hose.
- Use **cool, clean water** to rinse the filter. Avoid hot water, as it can damage the filter material.
- Gently spray or run water through the filter in the opposite direction of airflow. This helps push the trapped dirt out.
- You can use a very mild soap if the filter is exceptionally dirty, but rinse thoroughly to remove all soap residue.
The Critical Drying Stage
This is perhaps the **most important step** after rinsing. A damp filter is a recipe for disaster. Mold and mildew love moist environments, and you absolutely do not want to recirculate those spores through your home.
- Shake off any excess water.
- Allow the filter to **air dry completely**. This could take several hours, or even up to 24 hours, depending on humidity and airflow.
- Do NOT use heat to dry it, like a hairdryer or placing it in direct sunlight for extended periods.
- You can place it in a well-ventilated area. Many people put theirs on a drying rack.
Many filter manufacturers strongly advise against reinserting a wet or even slightly damp filter. It’s worth the wait for fresh, clean air!
Reassembling Your Honeywell Air Purifier
Once your filter is squeaky clean and bone dry, it’s time to put everything back together. Reinsert the filter according to your purifier’s design. Make sure it snaps or slides into place securely. Close up the housing or cover. Then, and only then, should you plug your air purifier back in and turn it on.
How Often Should You Clean Your Honeywell Filter?
This is a common question, and the answer varies a bit. However, we found a general guideline that works for most homes. For optimal performance, aim to clean your main filter **every 2 to 4 weeks**. If you live in a high-pollen area, have pets, or someone in your household suffers from allergies, you might need to clean it more frequently.
What to Look For
Your eyes are your best tool here. If the filter looks visibly dusty or dirty, it’s probably time for a clean. Don’t wait for the air quality to noticeably decline. Many experts suggest visual inspection as a good indicator (American Lung Association).
When to Replace, Not Just Clean
While cleaning extends the life of many filters, they don’t last forever. After several cleanings, or if your filter shows signs of wear and tear (like tears, thinning material, or permanent discoloration that doesn’t wash out), it’s time for a replacement. HEPA filters, for instance, are typically not washable and need to be replaced according to the manufacturer’s schedule, usually every 6-12 months.
Quick Filter Cleaning Checklist
Here’s a quick rundown to keep your filter maintenance on track:
- Unplug the purifier before starting any cleaning.
- Use a soft brush vacuum attachment for initial dust removal.
- If washable, rinse with cool water only.
- Ensure the filter is completely dry before reinsertion.
- Clean your filter every 2-4 weeks, or as needed.
- Check for signs of wear and replace when necessary.
Conclusion
You’ve learned how simple it is to keep your Honeywell air purifier running smoothly. Regular cleaning, focusing on gentle vacuuming and proper drying after rinsing, directly impacts your home’s air quality and extends your purifier’s life. Don’t let a dirty filter work against you; it’s a small effort for a big reward in fresh air. Your next step is to check your filter this week and give it the TLC it deserves!
Frequently Asked Questions
Can I use soap to clean my Honeywell air purifier filter?
For most washable Honeywell pre-filters, it’s best to use just cool water. If a filter is exceptionally grimy, a very mild soap can be used, but you must rinse it extremely thoroughly to remove all residue. Always ensure it’s completely dry afterward.
How long does it take for a Honeywell filter to dry after rinsing?
Drying time can vary significantly. It typically takes several hours, but can sometimes take up to 24 hours. Factors like humidity and airflow affect how quickly it dries. It’s essential to let it air dry completely in a well-ventilated area before putting it back.
What happens if I put a damp filter back into my Honeywell air purifier?
Putting a damp filter back can cause serious issues. It creates a perfect environment for mold and mildew to grow. You risk recirculating these spores throughout your home, which is unhealthy. It can also potentially damage the air purifier’s motor.
My Honeywell air purifier has a HEPA filter. Can I clean that?
Generally, HEPA filters are designed for replacement, not cleaning. They are made of fine materials that can be damaged by washing or vacuuming. Always check your specific Honeywell model’s manual to confirm if your HEPA filter is washable or if it needs to be replaced at regular intervals.
How do I know if it’s time to replace my Honeywell filter instead of just cleaning it?
Visually inspect your filter regularly. If it has tears, feels thin, or has permanent stains that won’t come out after cleaning, it’s time for a replacement. For washable filters, repeated cleaning can also degrade them over time, so replacement according to the manufacturer’s guidelines is still necessary.
![5 Best Air Fryer Cookbook for One [In 2026]](https://homeunderstandable.com/wp-content/uploads/2026/03/5-Best-Air-Fryer-Cookbook-for-One.jpg)