How to Clean Your Rabbit Air Purifier for Optimal Performance
The easiest way to clean your Rabbit air purifier is by regularly wiping down the exterior and cleaning or replacing the filters as recommended. Keeping your purifier clean ensures it runs efficiently and continues to deliver fresh air into your home. It’s a simple process that makes a big difference.
Your Rabbit air purifier works hard to remove pollutants. Over time, dust and debris can build up on the unit and its components. This buildup can affect performance. Consistent cleaning helps maintain optimal air quality and extends the life of your purifier. Think of it like giving your purifier a nice spa day!
- Unplug your purifier before starting.
- Wipe down the outside with a damp cloth.
- Check and clean or replace the filters.
- Vacuum the pre-filter gently.
- Refer to your manual for specifics.
Ready to get your Rabbit air purifier sparkling clean? Let’s walk through exactly how to do it, step by step, so you can breathe easy again.
Keeping Your Rabbit Air Purifier in Top Shape
Your Rabbit air purifier is a fantastic ally in maintaining clean air. To ensure it always performs at its best, regular cleaning is key. We’ve found that a consistent cleaning routine prevents dust buildup and helps your unit run efficiently for years.
Essential First Steps: Safety and Preparation
Before you begin any cleaning, safety comes first. Always unplug your Rabbit air purifier from the wall outlet. This is not just a recommendation; it’s a vital safety precaution. Working with electrical appliances while they are powered on can be dangerous. Ensure the unit is completely disconnected. You wouldn’t want any accidental shocks while trying to freshen up your air, right?
Gathering Your Cleaning Supplies
Having the right tools makes the job much easier. You’ll likely need a few simple items. A soft, damp cloth is essential for wiping down surfaces. For more stubborn marks, a mild, non-abrasive cleaner can be helpful, but always dilute it. A vacuum cleaner with a brush attachment is great for the pre-filter. A dry, lint-free cloth is useful for final touches. Having everything ready means you can clean your purifier without interruption. Think of it as a quick pit stop for your home’s air system.
Cleaning the Exterior of Your Rabbit Air Purifier
The outside of your air purifier collects dust just like any other surface in your home. A quick wipe-down can make a big difference in its appearance. This also prevents loose dust from being drawn into the unit. Many sources suggest that regular dusting is crucial for maintaining air quality (CDC).
Wiping Down the Casing
Take your soft, damp cloth. Wring out any excess water so the cloth is just moist. Gently wipe down the entire exterior of the air purifier. Pay attention to any vents or grilles where dust might accumulate. For any smudges or light dirt, this damp cloth should do the trick. Avoid spraying water or cleaners directly onto the unit. Moisture can damage internal components.
Tackling Tougher Spots
If you encounter any sticky spots or tougher grime, you can use a mild cleaning solution. Mix a tiny amount of dish soap with water. Dampen your cloth with this solution, wring it out thoroughly, and then wipe the affected area. Immediately follow up with a clean, damp cloth to remove any soap residue. Finally, dry the area with a clean, dry cloth. This approach ensures the exterior stays clean without risking damage.
Maintaining the Filters: The Heart of Your Air Purifier
The filters are where the magic happens. They trap pollutants and allergens. Therefore, keeping them clean or replacing them is the most important part of maintenance. Your Rabbit air purifier’s effectiveness depends heavily on its filters. Most manufacturers recommend checking filters every 1-3 months.
Understanding Your Filter Types
Rabbit air purifiers typically have a few layers of filtration. There’s usually a pre-filter, often a HEPA filter, and sometimes an activated carbon filter. The pre-filter is the first line of defense, catching larger particles like pet hair and dust bunnies. The HEPA filter captures microscopic particles. The carbon filter absorbs odors and VOCs. Knowing your filter types helps you clean them properly.
The Washable Pre-Filter
Many Rabbit models feature a washable pre-filter. This is great news for your wallet and the environment! You can usually remove this layer by sliding or unclipping it from the filter assembly. Take it to a sink and rinse it under cool, running water. You can use a soft brush or your fingers to gently dislodge any trapped debris. Make sure it’s completely dry before putting it back. A damp pre-filter can lead to mold growth.
Cleaning or Replacing the HEPA and Carbon Filters
HEPA and activated carbon filters are generally NOT washable. Attempting to wash them can damage the delicate filter media. For these filters, your primary option is replacement. However, some manufacturers suggest a light vacuuming of the HEPA filter surface to remove loose dust. If you choose to vacuum, use a soft brush attachment on your vacuum cleaner and work gently. Never use water or cleaning solutions on these filters. Check your specific Rabbit model’s manual for the exact filter replacement schedule. Many experts recommend replacing HEPA filters every 6-12 months, depending on usage and air quality (EPA).
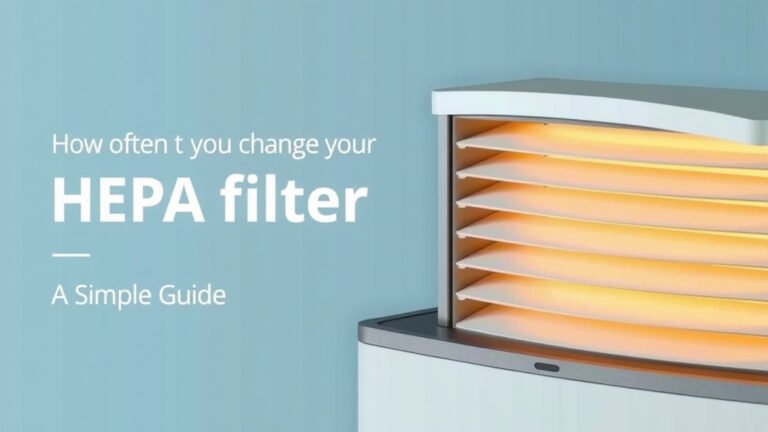
How Often to Clean or Replace Filters
The frequency depends on your home environment and how often you run your air purifier. If you have pets, allergies, or live in a high-pollen area, you may need to check your filters more often. We found that many users benefit from a monthly visual inspection. If filters appear visibly dirty or airflow seems reduced, it’s time for action. A clean filter means cleaner air for you and your family.
| Filter Type | Maintenance Action | Suggested Frequency |
|---|---|---|
| Pre-Filter (Washable) | Rinse with water, allow to air dry | Monthly, or as needed |
| HEPA Filter | Light vacuuming (optional), Replace | Inspect monthly; Replace every 6-12 months |
| Activated Carbon Filter | Replace | Replace every 6-12 months (often combined with HEPA) |
Don’t Forget the Inside Vents and Sensors
Dust can find its way into the nooks and crannies of your air purifier. Taking a moment to clean the inside vents and sensors ensures optimal performance. This is often overlooked but is quite important.
Cleaning Internal Air Vents
With the filters removed, you can often see into the internal workings. Use your vacuum cleaner’s crevice tool or a soft brush to gently remove dust from the fan blades and internal surfaces. Be very careful not to dislodge any wires or components. A gentle approach is always best here.
Wiping Air Quality Sensors
Some Rabbit models have air quality sensors. These sensors help the purifier adjust its fan speed based on detected pollutants. Dust accumulation on these sensors can lead to inaccurate readings. Check your manual for the sensor locations. Typically, you can gently wipe them with a dry cotton swab or a soft, dry cloth. Avoid using any liquids on the sensors.
A Quick Cleaning Checklist for Your Rabbit Air Purifier
To make things super simple, here’s a handy checklist. Keep this somewhere you can easily find it. It’s a great way to stay on track with your purifier’s care.
- Unplug the purifier before starting any cleaning.
- Wipe down the exterior with a damp cloth.
- Remove and inspect pre-filter. Rinse if washable.
- Check HEPA/Carbon filters for dirt. Replace if needed.
- Gently vacuum internal vents (optional).
- Clean air quality sensors with a dry swab.
Following these steps will help your Rabbit air purifier continue to provide you with fresh, clean air. It’s a small effort that yields big results for your home environment.
Conclusion
You’ve learned how simple it is to keep your Rabbit air purifier running smoothly. Regular exterior wiping and diligent filter maintenance are your best tools for clean air. Remember, unplugging the unit before you start is key for your safety. By following these steps, you ensure your purifier continues to capture dust, allergens, and odors effectively. Make this cleaning routine a habit, and you’ll consistently enjoy the fresh air it provides. Your next step is to schedule a quick monthly check of your filters!
Frequently Asked Questions
How often should I replace the HEPA filter on my Rabbit air purifier?
You should typically replace the HEPA filter every 6 to 12 months. This timeframe can vary based on your home’s air quality and how frequently you use the purifier. If you notice a significant decrease in airflow or your purifier seems less effective, it’s a good indicator that the filter needs replacing sooner.
Can I wash the HEPA filter of my Rabbit air purifier?
No, you should generally not wash the HEPA filter. Washing can damage the delicate fibers that make the filter effective at trapping small particles. For HEPA filters, the best practice is to replace them according to the manufacturer’s recommendations or when they appear heavily soiled.
What should I do if my Rabbit air purifier starts smelling strange?
A strange smell often means it’s time to check your filters. The activated carbon filter is usually responsible for absorbing odors. If this filter is saturated, it can no longer trap new smells and might even start to emit them. Inspecting and replacing your carbon and HEPA filters is your first step.
Is it safe to use household cleaners on my Rabbit air purifier?
It’s best to avoid harsh household cleaners. For the exterior, a slightly damp, soft cloth is usually sufficient. If you need a bit more cleaning power for stubborn spots, use a very mild, diluted soap solution and wipe it off immediately with a clean, damp cloth. Always ensure the unit is unplugged and dry before plugging it back in.
My Rabbit air purifier has a washable pre-filter. How do I clean it properly?
To clean a washable pre-filter, simply remove it from the unit and rinse it under cool running water. You can gently use your fingers or a soft brush to dislodge any accumulated dust or debris. Crucially, make sure the pre-filter is completely dry before reinserting it to prevent mold or mildew growth.