Clean Your Vornado Air Purifier: Simple Step-by-Step Guide
The easiest way to clean your Vornado air purifier is to regularly dust the exterior and deep clean the interior components. Keeping your Vornado clean ensures you’re breathing the freshest air possible and helps your unit run efficiently. You should aim to dust weekly and perform a deeper clean every 2-3 months.
Dirty air purifiers can actually make your air quality worse. Dust and debris can clog filters and prevent the unit from working its best. Consistent cleaning prevents this buildup and ensures your Vornado continues to be a helpful tool for a healthier home environment. It’s a simple maintenance step that makes a big difference.
- Unplug your Vornado before cleaning.
- Dust the outside regularly.
- Clean the pre-filter and main filters as recommended.
- Wipe down the interior housing.
- Reassemble and plug back in.
Let’s walk through exactly how to get your Vornado sparkling clean, step by step.
Keeping Your Vornado Air Purifier Clean and Effective
Your Vornado air purifier is a champion at keeping your home’s air fresh. But like any hard-working appliance, it needs a little TLC to stay in top shape. Regularly cleaning your Vornado isn’t just about looks; it’s vital for its performance and for the air you breathe. Think of it like giving your car an oil change – it keeps everything running smoothly.
Why Regular Cleaning Matters So Much
When dust and debris build up on your Vornado’s components, it’s like wearing a thick scarf on a hot day. The unit struggles to pull in air efficiently. This means it works harder, uses more energy, and doesn’t purify your air as well as it should. Plus, that trapped dust can sometimes get recirculated, which is the opposite of what you want!
Many experts agree that a dirty air purifier can actually decrease your indoor air quality. Dust, pet dander, and other allergens can accumulate on the filters and within the unit itself. When the fan blows, this buildup can get dispersed back into your room. Keeping your Vornado clean ensures it’s actively improving your air, not contributing to the problem.
Gathering Your Cleaning Supplies
Before you start, let’s make sure you have everything you need. Having your supplies ready means less interruption and a smoother cleaning process. You won’t have to stop midway to hunt for a missing tool.
- A vacuum cleaner with a brush attachment.
- A soft, dry microfiber cloth.
- A slightly damp microfiber cloth (water only, please!).
- A cotton swab or small brush for tight spots.
- Mild soap and water for stubborn grime (optional).
Your Step-by-Step Vornado Cleaning Guide
Now that you’re prepped, let’s get down to business. We’ll tackle this piece by piece to ensure every part of your Vornado gets the attention it deserves.
Step 1: Safety First – Unplug It!
This might seem obvious, but it’s the most important step. Never attempt to clean your Vornado while it’s plugged in. You don’t want any accidental shocks or to damage the unit. Always unplug the power cord from the wall outlet before you begin.
Step 2: Dusting the Exterior
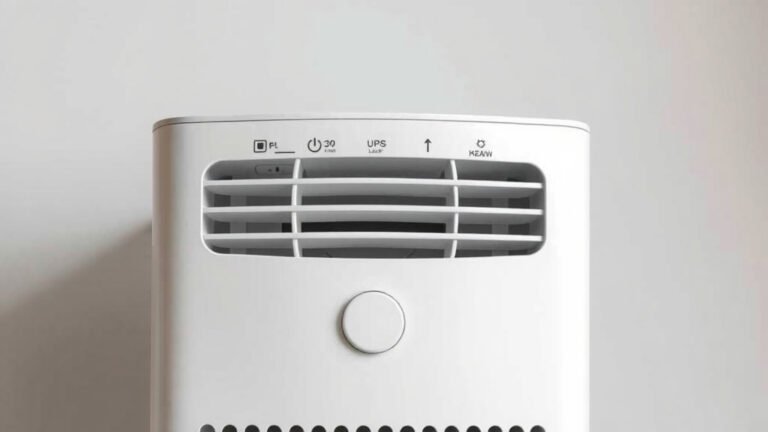
This is your weekly quick-clean task. Grab your dry microfiber cloth and give the outside of your Vornado a good wipe-down. Pay attention to the vents and grilles where dust loves to settle. A few minutes here can make a big difference in its appearance and airflow.
Think of this as a daily spa treatment for your air purifier. It keeps it looking good and prevents minor dust from becoming a major buildup. Many owners find that a quick dust every few days keeps their units looking almost new.
Step 3: Cleaning the Interior Components
This is where we get into the deeper cleaning. This usually needs to be done every 2-3 months, depending on your home environment. If you have pets or live in a dusty area, you might need to do this more often.
Removing the Outer Grille
Your Vornado unit typically has an outer grille that can be removed for access to the filters. Check your Vornado’s manual for the exact method, as it can vary slightly by model. Usually, there are clips or screws that allow it to detach. Carefully set the grille aside.
Cleaning the Pre-Filter
The pre-filter is the first line of defense. It traps larger particles like dust bunnies and pet hair. Most Vornado pre-filters are washable. Gently rinse it under cool running water. If it’s particularly grimy, you can use a mild soap, but make sure to rinse thoroughly until all soap is gone. Allow the pre-filter to air dry completely before putting it back. Never put a damp filter back in; this can lead to mold growth.
Cleaning or Replacing the Main Filter(s)
This is the heart of your air purifier. Vornado units typically use a combination of filters, often including an activated carbon filter and a HEPA filter. Refer to your Vornado manual for the recommended cleaning or replacement schedule for your specific model’s main filter(s). Some Vornado filters are designed to be vacuumed gently with a soft brush attachment, while others need to be replaced entirely after a certain period (usually 6-12 months).
We found that using the vacuum attachment on a low setting can help extend the life of some main filters. Always be gentle! You’re trying to remove dust, not tear the filter material. If your manual says to replace it, it’s best to follow that advice for optimal performance. Dirty or clogged filters are a major reason air purifiers stop working well, according to health organizations like the CDC.
Wiping Down the Interior Housing
With the filters removed, you can now access the inside of the unit. Use your dry microfiber cloth to wipe away any dust that has accumulated inside the housing. For any stubborn spots, use a slightly damp cloth. Be careful not to get water on any electrical components. A cotton swab or small brush can help you get into nooks and crannies around the fan motor. Ensure the interior is completely dry before reassembly.
Step 4: Reassembly and Final Touches
Once all components are clean and dry, it’s time to put your Vornado back together. Carefully reattach the main filter(s), then the pre-filter, and finally, secure the outer grille. Make sure everything clicks or locks into place securely.
After reassembly, give the exterior one last wipe with your dry microfiber cloth. Then, you can plug it back into the wall outlet and turn it on. You should notice a difference in how quietly and efficiently it runs!
Quick Vornado Cleaning Checklist
Here’s a handy list to keep your Vornado in tip-top shape:
- Unplug your Vornado before any cleaning.
- Dust the exterior weekly with a dry cloth.
- Wash or vacuum the pre-filter as needed.
- Clean or replace the main filter according to your manual.
- Wipe down the interior housing when deep cleaning.
- Ensure all parts are completely dry before reassembly.
Conclusion
You’ve learned how simple it is to keep your Vornado air purifier in top working order. Consistent dusting and periodic deep cleans ensure your unit purifies your air effectively. This maintenance protects your investment and provides a healthier living space for you and your family. Remember, a clean air purifier works best. Make cleaning a habit to breathe easier every day.
Frequently Asked Questions
How often should I clean my Vornado air purifier?
You should aim to dust the exterior of your Vornado weekly. For a deeper clean of the interior components and filters, plan to do this every 2-3 months. This frequency might increase if you have pets or live in a particularly dusty environment.
Can I wash the main Vornado filters?
It depends on your specific Vornado model. The pre-filter is usually washable. For the main filters (like HEPA or carbon), always check your Vornado’s manual. Some main filters can be gently vacuumed, while others are designed for replacement only to maintain optimal air purification.
What’s the best way to clean the inside of my Vornado?
After unplugging and removing the filters, use a dry microfiber cloth to wipe down the interior housing. For stubborn spots, a slightly damp cloth can work. Be very careful to avoid getting moisture near any electrical parts. A cotton swab or small brush is great for tight spaces.
My Vornado smells musty. What should I do?
A musty smell often indicates a dirty or damp filter. Ensure your pre-filter is completely dry after washing. If you have a main filter that can be cleaned, give it a thorough vacuuming. If the smell persists or your filter needs replacement, it’s time to clean or swap out the main filter according to your manual’s instructions.
Do I really need to replace the main Vornado filters?
Yes, in most cases, the main filters have a lifespan and will eventually need replacing. While cleaning can help extend their life, they can become clogged and less effective over time. Always refer to your Vornado owner’s manual for the recommended filter replacement schedule to ensure the best air quality.
![5 Best Air Purifier for Open Floor Plan [In 2026]](https://homeunderstandable.com/wp-content/uploads/2025/05/best-air-purifier-for-open-floor-plan-top-picks-for-large-spaces-768x384.jpg)

![5 Best Hepa Air Purifier for Home Use [In 2026]](https://homeunderstandable.com/wp-content/uploads/2025/05/best-hepa-air-purifier-for-home-use.jpg)