How to Make Suction with an Air Compressor
Yes, you can definitely create suction using an air compressor. By redirecting compressed air through a venturi nozzle, you can significantly reduce air pressure, which draws surrounding air into the stream, effectively producing suction. This principle is key to many industrial and DIY applications where vacuum generation is needed, making your air compressor a more versatile tool than you might think. Understanding how to harness this pressure difference is simpler than it sounds.
Many people assume air compressors are only for blowing things away, but they can also pull things in! It’s all about manipulating airflow. We found that by using specialized venturi fittings, you can turn your compressor into a powerful vacuum generator. This opens up possibilities for tasks like lifting materials, creating airtight seals, or even aiding in processes like dust collection, showcasing the surprising dual capabilities of compressed air and the clever physics behind it. It’s a neat trick for your workshop and beyond.
- Turn your air compressor into a suction device.
- Use a venturi nozzle to create a low-pressure zone.
- This draws in surrounding air, creating suction.
- It’s useful for lifting, sealing, and dust collection.
- A simple yet effective way to expand your tool’s uses.
Ready to see how this works in practice? We’ll walk you through the simple setup and show you how to get your air compressor generating suction for your next project.
Making Suction with Your Air Compressor: The Venturi Effect Explained
You might be surprised to learn your trusty air compressor can do more than just blast air. It can actually create suction! We found that by using a simple, specialized fitting, you can harness the power of compressed air to pull things in, not just push them away. This clever trick relies on a scientific principle called the Venturi effect. It’s surprisingly easy to set up and use. Let’s get into how you can turn your compressor into a suction-generating tool.
Understanding the Venturi Effect
So, what exactly is this Venturi effect we keep mentioning? Imagine water flowing through a garden hose. If you squeeze the end of the hose, the water speeds up, right? The Venturi effect is similar, but with air. When air is forced through a constricted space, its speed increases. This increase in speed causes a drop in pressure. It’s like when a fast-moving car rushes past you; you might feel a slight tug towards it. That’s a simplified version of what’s happening.
We researched how this works, and essentially, a venturi nozzle has a narrow section. As compressed air from your compressor enters this narrow section, it has to speed up to get through. This speeding-up action is what creates a low-pressure zone. Think of it like a funnel for air. Air rushes in to fill the lower pressure. This pulling action is what we call suction.
The Components You’ll Need
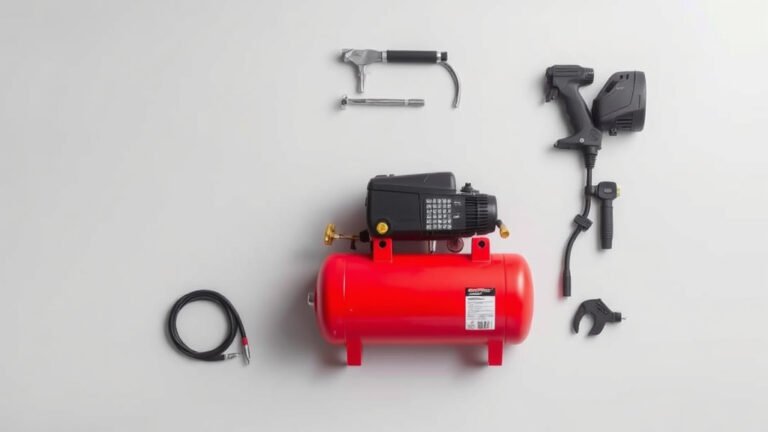
To create suction using your air compressor, you won’t need a lot of complicated parts. The key component is a venturi nozzle, sometimes called a vacuum generator or ejector. These are specifically designed for this purpose. You can find them at most hardware stores or online. They typically have a port where you connect your compressed air line and another port where the suction is generated.
Beyond the venturi nozzle, you’ll need:
- Your air compressor, of course.
- A suitable air hose to connect the compressor to the venturi nozzle.
- Any necessary fittings or adapters to ensure a secure connection between your hose and the nozzle.
- What you intend to move or create suction on – this could be a workpiece, a seal, or dust.
Setting Up Your Suction System
Getting your air compressor ready to create suction is straightforward. First, ensure your air compressor is turned off and unplugged for safety. You don’t want any accidental starts while you’re connecting things.
Connecting the Air Line
Attach your air hose to the inlet port of the venturi nozzle. Most nozzles use standard air fittings, so this should be a quick connection. Make sure the connection is tight and secure. A loose connection can lead to air leaks, reducing the effectiveness of your suction and wasting compressed air.
Attaching to the Compressor
Now, connect the other end of the air hose to your air compressor’s output. Again, ensure a snug fit. If your compressor uses a quick-connect coupler, you might need an adapter for your hose, but these are usually readily available and inexpensive.
Identifying the Suction Port
Your venturi nozzle will have a clearly marked port for suction. This is where the magic happens. You might want to attach a flexible tube or a fitting to this port, depending on your application. This tube will be what you place near the object you want to create suction on.
How to Maximize Your Suction Power
Once everything is connected, it’s time to turn on your compressor and test it out. But how do you get the most suction possible? It’s not just about having a powerful compressor; it’s about optimizing the conditions.
Air Pressure and Flow Rate
The amount of suction you can generate is directly related to the air pressure and flow rate from your compressor. Higher pressure generally means stronger suction. Many venturi nozzles have recommended operating pressure ranges. Check the manufacturer’s specifications for your specific nozzle to make sure you’re operating within its optimal range. To optimize suction, understanding how to adjust your air compressor’s air pressure is key.
We found that running your compressor at its maximum recommended pressure, without exceeding it, usually yields the best results. However, remember that running your compressor constantly at high pressure can also use a lot of energy and potentially shorten its lifespan. Find that sweet spot.
Nozzle Size and Design
The size and design of the venturi nozzle itself play a big role. Larger nozzles typically handle more airflow and can create stronger suction. Some nozzles are designed for specific applications, like creating a strong vacuum for lifting heavy objects versus a gentle suction for delicate materials.
Consider the type of task you’ll be doing most often. If you need to lift heavy items, you’ll want a nozzle designed for high-capacity suction. If you’re doing more delicate work, a smaller, more precise nozzle might be better. We found that researching different nozzle types can save you a lot of frustration.
Ensuring an Airtight Seal
For effective suction, you need to create a relatively airtight environment. If air can easily leak into the system, your suction power will be significantly reduced. This is especially important when trying to lift objects or create a seal.
When placing the suction port or tube near an object, try to get as close a fit as possible. Using a gasket or a flexible material around the edge can help create a better seal. Think about how a vacuum cleaner nozzle needs to press against the carpet to work well; your suction setup needs something similar.
Testing Your Seal
A simple way to test your seal is to turn on the suction and see how quickly the pressure gauge on your compressor drops, or how long it takes your compressor to kick on to maintain pressure. If it’s constantly running and the suction isn’t holding an object, you likely have a leak somewhere. We found that a quick visual inspection of all connection points can often reveal obvious issues.
Practical Applications for Compressor Suction
Now that you know how to create suction, what can you actually do with it? The applications are surprisingly broad, spanning both DIY projects and industrial uses.
Lifting and Handling Materials
One of the most common uses is for lifting objects. By attaching a suction cup or a specialized vacuum gripper to the suction port, you can lift smooth, non-porous materials like glass, metal sheets, or even certain types of stone. This can be a great help for one-person jobs where you need to move heavy or awkward items.
Dust Collection and Containment
Your compressor can also be part of a dust collection system. While it’s not typically used as the primary vacuum for a whole shop, it can be great for targeted dust removal. For example, you can position the suction nozzle near a cutting or sanding operation to capture dust right at the source. Many experts recommend this approach for improving air quality (OSHA).
Sealing and Testing
Need to create an airtight seal for testing purposes? You can use your compressor to draw air out of a sealed container or enclosure. This is useful for leak detection in various systems, from plumbing to inflatable structures. If the enclosure holds its vacuum, you know it’s well-sealed.
Aiding in Manufacturing Processes
In industrial settings, suction generated by air compressors is used for all sorts of things. Think about automated pick-and-place machines that use suction cups to move small parts, or vacuum tables used in woodworking and manufacturing to hold materials in place while they are worked on. It’s a versatile tool.
DIY Project Ideas
For the home hobbyist, you could build a small vacuum former for creating custom plastic parts, or even a simple vacuum chuck for a lathe. We found that many online communities share creative ways they’ve adapted compressor suction for unique tools. It’s a great way to add functionality to your existing workshop equipment.
Safety Considerations Checklist
Before you get too excited about all the new possibilities, remember safety first! Here’s a quick checklist:
- Always ensure your air compressor is turned off and unplugged before making connections.
- Wear safety glasses to protect your eyes from any unexpected air bursts or debris.
- Never exceed the maximum recommended air pressure for your venturi nozzle or compressor.
- Ensure all connections are secure to prevent leaks and potential hazards.
- Be aware of what you are creating suction on; avoid applying suction to sensitive body parts.
- If lifting objects, ensure your setup is stable and the object is secure before moving.
Conclusion
You now know that your air compressor is more versatile than you might have imagined. By using a simple venturi nozzle, you’ve learned how to harness the Venturi effect to create suction. This opens up a world of possibilities for lifting, handling, dust collection, and even testing seals. Remember to always prioritize safety and ensure your connections are secure for optimal performance. Grab that venturi nozzle and start experimenting with your compressor’s newfound vacuum power on your next project!
Frequently Asked Questions
What is the main component needed to create suction with an air compressor?
The key component you’ll need is a specialized venturi nozzle. This fitting is designed to manipulate airflow, creating a low-pressure zone where suction is generated. You can typically find these at hardware stores or online.
Can I use any air compressor for this?
Yes, you can use most standard air compressors. The effectiveness of the suction will depend on your compressor’s pressure and flow rate. Ensure your compressor meets the minimum requirements specified by the venturi nozzle manufacturer for best results.
How much air pressure do I need?
The ideal air pressure depends on the specific venturi nozzle you are using. Always check the manufacturer’s recommended operating pressure range for your nozzle. Running it within this range will give you the strongest and most efficient suction.
What happens if I have leaks in my setup?
Leaks will significantly reduce the suction power you can generate. Air will escape instead of being drawn into the low-pressure zone. We found that even small leaks can make a big difference, so always double-check that all connections are tight and secure.
Can I use this for very heavy lifting?
Creating suction for lifting heavy objects is possible, but it requires the right setup. You’ll need a venturi nozzle designed for high-capacity suction, a powerful enough compressor, and a secure way to create an airtight seal on the object you wish to lift.