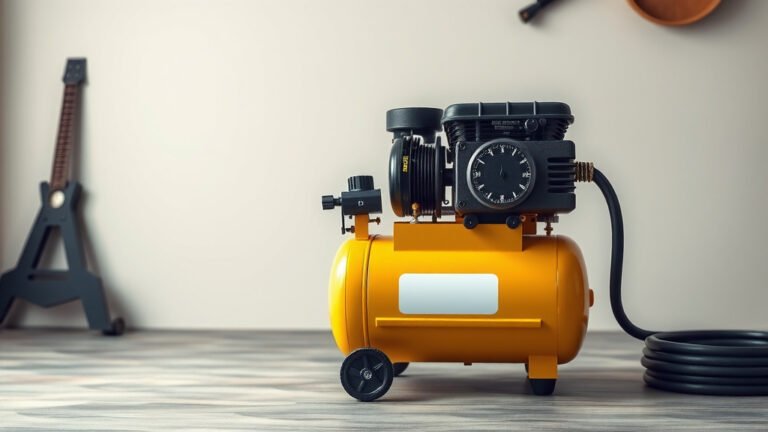
Choosing the Right Air Compressor Size: A Guide
Figuring out how to determine air compressor size means matching its power to your tools’ needs. You’ll need to consider two main things: the CFM (cubic feet per minute) your tools require and the PSI (pounds per square inch) they operate at. Get these right, and you’ll avoid frustrating downtime.
Choosing the correct size prevents your air compressor from constantly running or failing to keep up. Many folks overlook CFM, which is actually the most important factor for most tools. We found that underestimating this can lead to a compressor that simply can’t deliver enough air when you need it most. It’s a common mistake, but an easy one to fix with a little planning.
- You need to know your tools’ CFM and PSI ratings.
- Always pick a compressor with a higher CFM than your tools require.
- Consider if you’ll use multiple air tools at once.
- Factor in future tool purchases when sizing.
Let’s walk through exactly how to calculate your air compressor needs, step by step.
Choosing the Right Air Compressor Size for Your Needs
So, you’re ready to find the perfect air compressor, but how do you pick the right size? It boils down to matching the compressor’s air delivery to what your tools actually need. Think of it like picking the right engine for a car. Too small, and it’ll sputter. Too big, and it’s overkill and wastes energy.
The two most important numbers to focus on are CFM and PSI. You’ll find these specs on your air tools and on the compressor itself. Getting these numbers right ensures your tools run smoothly without the compressor struggling. We found that many DIYers and even some professionals can overlook CFM, which is often the real bottleneck.
Understanding CFM: The Airflow Factor
CFM stands for Cubic Feet per Minute. This is arguably the most critical number when sizing an air compressor. It tells you how much air the compressor can deliver at a certain pressure. Your air tools need a specific amount of air to operate correctly. If the compressor can’t supply enough CFM, your tools won’t perform as they should.
For example, a small air stapler might only need 1 CFM. A powerful impact wrench or a sandblaster will need much more. If you have multiple tools, you need to add up their CFM requirements. Research indicates that exceeding your tools’ CFM needs by about 30-50% is a good rule of thumb. This buffer ensures the compressor isn’t constantly running at its maximum capacity.
How to Find Your Tools’ CFM Requirements
Look for a label or plate on your air tool. It should clearly state the CFM needed. Sometimes, this information is in the owner’s manual. If you can’t find it, a quick online search for your specific tool model usually brings up the specs. We’ve found that older tools or less common brands might be harder to find data for.
Don’t have the manual? A good estimate can often be found through online forums or by contacting the manufacturer directly. Keep in mind that a tool’s CFM requirement can vary slightly based on its operation. Some tools might also list CFM at different PSI levels. Always note the PSI when looking at CFM data.
Understanding PSI: The Pressure Factor
PSI stands for Pounds per Square Inch. This measures the force or pressure of the air. Most common air tools operate between 70 and 100 PSI. Think of PSI as the “oomph” behind the air that makes your tools work. Your compressor needs to be able to reach and maintain the PSI your tools require.
While CFM is about the volume of air, PSI is about the intensity. If a tool needs 90 PSI to work, and your compressor can only deliver 70 PSI, it won’t function properly. Fortunately, most modern air compressors can easily meet the PSI needs of typical workshop tools. The real trick is ensuring they can deliver that pressure *consistently* with enough CFM.
Matching Compressor PSI to Tool Needs
When you look at air compressors, you’ll see a maximum PSI rating. This is the highest pressure the compressor can build. You want this maximum PSI to be higher than what your most demanding tool requires. For example, if your tools operate at a maximum of 100 PSI, a compressor rated for 125 PSI or 150 PSI is perfectly suitable.
Most DIY and home workshop tools fall within a similar PSI range. The key here is not to get a compressor with an unnecessarily high PSI rating. While it won’t hurt your tools, it might mean you’re paying for capacity you don’t need. We found that a compressor with a PSI rating about 20-30 PSI above your highest tool requirement is usually plenty.
Calculating Your Total Air Needs
Now, let’s put it all together. To figure out the minimum CFM your compressor needs, you’ll sum up the CFM requirements of all the tools you plan to use simultaneously. If you only ever use one air tool at a time, you just need to find the CFM for that single tool.
However, most people often use more than one tool, or they might have a compressor running for one tool while another is used intermittently. If you think you might use two tools at once, add their CFM needs together. Research from automotive repair guides often suggests adding a buffer for continuous use. This buffer is crucial for avoiding performance drops.
The Power of a Buffer: Adding Extra CFM
As we mentioned, it’s wise to add a buffer to your total CFM calculation. Why? Because compressors rarely run at 100% efficiency. Also, your tools might have brief moments where they demand a little more air. Experts often recommend adding 30% to 50% to your total CFM requirement.
Let’s say your primary tool needs 5 CFM, and you might use a secondary tool that needs 2 CFM. Your total is 7 CFM. Adding a 50% buffer means you’d look for a compressor that delivers at least 10.5 CFM (7 CFM * 1.50). This buffer is your insurance policy against underperformance and premature wear on your compressor. Many sources suggest this buffer is non-negotiable for consistent tool operation.
Considering Duty Cycle: How Long Can It Run?
Another factor to consider is the compressor’s duty cycle. This refers to how long a compressor can run within a 10-minute period without overheating. A compressor with a 50% duty cycle can run for 5 minutes and then needs to rest for 5 minutes. A 75% duty cycle means it can run for 7.5 minutes and rest for 2.5 minutes.
For intermittent use, like occasional nailing or inflation, a lower duty cycle might be acceptable. However, if you plan on running tools continuously, like with sandblasting or painting, you’ll need a compressor with a 100% duty cycle. These are typically more robust and designed for heavy, continuous operation. We found that underestimating duty cycle needs leads to a compressor that constantly overheats or fails to keep up during longer tasks.
Piston vs. Rotary Screw: Which Type Suits You?
Compressors come in different types, and this affects their suitability for various jobs. For most home users and small shops, piston compressors (also called reciprocating compressors) are common. They are generally less expensive and suitable for intermittent use.
Rotary screw compressors are much more efficient and designed for continuous operation. They have a higher upfront cost but are ideal for industrial settings or serious workshops where a compressor runs all day. Research shows these are the standard for professional applications requiring high CFM and constant air supply.
| Compressor Type | Best For | Typical Duty Cycle | Cost |
|---|---|---|---|
| Piston (Reciprocating) | Homeowners, DIYers, intermittent use, small tasks | 50-75% | Lower |
| Rotary Screw | Professional shops, industrial, continuous use, high demand | 100% | Higher |
Storage Tank Size: Holding Onto the Air
The tank size, measured in gallons, is also important. It acts as a reservoir for compressed air. A larger tank means the compressor doesn’t have to cycle on and off as frequently. This can reduce wear and tear and provide a steadier air supply.
For tools that use air in short bursts (like nail guns), a smaller tank might be fine. But if you’re using tools that require a continuous flow, a larger tank is beneficial. It acts as a buffer, allowing you to use air for a bit longer before the compressor kicks in again. Many experts suggest that for most workshops, a tank between 30 and 60 gallons offers a good balance.
Don’t Forget Future Needs!
When you’re sizing your compressor, think about the future. Will you be adding more air tools down the line? It’s often more economical in the long run to buy a slightly larger compressor than you need right now. This avoids having to upgrade later.
We found that people often underestimate their future tool acquisition. Investing a little extra now can save you money and frustration later. Think about the types of projects you might want to tackle in the next few years. This foresight will help you make a smarter purchase that serves you well for a long time. It’s better to have a little extra capacity than to constantly wish you did.
Quick Checklist for Sizing Your Compressor
- List all your air tools.
- Find the CFM and PSI for each tool.
- Add up the CFM of tools you’ll use simultaneously.
- Add a 30-50% buffer to your total CFM.
- Consider the duty cycle needed for your tasks.
- Factor in future tool purchases.
Conclusion
You’ve now learned the key steps to correctly sizing an air compressor for your needs. Remember, matching your tools’ CFM and PSI requirements is paramount. Don’t forget to factor in a buffer for those unexpected demands and consider your future tool acquisitions. By carefully calculating your air needs and understanding concepts like duty cycle and tank size, you’ll avoid common pitfalls. Your next step is to use this knowledge to confidently select a compressor that will serve you well for many projects to come.
Frequently Asked Questions
What happens if my air compressor’s CFM is too low?
If your air compressor’s CFM is too low, your air tools won’t perform as intended. They might run slower, struggle to maintain pressure, or stop working altogether when demand is high. This can lead to frustration and incomplete projects. You’ll often notice the compressor motor running constantly without being able to keep up.
Is it okay to buy an air compressor with a much higher PSI than I need?
While a higher PSI rating than your tools require won’t damage them, it’s generally not necessary. You might end up paying more for capacity you’ll never use. Most common shop tools operate within a similar PSI range, so focusing on getting the right CFM with adequate PSI is usually the most efficient approach.
How much of a CFM buffer should I really add?
Experts commonly recommend adding a buffer of 30% to 50% to your total calculated CFM requirement. This accounts for the compressor not always running at peak efficiency and for momentary spikes in air demand from your tools. It’s a smart way to ensure consistent performance and reduce wear on the compressor.
What’s the difference between a piston and a rotary screw compressor for home use?
For most homeowners and DIYers, a piston compressor is suitable. They are typically less expensive and best for intermittent use, like powering a nail gun or topping off tires. A rotary screw compressor is designed for continuous operation and high demand, common in professional shops, and has a higher initial cost.
Do I really need to consider the tank size when choosing an air compressor?
Yes, the tank size matters. A larger tank acts as a buffer, storing compressed air. This means your compressor won’t have to cycle on and off as frequently, providing a more consistent air supply and reducing wear and tear. For tools that use air in short bursts, a smaller tank might suffice, but continuous-use tools benefit from a larger reservoir.