How to Flush Your Air Compressor Tank Safely
Yes, you can easily flush out your air compressor tank. It’s a simple process that helps remove moisture and rust particles. Doing this regularly will keep your compressor in great shape and ready to go.
Keeping your air compressor tank clean is important for its performance. A buildup of water can lead to corrosion and damage over time. This guide will show you how to perform this essential maintenance. You’ll want to make sure you have the right tools handy.
- Drain the tank regularly.
- Open the drain valve slowly.
- Listen for the air escaping.
- Close the valve when done.
- Check your owner’s manual for specifics.
Let’s walk through exactly how to flush your air compressor tank step by step, ensuring it runs smoothly for your projects.
Keeping Your Air Compressor Tank Clean and Dry
One of the most important maintenance tasks for your air compressor is regularly draining the tank. This simple step prevents moisture and rust from building up inside. Doing this will help your compressor last longer and perform better. You can do this process in just a few minutes. One of the most important maintenance tasks for your air compressor is regularly draining the tank; our guide covers this process.
Why Draining Your Air Compressor Tank Matters
You might wonder why you need to drain your compressor tank at all. It’s all about the moisture. Air contains water vapor. When the compressor works, it heats up. Then, as the air cools inside the tank, that water vapor turns into liquid water. Think of it like condensation on a cold glass on a hot day.
This water doesn’t just sit there and do nothing. It can cause big problems. Over time, this moisture can lead to rust forming inside your tank. Rust particles can get into your air lines and tools, causing damage. Many experts say that water is the number one enemy of air compressor tanks (Industrial Maintenance News).
The Risks of Neglecting Your Tank
If you let water sit in the tank, it can corrode the metal. This means the tank can weaken over time. A weakened tank is a safety hazard. It could eventually fail. This is why checking and draining your tank is so critical.
Plus, rust particles aren’t good for your tools. They can clog up filters and damage delicate parts. This leads to more repairs and less efficiency for your tools. Keeping the tank clean means keeping your tools happy.
Gathering Your Tools for the Job
Before you start, make sure you have everything you need. This will make the draining process smooth and quick. You don’t need a lot of fancy equipment. Just a few basic items will do the trick.
Essential Items You’ll Need
- A drain pan or bucket large enough to hold the water and any debris.
- A shop rag or paper towels for wiping up spills.
- Safety glasses to protect your eyes from any flying particles or spray.
- Gloves, if you prefer to keep your hands clean.
You’ll also want to consult your air compressor’s owner’s manual. It might have specific instructions or recommendations for your model. Every compressor is a little different.
Step-by-Step Guide to Draining Your Air Compressor Tank
Now that you’re prepared, let’s get to the actual draining. It’s a straightforward process. Remember, safety first! Always make sure the compressor is turned off and unplugged before you begin.
Step 1: Power Down and Depressurize
First things first, turn off the compressor. Then, unplug the power cord from the outlet. This is a vital safety step. You don’t want the compressor to accidentally turn on while you’re working on it. You also need to release the air pressure in the tank. You can do this by turning off the power switch and letting the motor cool down. Some models may have a specific depressurizing valve. Check your manual for guidance on this.
Step 2: Locate the Drain Valve
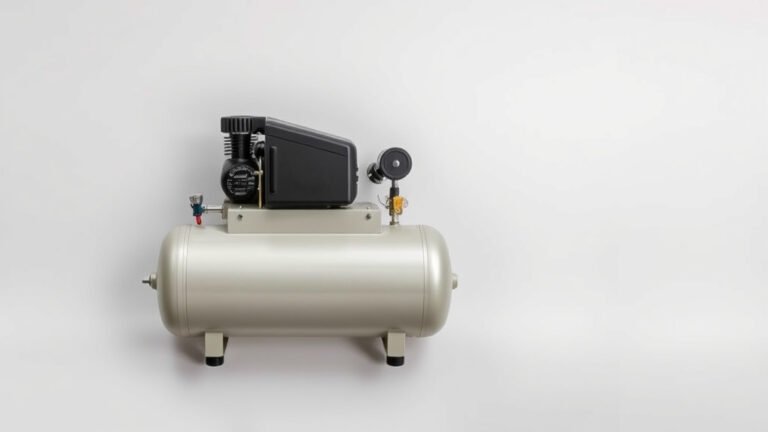
The drain valve is usually at the very bottom of the air compressor tank. It often looks like a small knob, a petcock, or a small pipe fitting. It might be a ball valve with a lever handle or a faucet-style valve. Take a look under the tank. You should find it without too much trouble.
Step 3: Position Your Drain Pan
Place your drain pan directly underneath the drain valve. Make sure it’s centered. You want to catch all the water and any rust particles that come out. Some water will likely spray out, so ensure the pan is wide enough to catch most of it. A little spill cleanup is usually part of the job.
Step 4: Open the Drain Valve Slowly
Now, it’s time to let the water out. Slowly open the drain valve. If it’s a lever-style valve, turn the lever. If it’s a knob or faucet, turn it counterclockwise. You should hear the air hissing out as it escapes the tank. It’s important to open it slowly at first. This prevents a sudden rush of water and debris.
As the air releases, the water will start to drain into your pan. You might see some murky water, and possibly small bits of rust. This is exactly what you’re trying to remove! Many users find this first burst of water to be quite dirty.
Step 5: Let it Drain Completely
Allow the tank to drain until no more water comes out. You’ll hear the air pressure equalize with the atmosphere. Once the hissing stops and only a trickle of water, or no water at all, is coming out, it’s mostly empty. Let it drain for a minute or two longer just to be sure. This ensures you get as much moisture out as possible.
Step 6: Close the Drain Valve
Once the draining is complete, close the drain valve. Turn it clockwise until it’s snug. Don’t overtighten it, but make sure it’s closed securely. You don’t want any air leaks. A properly sealed valve is key to your compressor’s efficiency.
Step 7: Final Wipe Down
Use your rag or paper towels to wipe up any water that spilled around the drain valve. Give the valve itself a quick wipe too. This keeps things tidy and prevents any residual moisture from sitting there.
How Often Should You Drain Your Air Compressor?
The frequency of draining depends on how often you use your compressor and the humidity levels in your work area. A good rule of thumb is to drain it at the end of each day you use it. This is especially true if you live in a humid climate. The frequency of draining depends on how often you use your compressor; our guide explains how often to drain.
If you only use your compressor occasionally, try to drain it at least once a month. Many guidelines suggest draining after every use for optimal tank life (Tooling Magazine). Consistent draining is key to preventing serious issues down the line. Think of it like brushing your teeth for your compressor’s tank.
Troubleshooting Common Issues
Sometimes, things don’t go exactly as planned. Here are a couple of common issues you might encounter:
Valve Won’t Open or Seems Stuck
If the drain valve is difficult to turn, don’t force it too hard. You could break it. Sometimes, rust or debris can jam the valve. You can try gently tapping around the valve with the handle of a screwdriver to loosen it. If that doesn’t work, you might need to apply a penetrating lubricant (like WD-40) and let it sit for a while. If it’s still stuck, you may need to replace the valve. This is something you can usually do yourself if you’re comfortable with basic plumbing.
Water Doesn’t Drain Out Freely
If very little water comes out, or it seems like it’s not draining properly, the drain line might be clogged. This is usually caused by rust and debris buildup. You might need to open the valve fully and try to clear the clog. Sometimes, you can use a thin wire or a small tool to carefully probe the opening. If the clog is severe, you may need to remove the drain valve entirely to clear it. Again, check your manual for specific instructions on valve removal.
Checklist for Draining Your Air Compressor
Here’s a quick checklist to make sure you don’t miss any steps:
- Turn off and unplug the air compressor.
- Locate the drain valve at the bottom of the tank.
- Place a suitable drain pan underneath.
- Slowly open the drain valve.
- Let all water and debris drain out.
- Close the drain valve securely.
Following these steps will help ensure your air compressor tank stays in good condition and functions reliably for all your projects. It’s a small amount of effort for a big return in performance and longevity.
Conclusion
You’ve learned how simple it is to flush your air compressor tank, a vital step to prevent moisture and rust buildup. Regular draining keeps your tools running efficiently and extends the life of your compressor. It prevents corrosion and potential safety hazards down the road. Make it a habit to drain your tank after each use, or at least monthly if usage is infrequent. Your compressor will thank you with reliable performance for all your projects. Take that small step today to keep your equipment in top shape!
Frequently Asked Questions
How do I know if my air compressor tank has water in it?
The easiest way is to drain it regularly. If you see murky water or rust particles come out, you know there was moisture. You might also notice a slight hissing sound even when the compressor isn’t running, indicating a potential leak from moisture buildup around the valve.
Can I use a wrench to open a stuck drain valve?
You can try using a wrench on the valve stem or lever, but be gentle. Forcing it can damage the valve. If it’s stuck due to rust, try a penetrating lubricant first and let it soak. Check your manual for any specific recommendations before applying force.
What happens if I never drain my air compressor tank?
If you don’t drain your tank, moisture will accumulate and cause rust to form inside. This rust can eventually break off, clog your tools, and damage them. The tank itself can also corrode over time, becoming a safety hazard.
Is it safe to drain the tank while the compressor is still slightly pressurized?
Yes, it’s safe and necessary to drain the tank after you’ve turned off and unplugged the compressor. The remaining pressure is what forces the water out. You should always ensure the compressor is powered off and disconnected from its power source before you begin draining.
What kind of drain pan do I need for flushing the tank?
You’ll need a drain pan or bucket that’s large enough to catch all the water that comes out, plus any debris. A standard oil drain pan or a sturdy bucket works well. Consider its width to catch potential splashes, especially during the initial release of air and water.