Hook Up Air Compressor to Sprinkler System: A Guide
Yes, you absolutely can hook up an air compressor to your sprinkler system, and it’s a smart move for winterizing. This method effectively blows out water, preventing frozen pipes and costly damage. It’s often considered the most reliable way to protect your sprinklers.
When winter approaches, draining your sprinkler system is essential. Using an air compressor is a homeowner’s best friend for this task. It ensures all residual moisture is removed from the lines, valves, and heads. Many find this approach less messy than manual draining methods.
- Winterize your sprinkler system effectively.
- Prevent frozen pipes and damage.
- Use an air compressor to blow out water.
- It’s a reliable and efficient method.
Let’s walk through exactly how you can connect your air compressor to your sprinkler system safely and effectively.
Connecting an Air Compressor to Your Sprinkler System for Winterizing
You’ve got an air compressor and a sprinkler system. Naturally, you’re wondering how they can work together to save your pipes. Connecting an air compressor is a fantastic way to blow out water before the freezing temperatures hit. It’s a method many homeowners find reliable. Let’s walk through how to do it safely and effectively.
Gathering Your Essential Tools
Before you start, make sure you have everything you need. Having the right tools makes the job much smoother and safer. You wouldn’t want to be halfway through and realize you’re missing a key component, right?
What You’ll Need
- Air Compressor: A compressor with at least 5 horsepower and a tank of 10 gallons or more is ideal. You’ll want enough airflow to do the job.
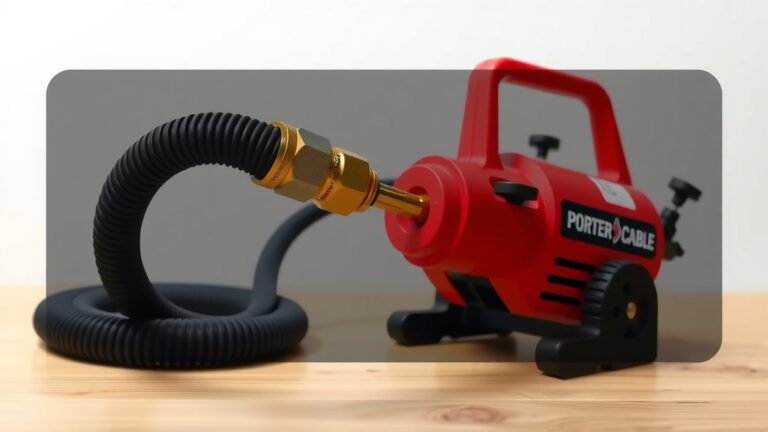
- Hose Adapter: You’ll need a way to connect your air compressor hose to your sprinkler system’s backflow preventer or an isolation valve. This is often a 3/4-inch or 1-inch threaded adapter.
- Hose Clamps: To secure the connection and prevent leaks.
- Teflon Tape: For ensuring threaded connections are watertight.
- Air Blower/Blowout Plug: This specialized plug screws into the same port as a sprinkler head. It allows air to enter the system.
- Trenching Shovel (Optional): If you need to access an underground valve.
- Safety Glasses: Always protect your eyes!
- Work Gloves: To protect your hands.
Preparing Your Sprinkler System for Airflow
Proper preparation is key to a successful blowout. You want to make sure your system is ready to receive compressed air without any surprises. This means shutting off the water and isolating the part of the system you’ll be working on.
Shutting Off the Water Supply
This is a critical first step. You absolutely must turn off the main water supply to your sprinkler system. Look for a shut-off valve, often located near your water meter or where the sprinkler line connects to your home’s main water line. Turning this valve clockwise will shut off the water.
Locating the Blowout Point
The best place to connect your air compressor is usually at the backflow preventer. This device is designed to stop sprinkler water from flowing back into your home’s drinking water supply. It’s typically located near your main water shut-off valve. If you can’t access your backflow preventer easily, you might need to connect at an isolation valve on the main sprinkler line.
Sometimes, these points are buried. You might need a shovel to gently uncover them. Be careful not to damage any pipes or wires. Many experts recommend using the main shut-off valve for your system if it’s easily accessible.
Disassembling the Backflow Preventer (If Necessary)
Your backflow preventer might have a small drain cap or a port that you can unscrew. This is where you’ll likely connect your air hose adapter. Use a wrench to carefully remove the cap. Make sure you don’t lose any small parts.
Connecting the Air Compressor
Now for the main event! Connecting the compressor needs to be done carefully to avoid damaging your system with too much pressure.
Attaching the Hose Adapter
Wrap the threads of your hose adapter with Teflon tape. This helps create a tight seal. Screw the adapter into the port you’ve identified on the backflow preventer or isolation valve. Hand-tighten it first, then use a wrench to snug it up. You don’t want it to leak!
Connecting the Air Compressor Hose
Attach your air compressor hose to the adapter. Secure it with a hose clamp. Ensure the clamp is tight enough to prevent air from escaping under pressure. A loose connection here will make your job much harder.
Setting the Air Pressure: A Crucial Step
This is where many people make a mistake. Sprinkler systems are not designed for high pressure. You need to regulate your air compressor’s output. Research shows that most sprinkler systems can safely handle between 30 to 50 PSI. Setting your compressor’s regulator too high can cause pipes to burst or heads to crack. Start low and increase slowly if needed.
We found that many DIY guides recommend setting the regulator to about 50 PSI. Always check your sprinkler system’s manual if you have it. It might specify a maximum pressure.
The Blowout Process: Step-by-Step
With everything connected, it’s time to start blowing out the water. This is where you’ll see your efforts pay off.
Starting the Compressor and Airflow
Turn on your air compressor. Let it build up pressure to your set level. Once it reaches the desired PSI, slowly open the valve on your air hose to begin introducing air into the sprinkler system. Listen for the air rushing through the pipes.
Blowing Out Each Zone
You’ll need to winterize your sprinkler system zone by zone. Most systems have multiple zones controlled by separate valves. You’ll typically need to isolate each zone to blow it out effectively. This might involve closing the main valve and then opening the valve for a specific zone. Research suggests this is more efficient.
For each zone, let the air run for a minute or two, or until you no longer hear water sputtering out of the sprinkler heads. You should hear a steady hiss of air. You can usually see water being expelled from the sprinkler heads furthest from your connection point.
Dealing with Sprinkler Heads
As you blow out each zone, walk around your yard and check the sprinkler heads. You want to see them spitting out air, not water. If you have pop-up heads, they should be popping up slightly as the air pressure builds. If a head isn’t working, it might be clogged or frozen already.
Checking for Water and Moving On
Once a zone is clear of water, close the valve for that zone (if you opened a specific zone valve) and move on to the next. Repeat the process until all zones have been blown out. It’s a bit like a water-wise dance.
Final Checks and Disconnection
Don’t rush the disconnection process. A few final checks ensure you’ve done a thorough job.
Ensuring All Water is Gone
After blowing out all zones, it’s good practice to go back to the blowout point and give it one last blast of air. This helps to push out any remaining moisture that might have settled. Many experts say this is a smart move.
Safely Disconnecting Components
Turn off your air compressor. Then, carefully disconnect the air hose from the adapter. You might hear a puff of air escaping, which is normal. Unscrew the adapter from the backflow preventer or valve. Reinstall any caps or covers you removed.
We found that making sure all connections are clean and dry before storing your equipment helps prevent rust and makes next year’s job easier.
Checklist for a Successful Blowout
- Water supply to the sprinkler system is OFF.
- You’ve identified and accessed the correct blowout point (backflow preventer or isolation valve).
- Air pressure is regulated to 30-50 PSI.
- Each zone has been individually blown out until only air remains.
- All components are safely disconnected and stored.
- Remember to wear safety glasses throughout the process.
Conclusion
You’ve successfully learned how to connect your air compressor to your sprinkler system for winterizing. This process is essential for protecting your pipes from freeze damage. By following these steps, you can effectively blow out all the water, ensuring a smooth startup next spring. Remember, proper pressure regulation and attention to each zone are key. Now, take a moment to review your checklist and feel confident you’ve winterized your system correctly. Make a note to check your system for any needed repairs before the next watering season begins.
Frequently Asked Questions
What size air compressor do I need for my sprinkler system?
A compressor with at least 5 horsepower and a 10-gallon tank is recommended for most residential systems. This size provides enough consistent airflow to effectively push water out of your lines. Using a smaller compressor might take much longer or not be powerful enough.
Can I use my air compressor to winterize my sprinkler system without a special blowout plug?
While a dedicated blowout plug that screws into a sprinkler head is convenient, you can often connect directly to the backflow preventer or an isolation valve using a hose adapter. Ensure this connection is secure with a hose clamp and Teflon tape to prevent leaks during the process.
How much air pressure (PSI) should I use when blowing out my sprinkler system?
It’s vital to keep the pressure low, typically between 30 and 50 PSI. Sprinkler system pipes and components aren’t designed for high pressure. Exceeding this range can cause them to burst or crack, leading to expensive repairs.
What happens if I don’t blow out all the water from my sprinkler system?
If water remains in your pipes and then freezes, it can expand and cause significant damage. This includes cracked pipes, broken sprinkler heads, and damaged valves. This damage can lead to costly repairs and a non-functional sprinkler system come spring.
How long should I let the air run for each zone?
You should let the air run for each zone for about one to two minutes, or until you no longer hear any sputtering water. You want to hear a steady hiss of air coming from the sprinkler heads in that zone. This indicates that most of the water has been expelled.