Install Auto Drain Valve for Air Compressor: A Step-by-Step Guide
Installing an auto drain valve for your air compressor is a straightforward DIY project. It will automatically remove moisture, which is key to protecting your compressor and tools. You can typically install one in about 30 minutes with basic tools.
Keeping your air compressor tank dry is really important. Water buildup can lead to rust and damage your equipment over time. An auto drain valve takes the guesswork out of draining. Many users find it a worthwhile upgrade for any compressor owner.
- Auto drain valves remove moisture automatically.
- This prevents rust and protects your tools.
- Installation is usually a quick DIY task.
- It’s a smart upgrade for compressor maintenance.
Let’s walk through exactly how to install an auto drain valve on your air compressor step by step.
Setting Up Your Air Compressor with an Auto Drain Valve
Installing an auto drain valve is a great way to protect your air compressor. It removes moisture automatically. This prevents rust and keeps your tools happy. You can usually do this yourself in under an hour.
Why You Need an Auto Drain Valve
Your air compressor works by compressing air. When air is compressed, it heats up. As it cools, water vapor condenses. This water collects in the bottom of your air tank. If left unchecked, this water can cause serious problems over time.
The Dangers of Water Buildup
That water sitting in your tank isn’t just harmless condensation. It’s a recipe for disaster. Rust is the most common culprit. This rust can flake off and contaminate your compressed air. Imagine spraying rusty water onto your car when you’re painting it! Not good.
Beyond just rust, standing water can damage the internal components of your compressor. It can lead to premature wear and tear. It can also affect the performance of your tools, especially sensitive ones like spray guns or impact wrenches. Keeping the tank dry is essential maintenance.
How an Auto Drain Valve Solves the Problem
An auto drain valve automates the draining process. Instead of you remembering to open the manual drain valve, the auto drain does it for you. It releases the built-up moisture at set intervals or when a certain pressure is reached. This ensures your tank stays consistently dry.
Many users find this a huge time-saver. It also provides peace of mind. You don’t have to worry about forgetting to drain the tank. This consistent moisture removal means less rust, longer tool life, and cleaner air. It’s a simple upgrade with big benefits.
Gathering Your Tools and Parts
Before you start, make sure you have everything ready. This makes the installation process smooth and quick. You don’t want to be searching for a specific wrench halfway through.
What You’ll Need
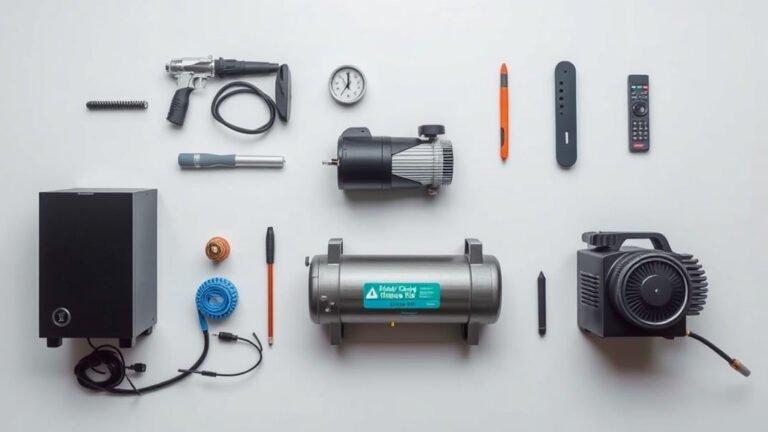
Most installations require just a few common tools. You’ll definitely need an adjustable wrench. A pipe wrench can also be helpful for stubborn fittings. Don’t forget thread seal tape, also known as plumber’s tape.
You’ll also need your new auto drain valve. Make sure it’s the correct type for your air compressor. Consider the threading size and the valve’s pressure rating. It’s wise to have a small container or rag handy for any residual drips.
Choosing the Right Auto Drain Valve
There are a few types of auto drain valves. The most common are solenoid valves and mechanical float valves. Solenoid valves use an electrical signal to open and close. Mechanical float valves use a float to detect water level.
For most DIYers, a simple timer-controlled solenoid valve is a great choice. You can set how often it drains and for how long. They are reliable and relatively inexpensive. Always check the reviews and specifications to ensure compatibility with your compressor’s operating pressure and tank size.
Step-by-Step Installation Guide
Now, let’s get down to the actual installation. We’ll break it down into simple, manageable steps. Remember to always prioritize safety.
Step 1: Safety First – Power Down and Depressurize
This is the most critical step. Your air compressor holds pressure, and working on it while pressurized is extremely dangerous. Turn off the compressor at the power switch. Then, locate the manual drain valve at the bottom of the tank.
Slowly open the manual drain valve to release all the stored air. You should hear the air escaping. Keep it open until no more air is coming out. Double-check that the compressor is unplugged from the power source. You want to be absolutely sure there’s no power and no pressure before you proceed.
Step 2: Locate and Remove the Old Drain Valve
Your air compressor likely has a manual drain valve at the very bottom of the tank. It’s usually a small knob or petcock. You need to remove this old valve.
Using your adjustable wrench or pipe wrench, carefully loosen the old drain valve. Turn it counter-clockwise. Be prepared for a small amount of residual water to drip out, even after draining. Have your rag or container ready for this. Once it’s loose, unscrew it completely.
Step 3: Prepare the Tank Outlet
Inspect the threads on the tank where the old valve was. Make sure they are clean and free of debris. If there’s any old thread seal tape or gunk, gently clean it away with a rag. Clean threads ensure a good seal for your new valve.
Step 4: Install the Auto Drain Valve
Take your new auto drain valve. Wrap the threads of the valve with thread seal tape. Apply 3-4 wraps, making sure to wrap in the same direction the fitting will tighten (usually clockwise). This tape helps create a watertight seal.
Now, carefully thread the auto drain valve into the tank outlet. Turn it clockwise by hand first. Once it’s snug, use your wrench to tighten it. Don’t overtighten it, as this can damage the threads or the valve. Aim for a firm, secure fit.
Connecting the Electrical Component (for Solenoid Valves)
If you’re installing an electrical solenoid valve, you’ll need to connect it to power. Many kits come with a power cord. You might need to plug it into a nearby outlet or wire it into the compressor’s control system. Follow the manufacturer’s instructions very carefully for this step.
If you’re not comfortable with electrical wiring, it’s best to consult an electrician or a qualified technician. Incorrect wiring can damage the valve or pose a safety hazard. Safety first!
Step 5: Set Up the Drain Timer (if applicable)
For timer-controlled solenoid valves, you’ll set the drainage frequency and duration. Most units have simple dials or buttons for this. A good starting point is to set it to drain for 1-2 seconds every 15-30 minutes.
You can adjust these settings later based on your usage. If you use your compressor a lot, you might want shorter intervals. If it sits idle for long periods, longer intervals are fine. Experiment to find what works best for your specific needs.
Step 6: Test for Leaks and Functionality
With the new valve installed and any electrical connections made, it’s time to test. Plug your compressor back in and turn it on. Let it build pressure.
Listen carefully for any hissing sounds, which could indicate a leak around the new valve. You can also use a spray bottle with soapy water. Spray around the fitting. If you see bubbles forming, you have a leak. If you find a small leak, try tightening the valve slightly. If it persists, you may need to remove the valve, reapply thread seal tape, and reinstall it.
Once the compressor reaches its cut-off pressure, the auto drain valve should activate according to its timer setting. You should hear it briefly hiss as it expels water. Ensure it’s operating as expected. This confirms your installation was successful and the valve is working correctly.
Maintenance Checklist for Your New Auto Drain Valve
Once your auto drain valve is installed, a little regular attention will keep it running smoothly. Think of it like changing the oil in your car – simple but important.
- Check for leaks monthly. A quick visual inspection is usually enough.
- Listen for the drain valve operating daily, especially when the compressor is cycling.
- Keep the valve area clean and free of dust or debris.
- Test the manual override (if your valve has one) every few months to ensure it still works.
- Periodically check your timer settings to ensure they’re still appropriate for your usage.
Conclusion
You’ve successfully learned how to install an auto drain valve on your air compressor. This simple upgrade significantly protects your equipment from moisture damage and rust. By automating the draining process, you save time and gain peace of mind. Remember to always prioritize safety by powering down and depressurizing your compressor before starting. Now that your auto drain valve is installed, you can enjoy cleaner air and extend the life of your tools and compressor. Make it a habit to check for leaks monthly.
Frequently Asked Questions
What kind of auto drain valve is best for a home garage compressor?
For most home garage setups, a timer-controlled solenoid valve is an excellent choice. They are reliable, affordable, and easy to set up. You can program them to drain your tank at regular intervals, ensuring moisture is removed consistently.
Can I install an auto drain valve if I’m not experienced with plumbing?
Yes, you can! The installation process for an auto drain valve is quite straightforward and generally considered a DIY-friendly task. With basic tools like an adjustable wrench and some thread seal tape, most people can complete the installation successfully.
How often should I set my auto drain valve to activate?
A good starting point is to set your timer-controlled valve to drain for 1-2 seconds every 15-30 minutes. You can adjust this based on how much you use your compressor. If it’s in frequent use, you might opt for shorter intervals. If it sits idle, longer intervals are usually sufficient.
What happens if my auto drain valve starts leaking?
If you notice a leak, the first step is to try tightening the valve slightly. If the leak persists, you may need to remove the valve, clean the threads on both the valve and the tank outlet, reapply fresh thread seal tape, and reinstall it securely. Ensure you don’t overtighten.
Do I need to worry about electrical connections for all auto drain valves?
Not all of them. Mechanical float valves operate without electricity. However, solenoid valves, which are very common and effective, do require an electrical connection to power their solenoid and timer mechanism. Always follow the manufacturer’s wiring instructions carefully for safety.