Dry Your Air Compressor Tank: Prevent Moisture Buildup
Keeping moisture out of your air compressor tank is essential for its longevity and performance. The most effective way to do this is by regularly draining the tank and using a good quality air dryer. This prevents rust and ensures your tools receive dry, clean air.
Excess moisture can cause serious problems, from damaging your compressor to ruining the tools you connect. It’s a common issue that many air compressor owners face. Addressing it promptly will save you money on repairs and ensure your equipment runs smoothly for years to come.
TL;DR:
- Drain your air compressor tank regularly.
- Install and maintain an air dryer.
- Check and replace air filters.
- Store your compressor in a dry location.
- Use a water separator if needed.
Let’s walk through exactly how to keep that pesky moisture from causing trouble in your air compressor tank.
Battling Moisture Buildup in Your Air Compressor Tank
Dealing with condensation inside your air compressor tank is like having an uninvited guest at a party. It shows up unannounced and can mess things up. Fortunately, keeping your tank dry is quite manageable. You just need to know the simple steps to take. Let’s dive into how you can prevent moisture from causing problems for your equipment.
Understanding Why Moisture Forms
So, why does water end up in your air compressor tank in the first place? It all comes down to basic physics. When you compress air, it heats up. As this hot, compressed air cools down in the tank, its ability to hold moisture decreases. This leads to condensation, much like how a cold glass of lemonade sweats on a warm day (U.S. Department of Energy).
Think of it this way: warm air is like a big suitcase that can hold a lot of items. When you cool that air down, it’s like trying to stuff those items into a tiny little bag. The excess items (water) have to come out. This water then settles at the bottom of your tank. It’s a natural process, but one you need to manage.
The Impact of Tank Moisture
Why is this water such a big deal? For starters, it can lead to rust. Metal tanks, when constantly exposed to water, will eventually corrode from the inside. This rust can then break off into flakes and get into your compressed air lines. This is bad news for your tools.
Your air tools, whether they’re paint sprayers, impact wrenches, or nail guns, are designed for clean, dry air. Water can cause internal components to seize up, leading to reduced performance or even complete failure. Plus, that rust can contaminate finishes if you’re painting, leaving tiny specks where they don’t belong.
Your First Line of Defense: Draining the Tank
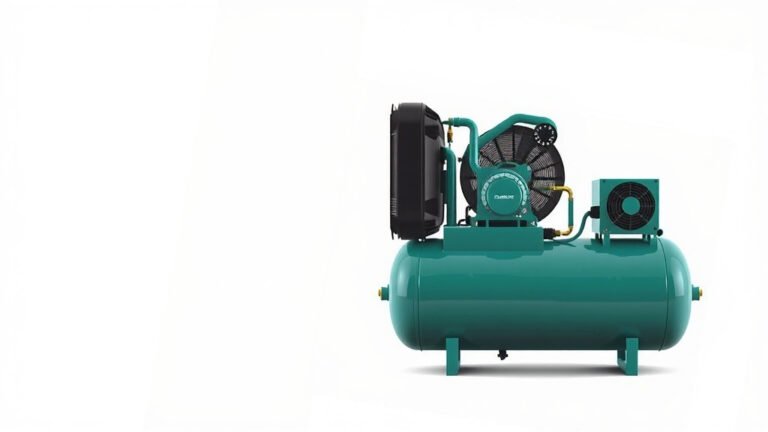
The most critical habit you can develop is regularly draining your air compressor tank. This is your primary defense against moisture buildup. Most compressors have a drain valve located at the very bottom of the tank. It often looks like a small faucet or a knob.
How Often Should You Drain?
The frequency depends on how much you use your compressor and the humidity in your environment. If you’re using your compressor daily, even for short periods, it’s a good practice to drain it at the end of each workday. For less frequent use, draining it after each session is still wise.
We found that a simple visual check can help. If you can see even a little water when you open the drain valve, it’s time to let it all out. Don’t wait until you hear sloshing sounds; that means a lot of water has already accumulated.
The Draining Process: Step-by-Step
Draining is straightforward. First, ensure the compressor is turned off and the tank has no pressure. You can do this by simply not running it for a while or by carefully releasing pressure using the regulator. Then, locate the drain valve at the bottom.
You can usually open it by hand, but sometimes a wrench might be needed. Position a suitable container underneath the valve to catch the expelled water and air. Slowly open the valve. You’ll likely hear a hiss as the air and water come out. Let it drain until only air comes out. Close the valve securely afterward.
Boosting Dryness with an Air Dryer or Filter
While draining is essential, it’s not always enough, especially if you need consistently dry air or work in a humid climate. This is where an air dryer or a water separator comes into play. These devices are designed to remove moisture before the air even reaches your tank or your tools.
Types of Air Dryers and Separators
There are a few main types. Refrigerated air dryers cool the compressed air down to a low temperature, causing moisture to condense and be removed. They are very effective for larger volumes of air.
Desiccant air dryers use a material that absorbs moisture. As the compressed air passes through, the desiccant material traps the water. These are great for applications where ultra-dry air is needed, like painting or operating sensitive pneumatic controls.
A simpler option is a cyclone water separator. These spin the air, forcing water droplets to the sides and out through a drain. They are less effective than dryers but are a good first step in moisture removal and are often much more affordable.
Installation and Maintenance
Installing an air dryer or water separator usually involves plumbing it into your compressed air line, typically after the compressor but before any storage tanks or tools. Follow the manufacturer’s instructions carefully for the best results.
Maintenance is key. For desiccant dryers, the desiccant material will eventually become saturated and need to be replaced or regenerated. Water separators often have automatic or manual drains that need to be checked regularly, just like your tank drain. Keep your manuals handy for specific maintenance schedules (U.S. Environmental Protection Agency).
Don’t Forget Your Air Filters!
Air filters are often overlooked in moisture control, but they play a role. Filters remove particles, but a clogged filter can affect airflow and potentially trap some moisture. Ensuring your filters are clean helps maintain efficient operation and can indirectly assist in managing moisture.
Checking and Replacing Filters
Check your compressor’s manual to locate your air intake filter and any inline filters. Inspect them regularly. If they look dirty or clogged, it’s time for a replacement. This simple step ensures your compressor breathes clean air, which is always a good thing.
Location, Location, Location!
Where you store and operate your air compressor can make a difference. Try to keep your compressor in a dry, well-ventilated area. Basements or garages can be humid environments, especially during certain times of the year. If possible, place your compressor away from potential moisture sources.
Environmental Factors
High humidity is your enemy. If you live in a region with consistently high humidity, you might need to be even more diligent with draining and consider upgrading your moisture removal system. Keeping the compressor itself clean and free from debris also helps with overall air circulation and reduces the chances of moisture settling in overlooked spots.
A Quick Checklist for a Dry Tank
Here’s a handy checklist to keep your tank moisture-free:
- Drain the tank after every use.
- Check the drain valve for leaks.
- Inspect air filters monthly.
- Consider an air dryer for demanding use.
- Store the compressor in a dry location.
- Listen for unusual hissing sounds (could indicate a leak).
By following these straightforward steps, you can effectively keep moisture out of your air compressor tank. This will ensure your equipment runs reliably and lasts much longer. Isn’t that what we all want for our tools?
Conclusion
You’ve learned how simple steps can make a big difference for your air compressor. Regularly draining your tank is your first and best defense against damaging moisture. For even better protection, especially in humid conditions or for sensitive tools, consider adding an air dryer or a water separator. Keeping your filters clean and your compressor in a dry spot also adds to its longevity.
By consistently applying these practices, you’ll prevent rust, ensure your tools work their best, and save yourself money on repairs. Make draining the tank a habit after every use – your compressor will thank you for it!
Frequently Asked Questions
How often should I *really* drain my air compressor tank?
It’s best to drain your tank after every time you use the compressor, or at least at the end of each workday. If you live in a very humid area or use your compressor frequently, draining it more often is a good idea. Check visually; if you see any water, drain it completely.
Can I just leave a bucket under the drain valve all the time?
While leaving a bucket can catch water, it’s not a foolproof method. You still need to open the valve to ensure all the condensed water and any trapped air are released. Leaving it open constantly could also allow dust or debris to enter your tank, which you definitely want to avoid.
What’s the difference between an air dryer and a water separator?
A water separator uses mechanical means, like spinning air, to remove larger water droplets. An air dryer, either refrigerated or desiccant, actively removes moisture from the air itself. Separators are a good first step, but dryers provide much drier air for more critical applications.
My compressor is in my garage, which can get damp. What can I do?
If your garage is humid, you might need to be extra diligent with draining. Consider placing your compressor on a small raised platform to keep it off a potentially damp floor. Investing in a more robust air dryer or a good quality water separator will also be beneficial in these conditions.
Will a little bit of water in the tank really hurt anything?
Even a small amount of water can start the rusting process inside your metal tank over time. This rust can then break off and travel through your air lines, damaging your sensitive air tools. Preventing moisture from accumulating in the first place is always the best approach for long-term equipment health.