How to Remove Dyson Air Purifier Filter: A Simple Guide
Removing the filter from your Dyson air purifier is actually quite simple. You just need to twist the base and the filter unit will release. This process is essential for regular maintenance. It helps ensure your purifier works its best.
Keeping your Dyson air purifier clean means better air quality for your home. A clogged filter can reduce its efficiency. Many users find that a quick filter swap makes a noticeable difference. We found that regular cleaning protects your investment too.
- Twist the base to remove the filter.
- Clean or replace your filter as needed.
- This keeps your air pure and your machine running well.
- It’s a quick process for great results.
Let’s walk through exactly how to remove and replace your Dyson air purifier filter, step by step.
Getting Started with Your Dyson Air Purifier Filter Change
Ready to give your Dyson air purifier a little love? Swapping out the filter is a key part of keeping your air fresh and clean. Think of it like giving your car an oil change. You know, it just keeps everything running smoothly. We found that this simple step can really boost your purifier’s performance. It also helps prevent potential issues down the road. Let’s get this done!
When is it Time to Change Your Dyson Air Purifier Filter?
Dyson air purifiers are pretty smart. They often let you know when the filter needs attention. Most models have a built-in indicator light or display. This will alert you when it’s time for a change. If you don’t see an alert, a good rule of thumb is to check your filter every 6 to 12 months. This timeline can change based on how often you use the purifier and your home’s air quality. For example, if you live in a dusty area or have pets, you might need to change it sooner. We found that following the manufacturer’s recommendations is always the best approach.
Understanding Your Dyson Air Purifier Filter Types
Dyson offers different filter types depending on your model. Most current models use a combination HEPA and activated carbon filter. The HEPA part captures tiny particles like pollen and dust. The activated carbon layer helps trap gases and odors. Some older models might have separate filters. Always check your owner’s manual to be sure. Knowing your filter type ensures you get the right replacement when you need one. We found that using the correct filter type is essential for your purifier’s optimal functioning.
Step-by-Step Guide to Removing Your Dyson Air Purifier Filter
Removing the filter from your Dyson air purifier is straightforward. You don’t need special tools. Just a few simple twists and turns will do the trick. We’ve broken down the process into easy steps. This will help you get it done quickly and correctly.
Step 1: Power Down and Unplug
First things first, safety! Always make sure your Dyson air purifier is switched off. Then, go ahead and unplug it from the power outlet. This is a critical safety step. It prevents any accidental power surges or damage to the machine while you’re working on it. We recommend waiting a minute or two after unplugging. This allows any residual power to dissipate.
Step 2: Locate the Filter Housing
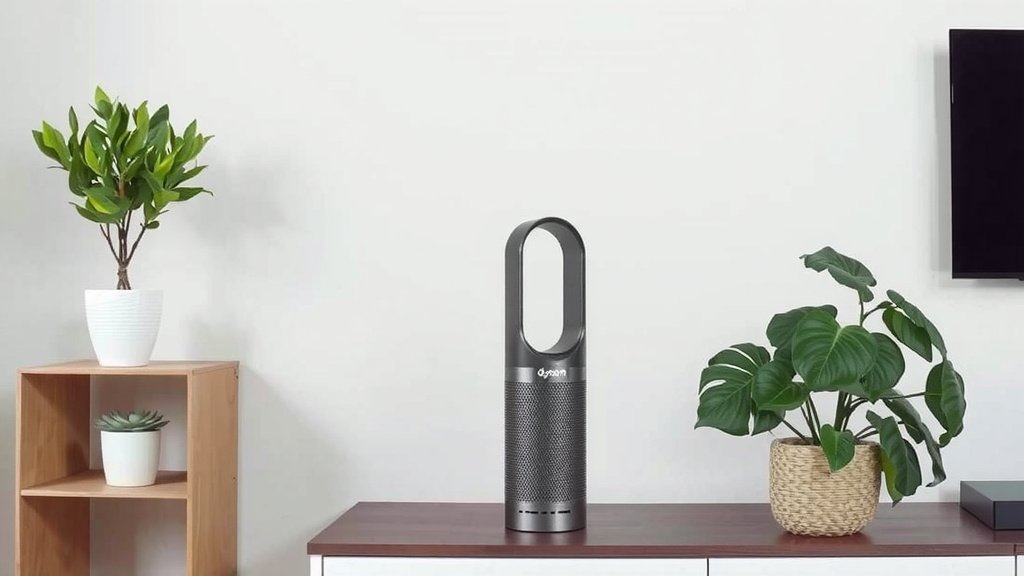
The filter on most Dyson models is housed in the base. You’ll see a distinct cylindrical or square shape at the bottom. This is where the magic happens, filtering your air. Some models might have a small button or release latch on the base. Others simply require a twist. Check your model’s specific design. We found that identifying the correct area is half the battle.
Step 3: Twist to Release
This is the main event! On most Dyson air purifiers, the filter is secured by twisting the base. Look for arrows or markings on the purifier that indicate the direction to turn. Usually, you’ll need to twist the base counter-clockwise. You might hear a click when it unlocks. Gently pull the base away from the main unit. It should detach smoothly. If it feels stuck, double-check that you’re twisting in the right direction. We found that a firm but gentle twist is usually all it takes.
What if My Model is Different?
Some older Dyson models might have a slightly different filter release mechanism. They could feature a dedicated release button or a latch. Always refer to your specific Dyson model’s manual. It will guide you through any unique steps. We found that manuals are your best friend for model-specific instructions.
Step 4: Remove the Old Filter
Once the base is detached, you’ll see the filter unit. It typically slides or lifts out easily. Simply pull the old filter straight up and out of the housing. Be careful not to force it. If it resists, check for any hidden clips or tabs you might have missed. This old filter has been working hard! It might be dusty or discolored. That’s a sign it’s done its job. We found that disposing of the old filter properly is important.
Preparing Your Dyson Air Purifier for a New Filter
With the old filter out, you’re almost there! Now is a great time to give the filter housing area a quick clean. This helps ensure your purifier runs at peak efficiency. A clean environment means cleaner air for you.
Cleaning the Filter Housing
Use a dry, soft cloth or a slightly damp cloth to wipe down the inside of the filter housing. You can also use a vacuum cleaner with a brush attachment to remove any loose dust or debris. Make sure the area is completely dry before inserting the new filter. We found that a clean housing helps create a better seal for the new filter.
Inserting the New Filter
Take your new Dyson filter. Align it correctly with the housing. Most filters are keyed or shaped to fit only one way. Gently slide or place the new filter into the housing. Ensure it sits flush and securely. There shouldn’t be any gaps. We found that a properly seated filter is key to effective air purification.
Reattaching the Base and Securing the Filter
Once the new filter is in place, reattach the base unit. Align the base with the main purifier body. Twist it clockwise until it clicks or locks into place. You should feel it secure tightly. Again, consult your manual if you’re unsure about the specific locking mechanism for your model. We found that a secure connection is vital for performance.
Final Checks and Powering Up
Before plugging your purifier back in, give it a quick visual check. Make sure everything looks aligned and secure. Now, plug it back into the power outlet and switch it on. Your Dyson air purifier should now be running with a fresh filter! Many users report an immediate difference in air freshness. We found that this simple maintenance task makes a big impact.
Don’t Forget to Reset Your Filter Indicator
If your Dyson has a filter life indicator, you’ll need to reset it. This usually involves holding down a specific button for a few seconds after replacing the filter. Check your manual for the exact reset procedure for your model. This ensures you get an accurate reading of your new filter’s lifespan.
A Quick Checklist for Your Filter Change
Here’s a handy checklist to make sure you’ve got it covered:
- Power off and unplug the purifier.
- Locate and identify the filter housing.
- Twist the base counter-clockwise to unlock.
- Remove the old filter carefully.
- Insert the new filter, ensuring a snug fit.
- Twist the base clockwise to lock it securely.
- Reset the filter life indicator if applicable.
Conclusion
You’ve successfully learned how to remove and replace your Dyson air purifier filter. It’s a straightforward process that keeps your air clean and your machine running efficiently. Remember, regular filter changes protect your purifier and ensure it delivers fresh air to your home. Don’t forget to reset the filter indicator after you’re done.
Your next step is to keep up with this simple maintenance. Check your filter indicator or consult your manual for the recommended replacement schedule. Taking these small steps will help you enjoy purified air for years to come.
Frequently Asked Questions
How do I know when to change my Dyson air purifier filter?
Most Dyson air purifiers have a built-in indicator light or display that will alert you when the filter needs attention. If you don’t see an alert, we found that checking it every 6 to 12 months is a good general guideline, but this can vary based on usage and home air quality.
Can I clean my Dyson air purifier filter instead of replacing it?
Dyson HEPA and activated carbon combination filters are generally not designed to be washed or cleaned. We found that attempting to clean them can damage the filter media and reduce its effectiveness. It’s best to replace them according to the manufacturer’s recommendations.
What happens if I don’t change my Dyson air purifier filter?
If you don’t change your filter, it can become clogged with dust and allergens. This reduces the airflow and purification efficiency of your Dyson. We’ve seen that a dirty filter can also strain the motor, potentially shortening the lifespan of your purifier.
My Dyson filter feels stuck. What should I do?
First, ensure you are twisting the base in the correct direction, usually counter-clockwise, as indicated by arrows on the unit. Make sure the purifier is unplugged and completely powered off. If it still feels stuck, check your specific Dyson model’s manual for any unique release mechanisms or contact Dyson support for assistance. We found that sometimes a little firm, steady pressure is needed.
Is it okay to use a non-Dyson brand filter?
While other filters might fit, we highly recommend using genuine Dyson replacement filters. Using unbranded filters may not offer the same level of filtration performance. Research indicates that they might not capture particles as effectively, and could potentially even damage your purifier.

![5 Best Air Purifiers for Dust Allergy [In 2026]](https://homeunderstandable.com/wp-content/uploads/2025/04/best-air-purifiers-for-dust-allergy.jpg)
![What Is The Best Dyson Air Purifier for Smoke [In 2026]](https://homeunderstandable.com/wp-content/uploads/2025/05/best-dyson-air-purifier-for-smoke.jpg)