Craftsman Air Compressor Setup Guide: Step-by-Step
Setting up your new Craftsman air compressor is simpler than you might think. You’ll need to connect the air hose, fill it with the correct oil if it’s an oil-lubricated model, and ensure it’s placed on a stable, level surface. Always read your specific model’s manual first.
Getting your compressor ready for its first use involves a few key steps to ensure safety and performance. Many users find that properly seating the air filter and checking the pressure gauge are important parts of the initial setup. We’ve found that taking a few minutes here saves a lot of headaches later on.
- Unpack carefully and check for damage.
- Connect your air hose securely.
- Add oil if your model requires it.
- Choose a good location.
- Test the pressure gauge.
Ready to get that new tool humming? Let’s walk through exactly how to get your Craftsman air compressor set up and ready to power your projects.
Getting Your Craftsman Air Compressor Ready to Roll
So you’ve got a new Craftsman air compressor, and you’re eager to put it to work. That’s fantastic! Getting it set up correctly is key to its longevity and your projects running smoothly. We’ve put together this guide to help you through each step. Let’s make sure your new compressor is ready for action.
Unpacking and Initial Inspection
First things first, let’s carefully unpack your new Craftsman air compressor. You want to make sure everything is accounted for and that there’s no damage from shipping. Think of it like unwrapping a present – take your time.
- Gently remove all packaging materials.
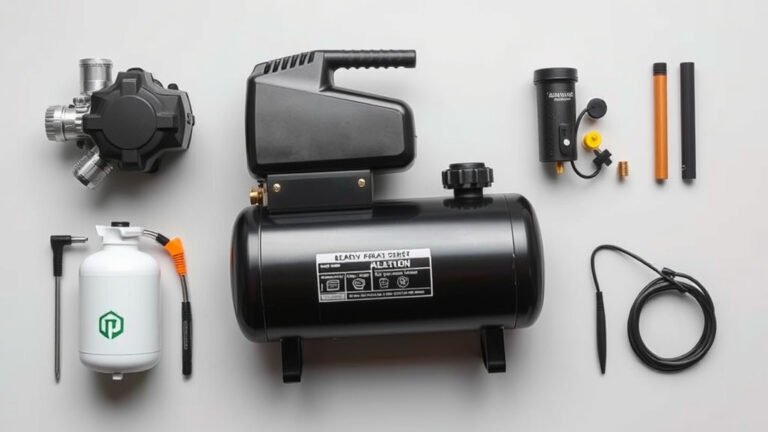
- Check the compressor unit, tank, and any included accessories.
- Look for any dents, scratches, or loose parts.
- Compare the contents with the parts list in your owner’s manual.
If you notice any issues, don’t proceed. Contact the retailer or Craftsman customer support right away. It’s better to address these things upfront before you’ve put any oil in or plugged it in.
Choosing the Right Spot for Your Compressor
Where you place your compressor matters a lot. It needs a good environment to operate efficiently and safely. We found that a little planning here goes a long way.
Stable and Level Ground
Your compressor must sit on a firm, level surface. An uneven or wobbly spot can cause vibrations. This can lead to premature wear and tear on the motor and pump. A concrete floor is ideal. If you’re using it outdoors, make sure the ground is stable and won’t shift.
Ventilation is Key
Air compressors generate heat. They need plenty of fresh air to cool down. Don’t tuck it away in a small, enclosed space. Allow at least 12 inches of clearance around all sides of the unit for good airflow. This helps prevent overheating, which can shorten its lifespan.
Consider the Noise
Air compressors aren’t exactly quiet. Think about where you’ll be using it and who might be nearby. Running it in a detached garage or a well-ventilated shed is often a good idea. If you’re using it in a shared space, consider how the noise level might affect others.
Adding Oil (If Your Model Requires It)
Some Craftsman air compressors are oil-lubricated, while others are oil-free. It’s super important to check your manual. If yours needs oil, you’ll need to add the correct type and amount before the first start-up.
Type of Oil Matters
Using the wrong oil can cause serious damage. Your owner’s manual will specify the exact type of oil required. It’s usually a specific compressor oil or a particular weight of motor oil. Using a generic oil is a gamble you don’t want to take.
Fill to the Correct Level
Most compressors have a sight glass or a dipstick to show the oil level. You want to fill it up to the indicated line. Overfilling or underfilling can both cause problems. Overfilling can lead to oil being expelled from the compressor. Underfilling can cause parts to run dry and overheat.
We found that many users make the mistake of just pouring oil in. Always double-check the manual for the exact capacity. Some small compressors only need a few ounces.
Connecting Your Air Hose and Accessories
Now for the part that gets the air moving! Connecting your air hose is usually pretty straightforward.
The Air Hose Connection
Your compressor will have an outlet fitting, often a universal coupler. Your air hose will have a corresponding fitting. Ensure the connection is tight and secure. A leaky connection wastes air and makes your compressor work harder than it needs to. Many couplers just push and click into place.
Important Accessories
Consider what you’ll be using your compressor for. You might need a regulator to control air pressure for delicate tasks. A water separator can also be very helpful, especially in humid environments. These accessories connect between the compressor outlet and your tool.
The Air Filter: Don’t Forget This Little Guy!
Your compressor likely came with an air filter. This part is essential for protecting the pump from dust and debris. Think of it as the compressor’s lungs.
Installing the Filter
Locate the air intake port on your compressor. It’s usually a threaded fitting. Screw or push the air filter assembly onto this port. Make sure it’s snug and properly seated. A loose filter means dirty air gets in.
Filter Maintenance
These filters can get clogged over time. Check your manual for recommended cleaning or replacement intervals. A dirty filter restricts airflow and makes your compressor less efficient. Many can be cleaned with compressed air, but some need to be replaced.
Pre-Start Checklist for Safety and Performance
Before you flip that switch, let’s run through a quick final check. This ensures everything is ready to go and minimizes any potential risks. We put together a handy checklist for you.
- Review your owner’s manual one last time.
- Confirm oil level is correct (if applicable).
- Ensure air filter is securely attached.
- Check that the drain valve is closed.
- Verify the air hose is connected tightly.
- Confirm the power cord is in good condition and plugged in.
This little routine can save you a lot of trouble. It’s like buckling your seatbelt before driving – a simple step for a safer journey.
First Start-Up and Pressure Check
Now for the moment of truth! It’s time to power up your Craftsman air compressor for the first time.
Initial Run
Turn on the compressor. Listen for any unusual noises. Watch for any obvious leaks from connections. It should start filling the tank with air. Most Craftsman compressors will automatically shut off when they reach their maximum tank pressure. This is normal.
Understanding the Pressure Gauge
Your compressor has a pressure gauge. This tells you how much air is stored in the tank. You’ll also likely have a regulator knob with another gauge if you’re using accessories. Understanding these gauges is important for proper operation. We found that testing the gauge accuracy is a good idea.
You can test the pressure gauge by connecting a known-accurate gauge if you have one. If the readings are significantly off, it might be time to replace the gauge. Many guidelines suggest checking your gauges periodically for accuracy (NIOSH).
Bleeding the Tank
After it has run and built pressure, you might want to run it for a few minutes and then shut it off. Let it cool slightly. Then, carefully open the drain valve at the bottom of the tank. This releases any moisture that may have accumulated during manufacturing or the initial run. It’s good practice to drain your tank after each use.
Conclusion
You’ve successfully navigated the setup process for your new Craftsman air compressor! By carefully unpacking, choosing the right spot, and handling essential connections like oil and hoses, you’re well on your way. Remember to always consult your manual for model-specific details and perform your pre-start checklist. Getting these initial steps right ensures your compressor runs efficiently and safely for all your projects. Now, go ahead and power it up, check those gauges, and enjoy the capabilities your new tool brings to your workshop!
Frequently Asked Questions
What kind of oil should I use in my Craftsman air compressor?
Always check your owner’s manual first. It will specify the exact type and weight of oil recommended for your specific Craftsman model. Using the wrong oil can cause serious damage to the pump. If your compressor is oil-free, you won’t need to add any oil.
How much clearance do I need around my Craftsman air compressor?
We found that good ventilation is key for preventing overheating. You should aim for at least 12 inches of clearance on all sides of the compressor unit. This allows for proper airflow and helps keep the motor and tank cool during operation.
Can I use my air compressor outdoors?
Yes, you can often use your Craftsman air compressor outdoors, but make sure it’s on a stable, level surface that won’t shift. Protect it from direct rain or extreme weather conditions if possible. Keep the air intake clear of dust and debris.
What is the purpose of the air filter, and do I need to maintain it?
The air filter is essential for protecting the compressor’s pump from dust and debris, acting like its lungs. You absolutely need to maintain it; a clogged filter restricts airflow and makes your compressor work harder. Check your manual for recommended cleaning or replacement intervals.
Why is it important to close the drain valve before starting the compressor?
Closing the drain valve ensures that the compressor can build up adequate air pressure in the tank. If the valve were open, air would escape, and the tank would never fill properly. You’ll want to open it after use to release accumulated moisture.