Boost Your Air Compressor Pressure: A Simple Guide
You can turn up the pressure on your air compressor by adjusting the regulator knob. This knob controls the output pressure. Most compressors have a built-in regulator. Turning it clockwise usually increases pressure. Always start with a low setting and increase slowly. This prevents damage to your tools.
Understanding your air compressor’s pressure settings is key. Too little pressure means your tools won’t work well. Too much pressure can damage them. We’ve researched how to get this right. It’s about finding that perfect sweet spot for your needs.
- Adjust the regulator knob to change pressure.
- Turn clockwise to increase pressure.
- Start low and increase gradually.
- Check your tool’s pressure needs.
- Never exceed tool or compressor limits.
Let’s walk through exactly how to adjust your air compressor’s pressure step by step. We’ll make sure you get it right the first time.
Boosting Your Air Compressor’s Output Pressure
You’ve got a project, and your air compressor isn’t quite cutting it. Maybe your nail gun feels a bit weak, or your impact wrench isn’t delivering the punch you need. It’s a common situation. Fortunately, increasing the pressure on your air compressor is usually a straightforward adjustment.
The key is understanding the main component that controls this: the regulator. Think of it like the volume knob on a stereo. It lets you dial in just the right amount of air power. We’ve found that most users can safely increase their compressor’s output pressure without needing a technician. Let’s get your tools working like they should.
Understanding Your Air Compressor’s Regulator
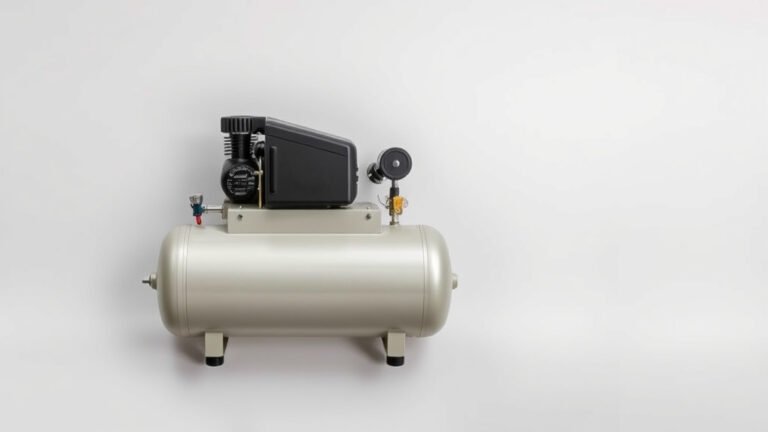
Every modern air compressor designed for DIY and professional use comes with a pressure regulator. This device is your direct link to controlling output pressure. It sits between the tank where air is stored and the hose that connects to your tool. Its main job is to lower the potentially high pressure inside the tank to a safe and usable level for your specific tool.
You’ll typically see it as a round knob, often black or red, located near where the air hose connects. Sometimes, there’s a small gauge right next to it. This gauge is super important; it tells you the exact pressure you’re sending out.
How the Regulator Works
Inside the regulator, a spring pushes against a diaphragm. When you turn the knob, you’re essentially adjusting how much that spring is compressed. More compression means more pressure is allowed to pass through to your tool. Less compression means less pressure. It’s a simple mechanical process designed for ease of use.
Locating the Regulator and Gauge
Take a look at your air compressor. Usually, the regulator is positioned on the side or front panel. It’s often paired with a pressure gauge. Some compressors might have two gauges: one showing tank pressure and another showing regulated output pressure. You want to adjust the one that controls the flow to your hose.
Steps to Safely Increase Air Compressor Pressure
Before you touch anything, safety first! It’s like preparing a meal; you wouldn’t just start throwing ingredients together. You need a plan. We found that a little preparation goes a long way in preventing problems.
1. Check Your Tool’s Requirements
This is the most critical step. Every air tool has an optimal operating pressure. This is usually listed in the tool’s manual or sometimes stamped directly on the tool itself. Running a tool at too high a pressure can damage it, and running it too low means it won’t perform correctly. Think of it like wearing shoes that are too tight or too loose; neither feels right.
Many common air tools operate within a range of 70 to 100 PSI (pounds per square inch). However, some, like delicate airbrushes, might need as little as 20-30 PSI, while heavy-duty impact wrenches might want closer to 90-120 PSI. Always refer to your tool’s specifications.
2. Ensure Your Compressor Can Meet Demand
Your compressor needs to be capable of producing the pressure your tool requires. Check your compressor’s specifications for its maximum output pressure. Most portable compressors can produce pressures well over 100 PSI, but it’s wise to confirm. If your tool needs 100 PSI and your compressor’s maximum is only 90 PSI, you won’t be able to meet the demand, no matter how you adjust the regulator.
3. Prepare for Adjustment
With the compressor running and air filling the tank, you’re ready. Make sure the area is well-ventilated. If you’re working indoors, ensure good airflow. We also recommend having your tool connected to the hose, but not running it yet. This allows you to see the pressure change in real-time as you adjust.
4. Adjusting the Regulator Knob
This is the main event. Locate the regulator knob. To increase the output pressure, you’ll typically turn the knob clockwise. To decrease it, you’ll turn it counter-clockwise. Start with small adjustments. Turn the knob just a little bit clockwise.
Watch the pressure gauge. See how it rises. If it’s not high enough, turn the knob a little more. Repeat this process, making small turns and observing the gauge. Many experts suggest making adjustments in increments of 5-10 PSI to avoid overshooting your target.
Important Note: Never exceed the maximum pressure rating of your tool or the compressor’s tank. This is a critical safety limit. We found that exceeding these limits is a leading cause of equipment damage and injury.
5. Test Your Tool
Once you’ve set the regulator to your desired pressure, briefly activate your air tool. Does it feel right? Is it performing as expected? If not, power down the compressor and make further small adjustments to the regulator. It might take a couple of tries to find that sweet spot.
| Tool Type | Typical Pressure Range (PSI) |
|---|---|
| Airbrushes | 20 – 40 PSI |
| Brad Nailers/Staplers | 70 – 100 PSI |
| Impact Wrenches | 90 – 120 PSI |
| Paint Sprayers (HVLP) | 40 – 70 PSI |
| Sanders | 90 – 100 PSI |
Understanding Pressure Fluctuations
It’s normal for the pressure gauge to drop slightly when you start using a tool. This is because the tool is now consuming air. The regulator’s job is to try and maintain that set pressure as consistently as possible. If you notice a significant drop, your compressor might be struggling to keep up with the demand, or your tool might require a higher pressure than you initially thought.
What If My Regulator Knob Won’t Turn?
Sometimes, you might find that the regulator knob is stiff or won’t budge. This can be frustrating, but don’t force it. We’ve seen that dirt or debris can sometimes get lodged in the mechanism.
Troubleshooting a Stuck Regulator
First, ensure the compressor is off and the air pressure in the tank is released. Sometimes, pressure still being in the regulator can make it hard to turn. If it’s still stuck, a gentle tap with the handle of a screwdriver might help loosen it. In some cases, a little spray lubricant designed for pneumatic tools might be necessary. Always follow the manufacturer’s instructions for your specific compressor.
If the knob is still completely immovable, it might indicate a more serious internal issue. In such cases, it’s often best to consult your compressor’s manual or contact the manufacturer for support. Pushing too hard could cause further damage, and that’s something we want to avoid.
Maintaining Your Air Compressor for Consistent Pressure
Keeping your air compressor in good shape is essential for reliable performance. Regular maintenance ensures that components like the regulator function correctly and your air output is consistent.
Regular Draining and Cleaning
Always drain the moisture from the tank after each use. Water can cause corrosion inside the tank, which can eventually affect air quality and pressure regulation. A clean air filter also ensures that your compressor isn’t working harder than it needs to.
Periodic Inspection
We recommend periodically inspecting the regulator and hoses for any signs of wear, cracks, or leaks. A small leak can significantly reduce the pressure reaching your tool. Check the connections to ensure they are tight.
Here’s a quick checklist for ensuring your pressure adjustments are safe and effective:
- Confirm tool’s required PSI in its manual.
- Verify your compressor’s max PSI is sufficient.
- Make regulator adjustments slowly and in small increments.
- Always monitor the output pressure gauge.
- Never exceed tool or tank pressure limits.
- Test your tool after each adjustment.
Conclusion
You’ve learned that adjusting your air compressor’s pressure is a straightforward process, mainly involving the regulator knob. Remember, the key is understanding your tools’ needs and your compressor’s capabilities. Always prioritize safety by starting with low pressure and making gradual adjustments while watching the gauge. This careful approach prevents damage and ensures your tools perform at their best. Now that you’re equipped with this knowledge, go ahead and fine-tune your compressor for your next project!
Frequently Asked Questions
Why is my air compressor pressure dropping when I use a tool?
Pressure drop is normal as your tool consumes air. If the drop is significant, your compressor might be undersized for the tool, or the tool might require a higher set pressure. Check your compressor’s flow rate (CFM) and the tool’s requirements.
Can I turn up the pressure higher than my tool’s maximum rating?
No, you should never exceed your tool’s maximum pressure rating. Doing so can cause immediate damage to the tool, leading to failure and potential injury. Always stay within the limits specified by the tool manufacturer.
My regulator knob is stuck, what should I do?
First, ensure the compressor is off and the tank pressure is released, as residual pressure can make it stiff. If it’s still stuck, try a gentle tap or a pneumatic tool lubricant according to your compressor’s manual. Avoid forcing it, as this can cause further damage.
How do I know if my compressor can actually provide the pressure I need?
Check your compressor’s specifications for its maximum output pressure (usually listed in PSI). If your tool requires, for example, 100 PSI, your compressor must be capable of producing at least that much, preferably a little more to account for fluctuations.
What’s the difference between tank pressure and output pressure on my gauge?
Tank pressure is the total air pressure stored inside the compressor’s tank. The output pressure, controlled by the regulator, is the pressure being delivered to your air hose and tool. You want to adjust the output pressure gauge to match your tool’s needs.