How to Replace Honeywell Air Purifier Filter: Step-by-Step Guide
Replacing the filter in your Honeywell air purifier is a straightforward process. You’ll generally want to replace it every 6 to 12 months, depending on usage and air quality. This keeps your purifier running efficiently and ensures you’re breathing the cleanest air possible. Don’t worry, it’s simpler than it sounds and we’ll guide you through it.
Keeping your Honeywell air purifier’s filter clean or replaced is essential for its performance. A clogged filter means your unit works harder, using more energy. It also can’t capture pollutants effectively, defeating its main purpose. We found that consistent filter maintenance can even extend the lifespan of your air purifier.
- Unplug your air purifier first.
- Locate the filter compartment.
- Remove the old filter.
- Insert the new filter correctly.
- Plug it back in and turn it on.
Ready to get your Honeywell air purifier back to its best? Let’s walk through exactly how to replace that filter step by step.
“`htmlYour Guide to Changing the Honeywell Air Purifier Filter
Swapping out the filter in your Honeywell air purifier is a breeze. It’s like giving your air purifier a fresh breath of air. This simple maintenance keeps your unit humming along efficiently. You’ll ensure you and your family are breathing the cleanest possible air.
When Should You Replace Your Honeywell Air Purifier Filter?
You might be wondering, “How often do I *really* need to change this thing?” It’s a common question! Most Honeywell models recommend filter replacement every 6 to 12 months. However, this can change based on a few things. We found that heavily polluted environments may require more frequent changes. Think of it like changing the oil in your car. More miles or rougher roads mean sooner changes.
Your filter is working hard to trap dust, pollen, pet dander, and even smoke particles. When it gets full, it can’t do its job effectively. Many experts agree that a clogged filter can reduce airflow by up to 50% (Environmental Protection Agency).
Factors Affecting Filter Lifespan
Several factors influence how long your filter will last:
- Usage: Running your purifier 24/7 will shorten filter life compared to occasional use.
- Air Quality: If you live in a city with high pollution or have pets, your filter will clog faster.
- Allergies: People with severe allergies might change filters more often to maintain optimal air quality.
- Model Specifics: Always check your Honeywell manual. Some models have indicators for filter changes.
Gathering Your Supplies for a Smooth Filter Change
Before you begin, let’s make sure you have everything ready. This prevents any “oops, I forgot” moments halfway through. You’ll need a few simple items.
What You’ll Need
- Your New Honeywell Filter: Make sure it’s the correct model number for your specific air purifier. Using the wrong filter won’t work correctly.
- A Damp Cloth: For wiping down the filter housing.
- Trash Bag: For easy disposal of the old filter.
- Your Honeywell Air Purifier Manual: Just in case you need a quick reference.
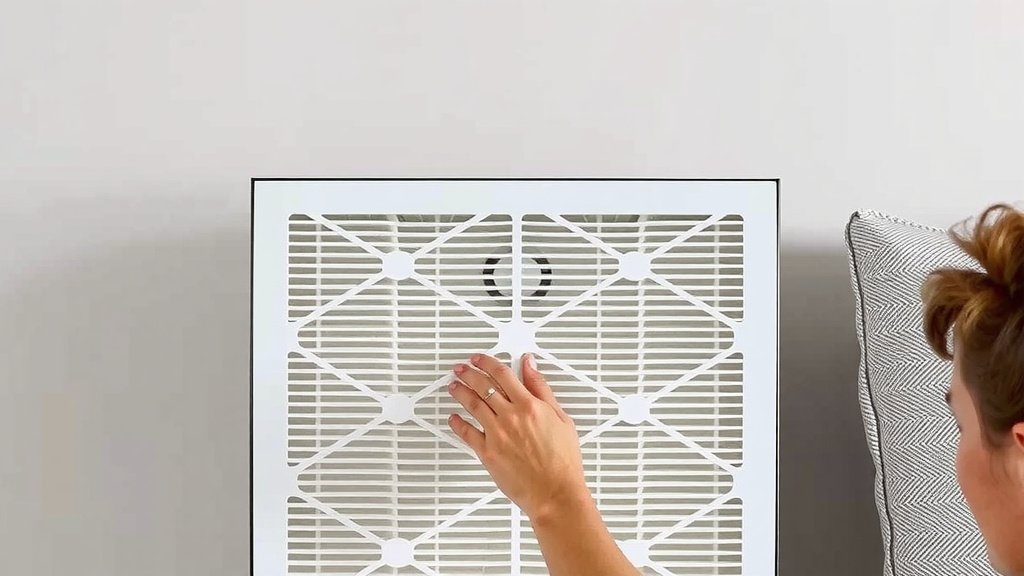
Step-by-Step: Replacing Your Honeywell Air Purifier Filter
Ready to get your hands dirty? Don’t worry, it’s usually a quick and easy process. We’ve broken it down into simple steps.
Step 1: Safety First – Unplug Your Purifier
This is the most important step. Before you do anything else, always unplug your Honeywell air purifier from the wall outlet. We’ve heard stories of people accidentally turning units on. This prevents any electrical hazards and ensures your safety. A quick tug of the cord is all it takes.
Step 2: Locate and Open the Filter Compartment
Your air purifier will have a specific place for the filter. This is often on the back or the side of the unit. You’ll typically see a latch, a handle, or a cover that needs to be opened. Many Honeywell models have a rear cover that slides off or has clips. Just gently pull or press where indicated. If you’re unsure, your manual is your best friend here.
Step 3: Remove the Old, Dirty Filter
Once the compartment is open, you’ll see the old filter. It might look quite dusty and grimy. That’s a good sign it’s been doing its job! Carefully slide or lift the old filter out. Try not to shake it too much, as you don’t want dust particles to fly around. Place it directly into your trash bag for a clean getaway.
Step 4: Clean the Filter Housing (Optional but Recommended)
While the filter compartment is open, take your damp cloth and wipe down the inside. This removes any accumulated dust or debris. It’s a good practice to keep the internal components clean. Think of it as a quick tidy-up before the new filter moves in. This step ensures optimal airflow and performance.
Step 5: Insert the New Honeywell Filter Correctly
Now for the exciting part – the fresh filter! Check your new filter and the housing for any markings. Often, there are arrows indicating airflow direction or “front” and “back.” Make sure the new filter is oriented the correct way. Slide or place it gently into the compartment. It should fit snugly without forcing. Close the compartment cover securely until you hear or feel it click into place.
Step 6: Plug In and Power On
With the new filter in place and the cover secured, it’s time to bring your purifier back to life. Plug the power cord back into the wall outlet. Then, turn your Honeywell air purifier on. You should notice it running smoothly, perhaps even quieter than before!
Quick Filter Change Checklist
To make sure you don’t miss a step, here’s a handy checklist:
- Unplug the unit completely before starting.
- Open the filter compartment carefully.
- Remove the old filter and dispose of it properly.
- Wipe down the housing if needed.
- Insert the new filter in the correct orientation.
- Secure the compartment cover and plug the unit back in.
Conclusion
You’ve successfully navigated the simple process of replacing your Honeywell air purifier filter. Remember, this routine maintenance is key to ensuring your unit continues to provide the cleanest air possible for your home. By regularly changing your filter, you’re not just breathing easier; you’re also helping your air purifier run more efficiently and potentially extending its lifespan. Keep an eye on your manual for any specific indicators or recommended schedules. Your next step is simple: mark your calendar for your next filter change to maintain optimal air quality year-round.
Frequently Asked Questions
How do I know if my Honeywell air purifier filter needs changing?
Many Honeywell models include a filter change indicator light on the unit itself. If yours doesn’t, pay attention to reduced airflow, increased noise, or a visible buildup of dust on the filter. Generally, changing it every 6-12 months is a good rule of thumb, but consider your environment.
Can I wash my Honeywell air purifier filter?
No, most Honeywell air purifier filters are designed for single use and cannot be washed. Washing them can damage the filter media and reduce its effectiveness in capturing airborne particles. Always replace with a new, genuine Honeywell filter.
Where can I buy replacement Honeywell air purifier filters?
You can typically purchase genuine Honeywell replacement filters from the manufacturer’s website, major online retailers like Amazon, or from authorized appliance and home goods stores. Always ensure you’re buying the correct model number for your specific purifier.
What happens if I don’t change the filter in my Honeywell air purifier?
Not changing the filter means your air purifier will struggle to draw air through it, significantly reducing its effectiveness in cleaning your air. A clogged filter can also cause the unit to work harder, potentially leading to overheating or reduced lifespan.
How do I find the correct replacement filter for my specific Honeywell model?
The best way to find the correct filter is to check the model number of your Honeywell air purifier, usually located on a sticker on the back or bottom of the unit. Refer to your air purifier’s manual or the manufacturer’s website for a list of compatible filter part numbers.