Front Load Washer Load Size: How Full Is Too Full
For your front-loading washer, you should aim to load it about three-quarters full. This ensures your clothes have enough space to tumble freely and get properly clean. Overloading can lead to poor washing results and even damage your machine over time.
Getting the load size right is key to a cleaner wash and a longer-lasting appliance. Too little, and you might be wasting water and energy. Too much, and you risk dingy clothes and potential strain on the drum. Finding that sweet spot makes a big difference.
- Load your front-loader about 3/4 full.
- Give clothes enough room to move freely.
- Avoid packing the drum too tightly.
- Proper loading leads to cleaner clothes.
- It also helps prevent machine damage.
Let’s dive into how to figure out that perfect load size for your front-loading washer. We’ll cover what happens when you get it wrong and how to achieve optimal cleaning every time.
Figuring Out the Right Load Size for Your Front-Loading Washer
So, how full is too full for your front-loader? The general rule of thumb we’ve found is to load it about three-quarters full. This isn’t just a random suggestion; it’s based on how these machines work best. You want your clothes to have enough room to tumble and get clean without being packed in like sardines.
Think of it like giving your clothes a little dance floor. If the floor is too crowded, nobody can move, and the dance is pretty boring. Your laundry is similar. When it’s packed too tightly, the water and detergent can’t reach every surface effectively. This can leave you with clothes that aren’t as clean as they could be.
Why Load Size Matters for Your Front-Loader
It might seem like common sense, but getting the load size right impacts more than just cleanliness. It affects your machine’s performance and longevity. Overloading is a common mistake people make, and it can lead to a few issues down the line.
The Impact of Overloading
When you stuff your front-loader too full, you’re asking a lot of it. The drum has to spin, and if it’s too heavy, it puts a strain on the motor and bearings. We found research indicating that consistently overloading can lead to premature wear and tear. This could mean costly repairs or even needing a new machine sooner than you’d expect.
Beyond mechanical stress, overloaded machines struggle with proper rinsing. Think about it: if there isn’t enough space for water to move freely, it’s hard for the machine to get all the soap out. This often results in clothes feeling stiff or having a dingy appearance. Many experts, like those at the Cleveland Clinic, suggest proper loading for better wash results.
What About Underloading?
On the flip side, using a front-loader for a tiny load isn’t ideal either. While it won’t damage the machine like overloading can, it’s inefficient. You’re using water and electricity for just a few items. It’s like using a giant oven to bake a single cookie. Many washing machine manufacturers recommend filling the drum to a certain level for optimal efficiency (Energy Star).
Smaller loads mean less friction between clothes. This friction helps in scrubbing away dirt. So, while you get clean clothes, they might not be as spotless as they would be in a properly sized load. It’s about balancing efficiency with effective cleaning. Research from the U.S. Department of Energy points to optimizing load size for energy savings.
The “Three-Quarters Full” Rule Explained
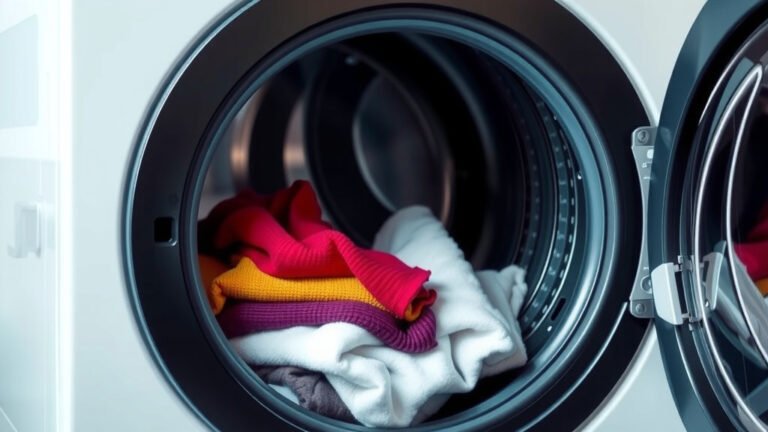
Let’s break down what “three-quarters full” actually looks like. Imagine your washing machine drum is a big empty space. You want to fill that space with clothes, but not to the brim. Leave enough room at the top so that when you push down gently, you can still see a bit of space, perhaps an inch or two.
Visualizing the Ideal Load
A good way to check is to reach your hand into the top of the drum after you’ve loaded your clothes. If you can easily slide your hand in and feel that there’s a good amount of air space above the fabric, you’re likely in the sweet spot. If your hand hits fabric immediately, it’s probably too full.
Another helpful visual is to imagine a pillow. When you put a pillow into a pillowcase, you don’t stuff it so tight that you can’t see any of the pillow’s fluff. You leave a little give. Your laundry should have that same sense of “give” within the drum. This allows for better water circulation.
Considering Different Fabric Types
The type of fabric you’re washing can also influence how much you can fit. Heavy towels will take up more space and weigh more than lightweight activewear. So, a load of jeans might fill the drum less than a load of t-shirts. Many guides suggest washing similar fabric types together for this reason.
If you’re washing a mix of items, try to feel the overall density. A load composed primarily of thick items will require you to leave more space than a load of thin items. Many washing machine manuals suggest sorting by fabric weight and type to achieve the best results (Whirlpool).
How to Test If Your Load Size is Right
There are a few simple ways to test if you’ve got your load size just right. It doesn’t require a degree in engineering! These are practical tests you can do right after you load your machine.
The Hand Test
As mentioned, the hand test is a great indicator. After loading your clothes, try to slide your hand from the top down into the drum. If you can fit your hand easily and feel air space above the clothes, you’re likely good to go. If your hand is immediately met with fabric, you might want to remove a few items.
The “Tumble” Test (Imaginary!)
Before you even start the machine, imagine your clothes tumbling. Can you picture them moving freely? If the load looks so dense that items would just bump against each other rather than truly tumble, it’s probably too full. This is an intuitive test, but it works surprisingly well.
Observing Wash Performance
Pay attention to your laundry results. Are your clothes coming out noticeably cleaner? Do they rinse out well without any soapy residue? If you’re consistently seeing good results, chances are your loading habits are spot on. On the other hand, if you notice lingering odors or stiffness, your load size might be a culprit.
Common Mistakes to Avoid
Even with the best intentions, it’s easy to fall into common loading traps. Being aware of these can help you prevent issues and ensure your machine works its best.
Stuffing and Packing
This is the most common mistake. We often think more laundry means fewer loads, so we pack it in. Resist the urge to cram clothes down. Your machine needs space to circulate water and detergent effectively. Experts often caution against this “more is better” approach.
Ignoring Fabric Types
Throwing everything in together, regardless of fabric weight, can lead to problems. Lighter items might get trapped under heavier ones, preventing them from getting fully saturated. This can also lead to uneven cleaning and wear. Many washing machine manufacturers suggest sorting by fabric type (LG).
Not Adjusting for Load Size
Front-loaders often have sensors that adjust water levels based on the load. However, if a load is packed too tightly, these sensors might not be as effective. Ensure you’re not just filling the drum, but filling it with space for movement. This allows the machine’s sensors to work optimally.
Quick Checklist for Perfect Loading
Here’s a quick rundown to help you remember the key points for loading your front-loader:
- Check the Drum Space: Always leave about 1-2 inches of space at the top.
- Don’t Pack It Down: Avoid stuffing clothes tightly.
- Feel the Load: Use your hand to gauge how much space is left.
- Sort Your Laundry: Group similar fabric weights and types together.
- Visualize Tumble: Imagine clothes moving freely during the cycle.
- Observe Results: Pay attention to how clean and fresh your clothes come out.
Conclusion
Mastering the art of loading your front-loader is simpler than you might think. Remember, the goal is to give your clothes room to move, ensuring a thorough clean and protecting your machine. Aim for that sweet spot: about three-quarters full, leaving enough space for water to circulate and detergent to work its magic. You’ve learned how to visually check this, understand the risks of overloading, and why underloading isn’t ideal either. By following these simple tips, you’ll see cleaner clothes and extend the life of your washer. Your next load will be your best load yet!
Frequently Asked Questions
What happens if I overload my front-loader too often?
Consistently overloading your front-loader can put excessive strain on the motor and bearings. Research suggests this can lead to premature wear and tear on your machine. You might also notice clothes aren’t getting as clean or are coming out with soap residue.
Is it bad to run a front-loader with only a few items?
While it won’t harm your machine, running a front-loader with a very small load is inefficient. You’ll be using more water and energy than necessary for just a few garments. It also means less friction between clothes, which can impact how well they get scrubbed clean.
How can I tell if my load is too full without a measuring cup?
A simple hand test works wonders. After loading your clothes, reach into the top of the drum. If you can easily slide your hand in and feel a good amount of air space, your load is likely just right. If your hand hits fabric immediately, it’s probably too full.
Does the type of clothing affect how much I can load?
Yes, it absolutely does. Bulky items like towels and jeans take up more space and weigh more than lighter fabrics like t-shirts or workout gear. You’ll need to leave more room in the drum for heavier loads compared to lighter ones.
Will my washing machine tell me if the load is wrong?
Most modern front-loaders have sensors that adjust water levels based on load size. However, if the drum is packed too tightly, these sensors might not be able to function effectively. It’s still important to visually check and feel the load to ensure optimal performance.
![7 Best Reviewed Stackable Washer And Dryer [In 2026]](https://homeunderstandable.com/wp-content/uploads/2026/09/7-best-reviewed-stackable-washer-and-dryer-in-2026-featured-768x432.jpg)