Safely Blow Out Water Pipes With Air Compressor
Yes, you can effectively blow out water pipes with an air compressor to prevent freezing and damage. This method is a reliable way to winterize your plumbing. It pushes water out of the lines, leaving them dry and safe. You’ll need a few key items for this task.
Winterizing your pipes is important for homeowners. Freezing water can cause pipes to burst, leading to costly repairs. Using an air compressor is a DIY-friendly approach. Many people successfully use this technique every year. It’s a smart way to protect your home’s infrastructure.
- Use an air compressor to remove water from pipes.
- This prevents freezing and potential pipe bursts.
- Gather necessary tools like an adapter and compressor.
- Ensure the compressor has a water trap.
- Work systematically through your home’s plumbing.
Below, we’ll walk you through exactly how to use your air compressor to get your pipes ready for winter. Let’s get started on protecting your home.
Winterizing Your Home: Blowing Out Pipes with an Air Compressor
You’re likely here because you want to protect your plumbing from winter’s chill. That’s a smart move! Freezing temperatures can cause water in your pipes to expand. This expansion can lead to serious damage. Burst pipes can mean messy leaks and expensive repairs. Fortunately, using an air compressor is a highly effective way to remove that water. We’ll guide you through the process.
Preparing for the Task: What You’ll Need
Before you connect that compressor, let’s make sure you have everything you need. Gathering your supplies upfront will make the job smoother. Think of it like prepping for a big cooking project. You wouldn’t start without your ingredients, right? Your plumbing project needs its tools too.
Essential Tools and Equipment
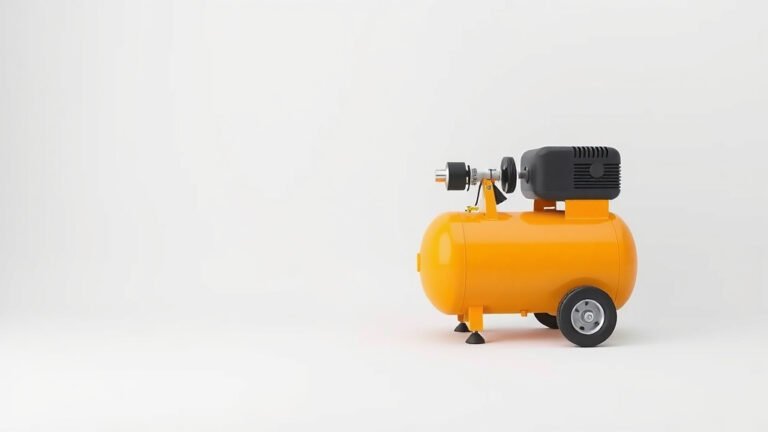
You’ll need your trusty air compressor, of course. But that’s just the start. You’ll also need a few specialized items. A good air compressor is key. Look for one that can deliver consistent pressure. Many homeowners already have one for various DIY tasks. You probably have one lying around! Our guide to 1-gallon vs 2-gallon air compressors can help you choose the right size.
The Air Compressor Itself
Your air compressor needs to have enough power to push the water out. Most standard homeowner compressors will work just fine. The important thing is the air volume it can deliver. Aim for a compressor that can put out at least 50 PSI (pounds per square inch). This is usually more than enough for most residential plumbing systems.
Essential Adapters and Fittings
Connecting your air compressor hose to your plumbing isn’t always straightforward. You’ll likely need an adapter. Many plumbing supply stores sell specific air compressor adapters for pipe winterizing. These usually screw onto a faucet or a hose bib. Ensure the adapter fits your compressor hose and your plumbing outlet. You want a snug fit to prevent air leaks. A loose connection wastes air and makes the job harder.
Water Trap or Filter
This is a really important piece of equipment to consider. You don’t want to push moisture from the compressor *into* your pipes. That would defeat the purpose! Look for an air compressor water separator. This device attaches between your compressor and the hose. It filters out moisture and oil from the compressed air. Many newer compressors have built-in water traps, but an external one is a great addition if yours doesn’t. You can often find them at hardware stores.
Additional Helpful Items
You might also want some plumber’s tape to ensure a good seal on threaded connections. A set of adjustable wrenches will help tighten fittings securely. And, of course, you’ll need a supply of dry, compressed air. Always check the tank on your compressor to ensure it’s not filled with water or debris before you begin.
The Step-by-Step Process for Blowing Out Pipes
Now that you have your gear, it’s time to get to work. We’ll go through this logically, section by section. It’s best to work from the point where your water supply enters the house. This way, you push the water *out* towards the fixtures.
Step 1: Shut Off the Water Supply
This is a critical first step. You need to find the main water shut-off valve for your home. It’s usually located where the water line enters your house, often in a basement, crawl space, or utility closet. Turn this valve completely off. You don’t want any water entering the system while you’re trying to push it out.
Step 2: Open Faucets and Drains
Next, you need to create an exit point for the water and air. Open all the faucets in your home. Start with the ones furthest from your main water line, like upstairs bathrooms. Open them all the way. Also, consider opening toilet tank valves and flushing toilets. This helps release any built-up pressure. Leave these fixtures open throughout the process.
Step 3: Connect the Air Compressor
Now, it’s time to bring in your air compressor. You’ll connect it to the main water line, usually at the shut-off valve or a sillcock (outdoor faucet). Attach your adapter securely. Make sure the water trap or filter is in place between the compressor and the hose. Ensure a tight seal to prevent air from escaping. You don’t want to lose precious compressed air!
Step 4: Begin Airflow Gradually
Start your air compressor. Let it build up some pressure, but don’t crank it to its maximum. You want to introduce air slowly. Many experts suggest starting around 30-40 PSI. You’re not trying to blast the pipes apart. You’re gently pushing the water out. You can gradually increase the pressure if needed, but always stay within safe limits for your plumbing. Never exceed 50 PSI for typical household pipes.
Step 5: Clear Each Line Systematically
Now, you’ll work your way through your home’s plumbing. Start with the lowest faucet in your house, often a basement sink or outdoor spigot. Connect your compressor there if you can. If not, you’ll be working from the main line. Close the faucet you’re working on *briefly* while the air is on. You should hear the air push water out the next open faucet. Then, open the faucet again and let the air flow until you hear no more water sputtering. Repeat this process for every faucet and fixture in your home. Don’t forget washing machines, dishwashers, and ice makers. These often have separate lines that need clearing. You may need to disconnect their supply hoses to get good air pressure to them. Always work from the lowest point upwards to ensure complete water removal.
Clearing Fixtures and Appliances
For appliances like washing machines or dishwashers, you might need to disconnect the water supply hoses. Then, attach your air compressor adapter to the valve where the hose connected. Apply air until you hear it blowing freely from the appliance’s drain hose or other outlets. This ensures those lines are clear too.
Step 6: Final Checks and Disconnection
Once you’ve gone through every fixture and appliance, do a final check. Ensure all open faucets are still open. Give each line a final blast of air to be absolutely sure. After you’ve cleared all the water, turn off the air compressor. Then, disconnect your air hose and adapter. It’s a good idea to leave all your faucets open for a while to allow any residual moisture to evaporate. Some people also recommend pouring a bit of RV antifreeze into drains and toilet bowls to prevent any remaining water from freezing. This is especially helpful in very cold climates or for vacation homes.
Important Safety Precautions to Follow
Safety should always be your top priority when working with tools and plumbing. An air compressor can be powerful, and improper use can lead to injury or damage. Let’s cover some key safety points.
Protecting Your Eyes and Ears
Always wear safety glasses or goggles when working with compressed air. Debris can be kicked up unexpectedly. The noise from the compressor can also be quite loud. Consider wearing ear protection, especially if you’ll be running the compressor for an extended period. Your hearing is precious!
Understanding Air Pressure Limits
As mentioned, over-pressurizing your pipes can cause them to burst. This is a serious risk. Residential plumbing systems are not designed for extremely high pressures. Never exceed 50 PSI when blowing out your pipes. If you’re unsure about your system’s limits, consult a professional plumber. Research indicates that typical home plumbing can typically withstand pressures up to 80 PSI, but for winterizing, lower is much safer (CDC).
Checking for Leaks and Damage
While working, be observant. Listen for any hissing sounds that indicate air leaks at your connection points. Tighten fittings as needed. Also, inspect your pipes for any existing signs of damage, corrosion, or wear. Addressing these issues proactively can prevent future problems. You’re already doing great maintenance work!
Quick Checklist for a Successful Pipe Blowout
To recap and ensure you don’t miss a step, here’s a handy checklist:
- Shut off the main water supply valve.
- Open all faucets and fixtures to create air exits.
- Connect your air compressor with a water trap.
- Start air pressure at 30-40 PSI, never exceeding 50 PSI.
- Systematically clear water from each pipe, working low to high.
- Leave faucets open to allow drying after blowing out.
Conclusion
You’ve now learned how to successfully blow out your water pipes using an air compressor. This DIY project is a smart way to winterize your plumbing and prevent costly freeze damage. Remember to gather your tools, work methodically from the main water line outwards, and always prioritize safety by wearing eye protection and respecting pressure limits. By following these steps, you’re giving your home’s pipes the best defense against Old Man Winter. Your next step is to schedule a day soon to complete this task before the cold weather truly sets in!
Frequently Asked Questions
How much air pressure should I use to blow out pipes?
It’s best to start with low pressure, around 30-40 PSI. You should never exceed 50 PSI for typical residential plumbing. Exceeding this can risk damaging your pipes or fittings. Always check your compressor’s gauge.
Can I use a shop vac to blow out my pipes?
A shop vac typically doesn’t generate enough consistent air pressure to effectively blow out all the water from your pipes. An air compressor is designed for this task and is much more reliable. You need steady airflow to push the water out.
What if I can’t find my main water shut-off valve?
If you can’t locate your main shut-off valve, you may need to consult your home’s blueprints or call a plumber. It’s essential to shut off the water supply before connecting the air compressor. Some homes have an exterior shut-off valve.
Do I need to disconnect appliances like my washing machine?
Yes, for appliances like washing machines and dishwashers, it’s highly recommended to disconnect their water supply hoses. You can then connect your air compressor to the supply valve to blow out those specific lines, ensuring no water remains.
What happens if I leave a faucet on too long with the air running?
Leaving a faucet open with the air compressor running will allow the air to escape freely after the water is gone. This is necessary to ensure the line is completely dry. The key is to run air until you no longer hear water sputtering, then move to the next fixture.