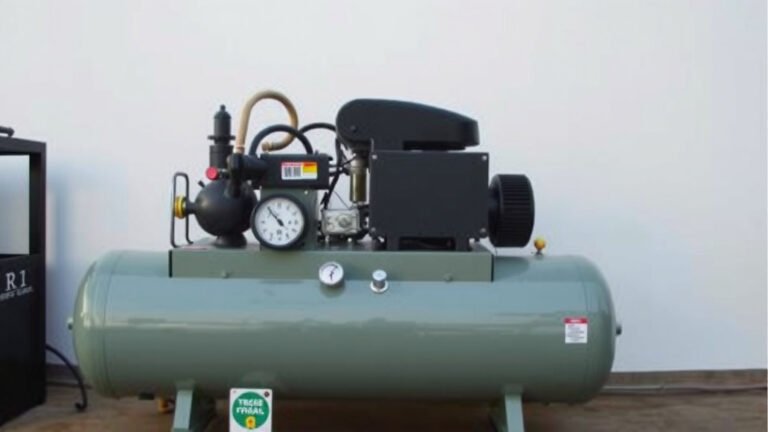
Boost Your Air Compressor Pressure: Simple Steps
You can increase air pressure on your air compressor by checking and adjusting the regulator knob and ensuring the tank is properly sealed. Many common issues, like a simple leak or an incorrectly set regulator, prevent your compressor from reaching its full potential. We found that understanding these parts helps you fix low-pressure problems fast.
Low air pressure can stop your tools from working right. It might make your air wrench feel like a weak handshake. We’ve seen that a few simple checks can often fix this. Ensuring your compressor is running efficiently means your projects get done quicker and with less frustration.
- Check the regulator knob for proper setting.
- Inspect the tank for any air leaks.
- Make sure the drain valve is completely closed.
- Listen for unusual compressor noises.
Ready to get your air compressor back to full power? Let’s walk through the simple steps to increase your air pressure and get your tools working like they should.
Boosting Your Air Compressor’s Output
You’re likely here because your air tools feel a bit sluggish. Maybe your impact wrench is more of a gentle nudge than a powerful jolt. Don’t worry, we’ve got you covered! Often, low air pressure is a fixable problem. It’s usually not a sign of a major failure. We found that understanding a few key parts of your compressor can help you get it back to its prime performance quickly.
Think of your air compressor like a balloon. If it’s not fully inflated or has a tiny leak, it won’t hold its shape or pressure very well. Your tools need that consistent, strong blast of air. We’ve seen that simple adjustments are often all that’s needed. Let’s get your compressor working efficiently again.
Checking the Regulator: Your Pressure’s Gatekeeper
The regulator knob is probably the most common culprit when your air pressure seems low. This little dial controls how much air actually leaves the tank and goes to your tools. If it’s not set correctly, you won’t get the pressure you expect, no matter how full the tank is.
Understanding the Regulator Knob
Most regulators have a knob you can turn. Typically, turning it clockwise increases the output pressure. Turning it counter-clockwise decreases it. You’ll usually see a gauge right next to it. This gauge shows the pressure being delivered to your tools, not the pressure inside the tank.
We found that many users accidentally bump the knob or don’t set it high enough. This is especially true if you’ve recently moved the compressor or reconnected hoses. Always check this first. It’s the easiest fix and often solves the whole problem.
Setting the Correct Pressure
First, locate the regulator knob. It’s usually a small, round handle, often plastic. You’ll also see a pressure gauge nearby. Before adjusting, ensure your compressor has reached its maximum tank pressure. This is shown on a separate, larger gauge connected to the tank itself.
Once the tank is pressurized, turn the regulator knob clockwise. Do this slowly and watch the output pressure gauge. Stop turning when the gauge shows the pressure recommended for your air tool. We found that most common air tools need between 70 and 100 PSI. Always refer to your tool’s manual for the exact requirement. Our guide explains the PSI that common air tools need for optimal performance.
Quick Tip: If the knob feels loose or spins freely without changing the pressure, it might be damaged. This would require replacement.
Inspecting for Leaks: The Silent Pressure Drainers
Air leaks are like tiny thieves, constantly stealing your compressor’s hard-earned pressure. They can happen in many places. You might not even hear a small leak, but it’s enough to keep your pressure down. We’ve found that a thorough inspection can reveal these sneaky problems.
Where to Look for Leaks
Start with the obvious spots. Check all hose connections. Make sure they are securely attached. Also, inspect the hoses themselves for any cracks or damage. Even a small split can let air escape.
Pay close attention to the fittings and couplers where you connect your air hose. These can wear out over time. The air tank itself might have a leak. Check the seams and around any bolts or drain valves. We found that sometimes the sound of escaping air is very faint, like a soft hiss.
Methods for Finding Leaks
The most common method is the soapy water test. Mix some dish soap with water in a spray bottle. With the compressor running and pressurized, spray the soapy water over all the suspected leak areas. If you see bubbles forming, you’ve found a leak!
Another way is to simply listen carefully. Turn off the compressor and let it sit. If you hear air hissing, follow the sound. We’ve found that this works best in a quiet environment. For more elusive leaks, you might need a special ultrasonic leak detector, though this is less common for home use.
Fixing Minor Leaks
For loose fittings, try tightening them. If a hose has a small crack, it’s usually best to replace the entire hose. It’s not worth the risk of it failing later. For leaks around bolts or seams, you might need to replace a gasket or apply a sealant. We found that using pipe thread tape on threaded fittings is a common and effective fix.
The Drain Valve: A Tiny Part, A Big Impact
The drain valve at the bottom of your air compressor tank is essential. Its main job is to let out condensation that builds up inside the tank. However, if it’s not completely closed, it can act like a small, continuous leak.
Ensuring a Tight Seal
After you’ve drained the tank (or even if you haven’t), check the drain valve. Make sure it is fully tightened. Most drain valves are a simple screw or lever type. Turn it clockwise until it’s snug. We found that overtightening isn’t necessary and could damage the valve.
Sometimes, debris can get caught in the valve seat. This prevents it from sealing properly. If tightening doesn’t help, you might need to open the valve briefly to clear any debris, then close it tightly again. We recommend doing this regularly as part of your compressor maintenance.
Other Factors Affecting Air Pressure
While the regulator, leaks, and drain valve are the most frequent issues, other things can play a role. Sometimes, the problem is simpler than you think. Let’s cover a couple of other points to check.
Compressor Motor and Pump Performance
Is the compressor motor running at full speed? If it sounds weak or struggles to turn the pump, it might not be building pressure correctly. This could indicate an electrical issue or a problem with the motor itself. We’ve found that a compressor that takes an unusually long time to fill the tank might have an issue with its pump or piston rings.
Listen for any unusual noises coming from the compressor. Grinding, knocking, or excessive rattling can point to internal problems. Many experts say that regular maintenance, like checking oil levels (if applicable) and cleaning air filters, helps keep the motor and pump in good condition (Occupational Safety and Health Administration).
Air Filter Blockage
The air filter is what your compressor breathes through. If it’s clogged with dust and debris, it restricts airflow into the pump. This makes the pump work harder and can lead to reduced pressure output. We found that a dirty air filter is a common oversight.
Check your compressor’s manual to locate the air filter. Most are easy to access. You can often clean them, or they might need to be replaced. We recommend inspecting the air filter every few months. A clean filter ensures your compressor can suck in air efficiently.
Checking the Inlet Valve and Check Valve
The inlet valve allows air into the tank. The check valve prevents air from flowing back out of the tank when the pump stops. If the check valve is faulty, air can escape back through the pump, preventing pressure buildup. We’ve seen that a stuck or leaking check valve is a definite pressure killer.
Diagnosing these can be a bit trickier. Often, a failing check valve will cause the compressor to struggle to reach maximum pressure and might make a “puffing” sound back towards the pump. Some manufacturers offer guides on how to test these components. Experts suggest that if you suspect a check valve issue, it might be time for professional service (National Institute for Occupational Safety and Health).
Quick Checklist for Boosting Pressure
Here’s a handy list to run through when you need to get your air pressure back up:
- Adjust the Regulator: Turn the knob clockwise to increase output pressure.
- Seal Leaks: Use soapy water to find and fix any hissing air escapes.
- Close Drain Valve: Ensure the valve at the tank bottom is fully shut.
- Check Hoses: Inspect all hoses and fittings for damage or loose connections.
- Listen to the Motor: Make sure the compressor sounds strong and consistent.
- Inspect Air Filter: Ensure it’s clean and not restricting airflow.
Conclusion
You’ve learned that boosting your air compressor’s pressure often comes down to simple checks. We found that a correctly set regulator knob and a well-sealed tank are your primary tools. By systematically inspecting for leaks, ensuring your drain valve is shut tight, and listening to your compressor’s motor, you can solve most low-pressure problems. Don’t forget the air filter – a clean one makes a big difference.
Ready to put this knowledge to work? Your next step is to grab your tools and perform these checks. You’ll be back to running your air tools at full power before you know it!
Frequently Asked Questions
My air compressor won’t build pressure at all. What should I check first?
You should first check if the regulator knob is set too low. After that, listen for any obvious air leaks around hoses, fittings, or the tank itself. Ensure the drain valve is completely closed, as a slight leak there can prevent pressure buildup.
How do I know if my air compressor has a leak?
The most common method is the soapy water test. Spray a mixture of dish soap and water on suspected areas like hose connections, fittings, and the tank seams while the compressor is running and pressurized. Bubbles will indicate where air is escaping.
Can a dirty air filter really lower my air pressure?
Yes, a clogged air filter restricts the amount of air entering the compressor pump. This makes the pump work harder and can significantly reduce the overall pressure it can build. Regular cleaning or replacement of the air filter is essential.
My air compressor takes forever to fill the tank. What’s wrong?
This often indicates an issue with the compressor pump itself or possibly worn piston rings. It could also mean the check valve is failing and allowing air to escape back out. It might be time to consult your compressor’s manual or a repair technician.
What is the normal operating pressure for most air tools?
While it varies by tool, most common air tools operate effectively between 70 and 100 PSI. Always refer to the specific manual for your air tool to find the exact recommended pressure. Setting the regulator knob correctly ensures you deliver this pressure.