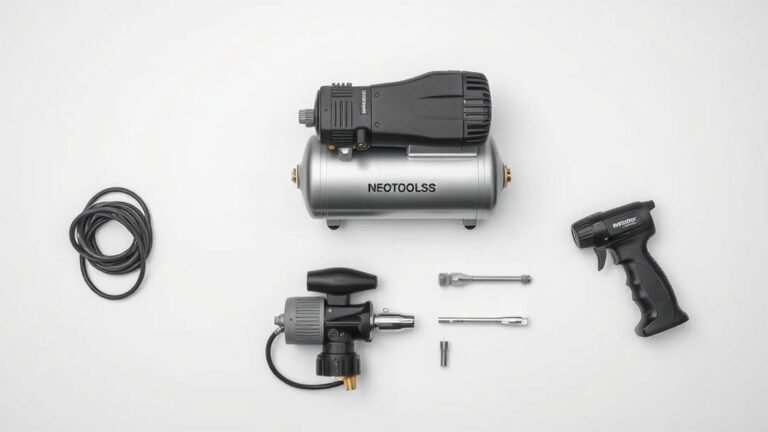
How to Remove Rust from Your Air Compressor Tank
Yes, you can effectively remove rust from your air compressor tank using a few common household items and some elbow grease. The most common methods involve using a rust remover solution, wire brushes, and a bit of patience to get your tank looking like new. We’ll show you the simplest and most effective ways to tackle this problem and keep your compressor running smoothly.
Dealing with rust in your air compressor tank is a common issue that many DIYers face. Neglecting it can lead to reduced efficiency and even damage to your equipment. Fortunately, you don’t need special tools for this task. We’ve researched the best approaches to tackle rust, ensuring your tank remains safe and functional.
- Gather your supplies: You’ll likely need a rust remover, wire brush, and rags.
- Drain and disconnect: Always start by safely draining the tank and disconnecting power.
- Apply rust remover: Let the solution work its magic on the rust.
- Scrub and wipe: Use a wire brush to scrub away loosened rust.
- Rinse and dry thoroughly: Prevent new rust from forming immediately.
Ready to get started? Let’s walk through the step-by-step process to banish that rust from your air compressor tank.
Tackling Rust in Your Air Compressor Tank
Rust buildup inside your air compressor tank is more than just an unsightly problem. It can seriously impact your compressor’s performance and longevity. You might notice it spitting rust particles, or perhaps your tank pressure isn’t holding like it used to. This happens because moisture is always present in compressed air, and it can settle in the tank, creating the perfect environment for rust to form. Don’t worry, though! Removing this rust is a manageable DIY task.
Safety First: Preparing Your Compressor
Before you even think about touching that rust, safety is your top priority. You’ll want to ensure your compressor is completely safe to work on. This involves a few key steps to prevent any accidental starts or pressure releases. We found that taking these precautions is non-negotiable for any maintenance job.
Draining the Tank Safely
First, you need to empty all the air and water from the tank. Locate the drain valve, usually found at the bottom of the tank. It often looks like a small faucet. Slowly open this valve to release the pressure. You might hear a hiss as the air escapes. Let it drain completely until no more air or water comes out. Remember, water is the enemy here, and getting it all out is the first line of defense against future rust.
Disconnecting Power
Once the tank is depressurized, it’s time to disconnect the power source. For electric compressors, this means unplugging the power cord from the wall outlet. If you have a gas-powered compressor, ensure the engine is off and cool, and disconnect the spark plug wire. This step ensures that the compressor cannot accidentally start while you’re working on it, preventing serious injury.
Choosing Your Rust Removal Method
There are several effective ways to remove rust from your air compressor tank. The best method for you will depend on how severe the rust is and what materials you have on hand. We looked into the most common and successful approaches.
Using a Commercial Rust Remover
Commercial rust removers are often formulated to break down rust quickly and efficiently. These products typically contain acids that react with iron oxide (rust). Always follow the manufacturer’s instructions carefully, as these can be potent chemicals. You’ll usually apply the solution, let it sit for a specified time, and then scrub or wipe away the loosened rust.
The Vinegar and Baking Soda Approach
For a more natural or DIY approach, white vinegar and baking soda can be quite effective, especially for lighter rust. Vinegar’s acetic acid helps dissolve rust. Baking soda acts as a mild abrasive when mixed into a paste. Many DIYers report great success with this method. It’s generally less harsh than commercial removers, making it a good starting point.
Mechanical Removal: Wire Brushes and More
Sometimes, you just need some good old-fashioned elbow grease. A wire brush, either manual or attached to a drill, can physically scrape away rust. For very stubborn rust, you might consider using sandpaper or a rust removal disc on a grinder. However, be cautious not to remove too much of the tank’s metal. The goal is to remove the rust, not to wear down the tank itself. Many sources suggest a combination approach for the best results.
Step-by-Step Rust Removal Process
Let’s walk through a common and effective method using a rust remover solution and a wire brush. This process is designed to be thorough and leave your tank clean.
Step 1: Apply the Rust Remover
Once your tank is drained and power is disconnected, it’s time to tackle the rust. If you’re using a liquid rust remover, pour enough into the tank to cover the rusted areas. If the rust is localized, you can use a rag soaked in the remover. For tougher jobs, you might fill the tank partially. Read the product label for specific application instructions and safety gear recommendations, such as gloves and eye protection.
Step 2: Let the Solution Work
This is where patience comes in. Allow the rust remover to sit in the tank for the time recommended by the manufacturer. This dwell time is crucial for the chemicals to break down the rust effectively. For vinegar, you might let it sit for several hours or even overnight. We found that allowing sufficient dwell time makes subsequent scrubbing much easier.
Step 3: Scrub Away the Rust
After the dwell time, it’s time to scrub. Use a stiff wire brush to work on the rusted areas. If you can get inside the tank, a manual brush is perfect. For tanks with smaller openings, you might use a brush attachment on a drill. You should see the rust starting to loosen and flake away. Continue scrubbing until you’ve removed as much rust as possible. This is the part that requires the most physical effort.
Step 4: Rinse and Neutralize (If Needed)
Once you’ve scrubbed away the bulk of the rust, it’s time to rinse. Some rust removers require a specific neutralizing agent, while others just need a good rinse with water. If you used vinegar, a rinse with plain water is usually sufficient. Make sure to flush out all the rust particles and any remaining cleaning solution. Thorough rinsing prevents any lingering chemicals from causing future issues.
Step 5: Dry the Tank Completely
This is a critical step to prevent immediate re-rusting. Moisture is the enemy! Use clean rags to dry the inside of the tank as much as possible. You can also use a shop vac to suck out any remaining moisture. Some people even use a heat gun or a hairdryer on a low setting to ensure the tank is bone dry. The tank must be absolutely dry before you proceed to the next step or close it up.
Protecting Your Tank from Future Rust
Removing rust is only half the battle. The real win is preventing it from coming back. Moisture is the primary culprit, so managing it is key.
Regular Draining
Make it a habit to drain your air compressor tank at the end of each use. This releases any accumulated moisture. Many experts, like those at the Occupational Safety and Health Administration (OSHA), highlight regular maintenance, including draining, as essential for safe operation.
Consider a Moisture Trap or Dryer
For compressors that are used frequently or in humid environments, a moisture trap or an air dryer can be a worthwhile investment. These devices remove water vapor from the compressed air before it enters the tank. This is a highly effective way to combat internal rust.
Internal Tank Coatings
Some high-quality air compressor tanks are coated internally with a rust-resistant material. If your tank is particularly old or the coating has worn off, you might consider a specialized internal tank coating product. These are designed to create a protective barrier. This offers a long-term solution against rust.
Quick Checklist for Rust Removal
Here’s a quick rundown to make sure you cover all your bases:
- Ensure the tank is completely drained of air and water.
- Always disconnect the power source before starting.
- Choose a rust remover or cleaning agent suitable for your needs.
- Allow adequate dwell time for the cleaner to work.
- Scrub thoroughly to remove all loosened rust particles.
- Dry the tank absolutely thoroughly to prevent new rust.
By following these steps, you can effectively remove rust from your air compressor tank and take measures to keep it rust-free for longer. A clean tank means a more efficient compressor and a longer lifespan for your equipment. It’s all about consistent care and a little preventative maintenance!
Conclusion
You’ve learned that removing rust from your air compressor tank is totally achievable with common household items and a little effort. We’ve covered the importance of safety first, with draining and disconnecting power being key steps. You now know about various methods, from commercial removers to the vinegar and baking soda trick, and how to physically scrub away rust. Remember, thoroughly drying your tank after cleaning is absolutely essential to prevent rust from returning immediately. Make draining your tank a regular habit, and consider a moisture trap for long-term protection. Your next step? Grab your supplies and give your compressor tank the clean it deserves for better performance!
Frequently Asked Questions
How often should I drain my air compressor tank?
It’s best practice to drain your air compressor tank at the end of each use. This simple habit helps remove accumulated moisture, which is the main cause of rust formation. Regular draining is a cornerstone of air compressor maintenance.
Can I use steel wool to remove rust from my compressor tank?
While steel wool can remove rust, we recommend using a wire brush for better results. Steel wool can leave behind small particles that might rust quickly or contaminate your compressed air. A wire brush offers more control and is generally safer for the tank’s interior.
What’s the best way to dry the inside of the tank completely?
After rinsing, use clean rags to wipe down as much of the interior as you can reach. A shop vac can help suck out lingering moisture. For an absolutely dry tank, some people use a hairdryer or heat gun on a low setting, moving it around the interior to ensure all dampness evaporates.
Will rust remover damage my air compressor tank?
Most commercial rust removers are designed to target rust without harming the underlying metal when used as directed. However, always follow the manufacturer’s instructions carefully. Over-application or leaving strong chemicals in for too long could potentially affect the tank’s integrity. Always test in a small, inconspicuous area if you’re unsure.
Is it okay to use my air compressor if the tank has some rust?
It’s not ideal. Even minor rust can degrade the tank over time and contaminate your compressed air with rust particles. This can damage tools and equipment that use the compressed air. Addressing the rust promptly ensures your compressor runs efficiently and safely.